Hitikida avarekalu/ Deskinned Hyacinth bean curry:

Avarekai has many names like Lablab or Hyacinth bean.

Avarekai is an integral part of every household of native Bangalore or Mysore region during every winter. People wait for its arrival. Winter special lima bean is called “Sogadavare” and it has double the aroma of what we get normally throughout the year.

DSC05495_Fotor

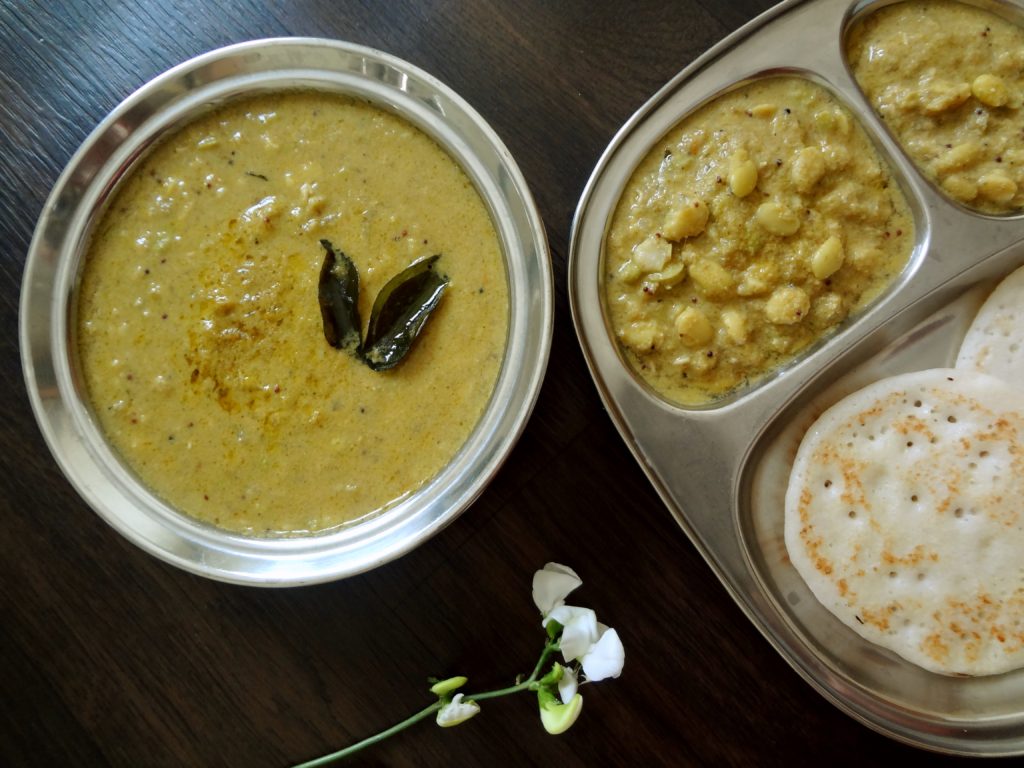
Initially I used to struggle with avarekai recipes and never used to get that authentic touch. Now over the years, I have mastered this authentic, tasty curry and my family started liking it and we do enjoy our share of this traditional curry with soft dosas.

If you are using fresh beans, it is a little time-consuming process. During the season we even get the deskinned ones. If you have frozen beans, curry making is an easy task.

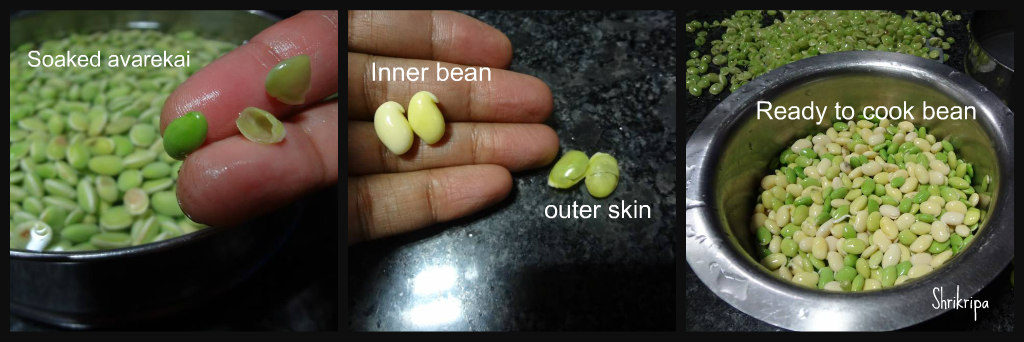
At first, we will see the procedure of de skinning –

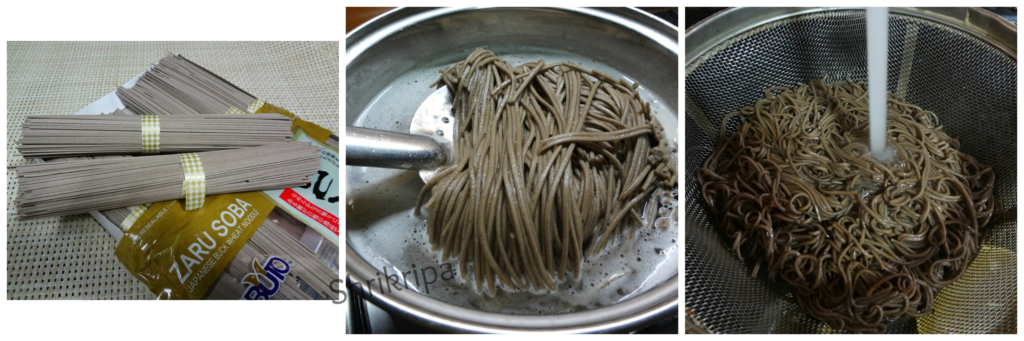
-At first take a fresh bean pod, remove outer thick green skin and separate the light yellowish green bean. Collect all the shelled beans, soak it in water for 3   to 4 hours.

Ribbet collage 1

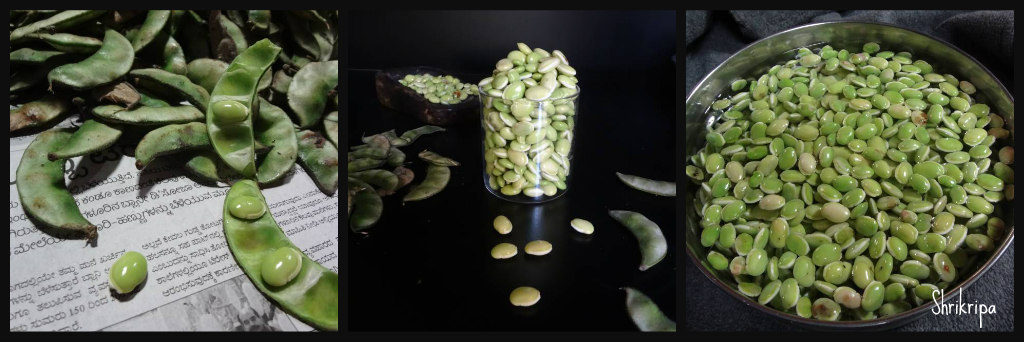
 Now starts your time consuming real exercise. Dip your hand in water, remove soaked beans and start deskinning by keeping the bean in between your thumb finger and fore finger and press a little, you will see the transparent outer skin would flip and inner bean will come out. Continue the exercise until it is done and collect deskinned “Hitikida bele” and proceed to make very tasty curry.

Ribbet collage 2

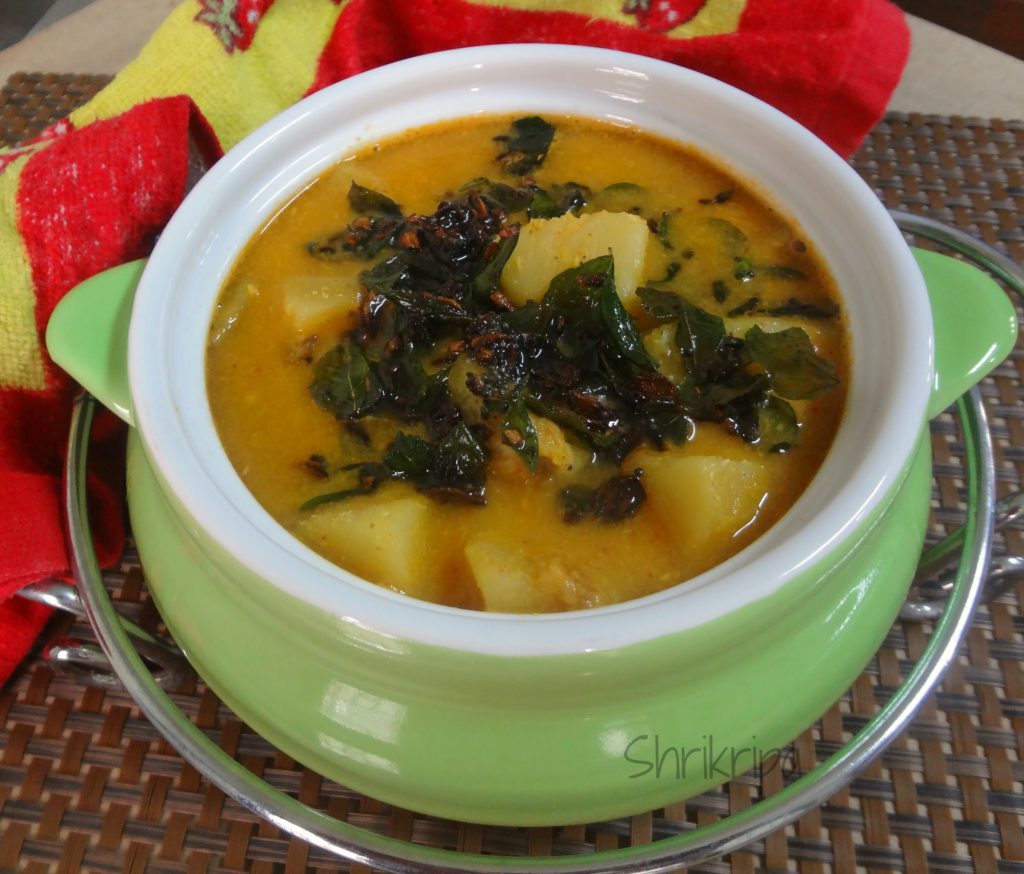
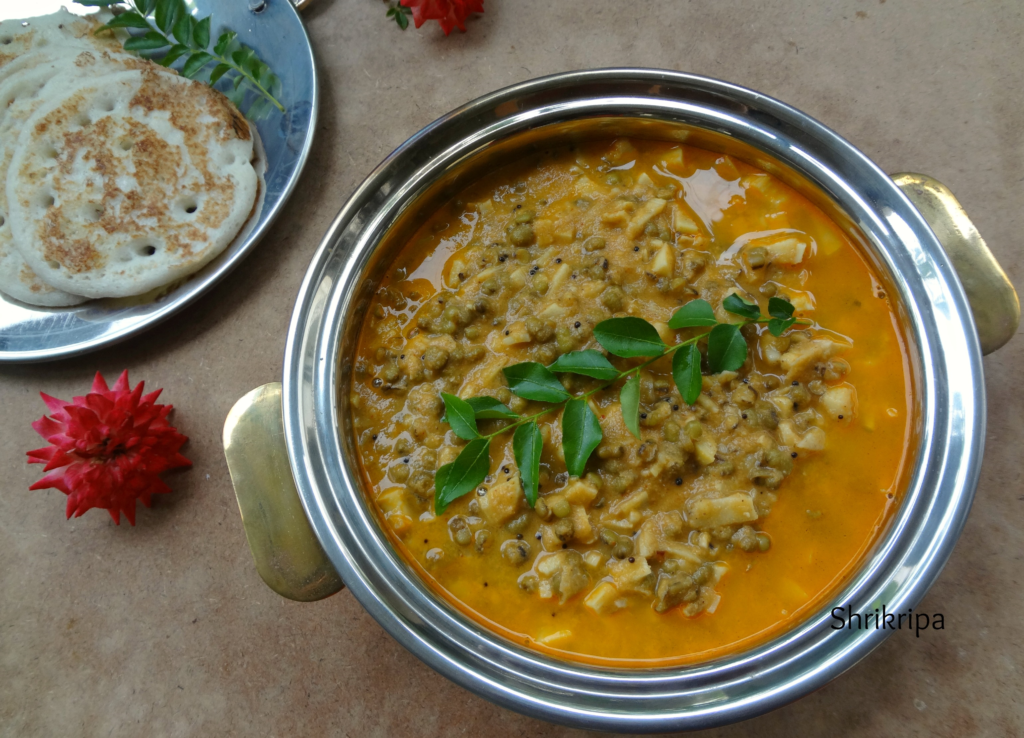
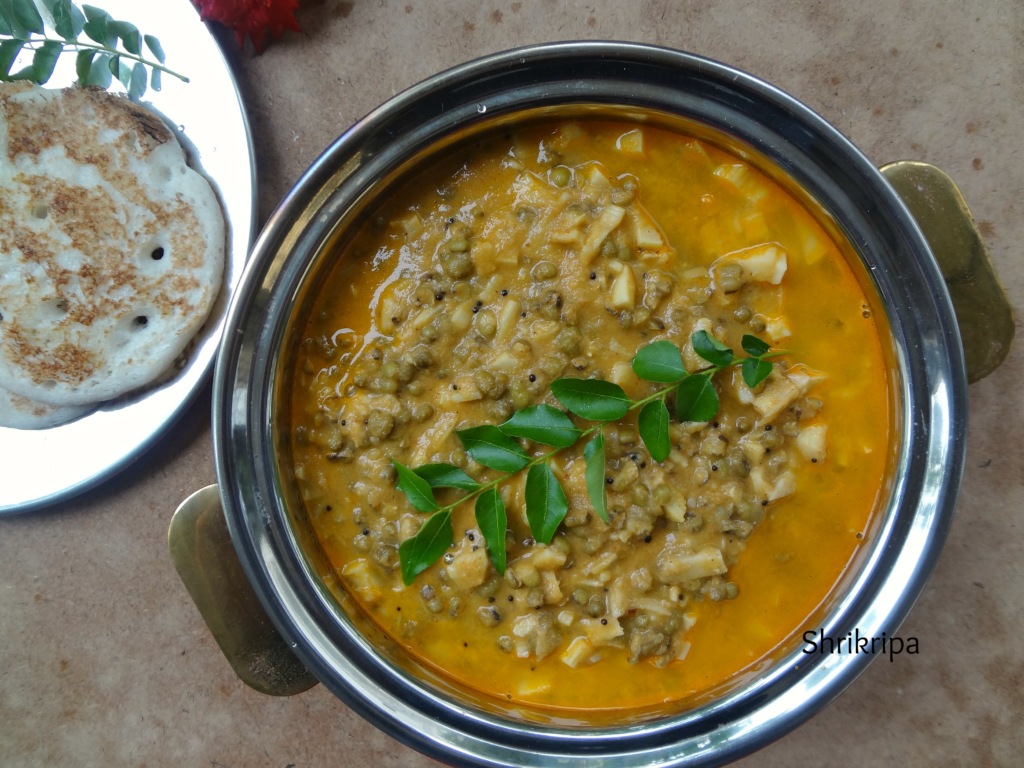
Now we will see the procedure of “Hitikida bele saaru” /Curry

Ingredient-

Deskinned Avarekai – 1 big bowl

Onion – 1 for seasoning

Oil – 3 table spoons

Ghee – 2 tea spoons

Mustard – 1 tea spoon

Curry leaves – 2 springs

Green chillies – 4 (3 for grinding + 1 for seasoning)

Garlic – 8 cloves (4 for grinding + 4 for seasoning)

Coconut – 2 cups

Tamarind – marble size

 Coriander seeds – 2 tea spoons

Cumin – ½ tea spoon

Cinnamon – ½ inch

Clove – 2

Ginger – ½ inch piece

Coriander leaves – ½ cup

Method:

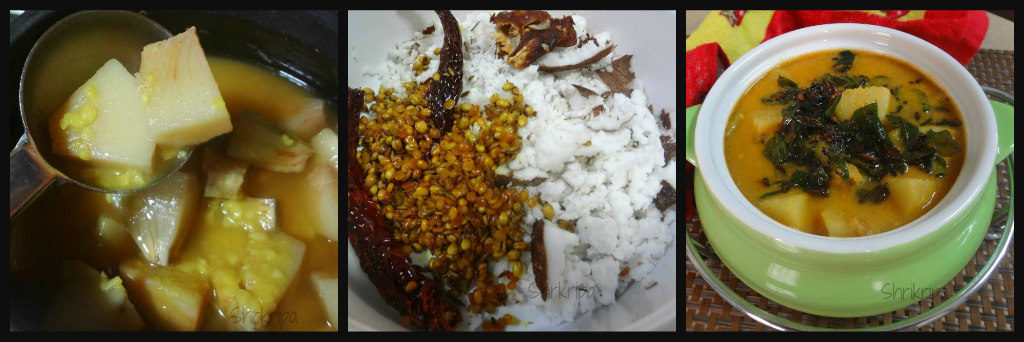
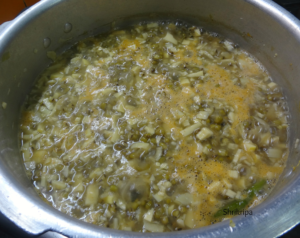
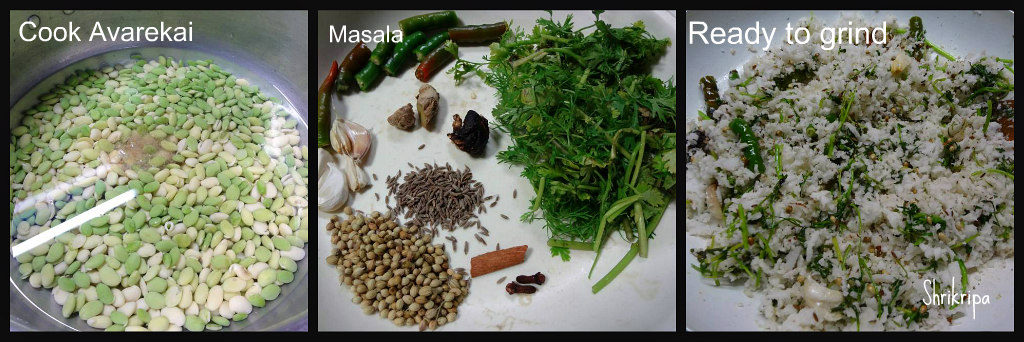
-Cook avarekai with required amount of water and salt. You can opt for a cooker or an open vessel. Slow coking gives a better result for this curry.

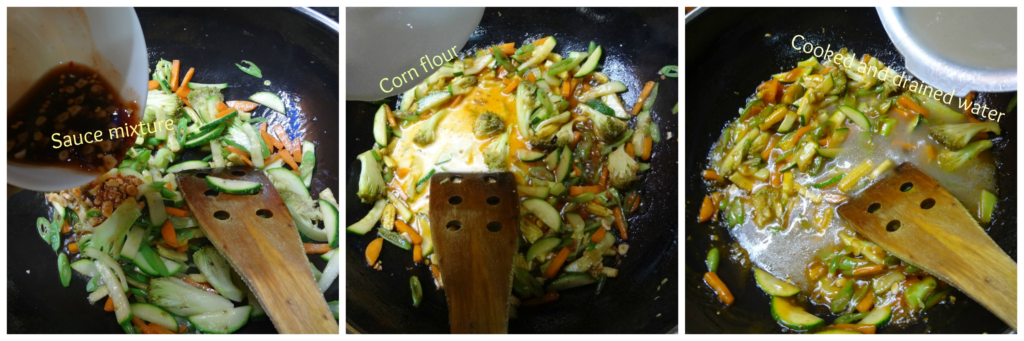
– Next is the masala preparation. Fry Coriander, cumin, cinnamon, cloves. When coriander becomes light brown, add garlic, ginger, green chillies, coriander leaves,tamarind and coconut and fry until it emits a nice aroma.

Ribbet collage 3

-Switch off the gas, cool the content and grind this in to a smooth paste by adding required amount of water.

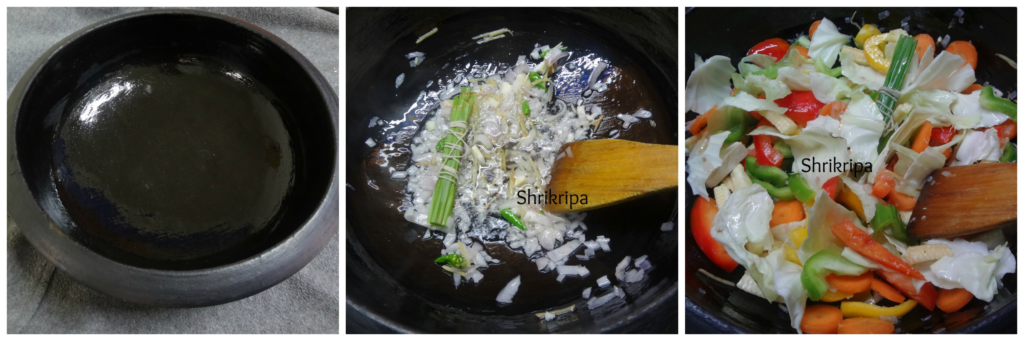
-Now do the seasoning, heat oil, splutter mustard, curry leaves, garlic, green chilli, chopped onion and fry until onion becomes light brown.

Ribbet collage 4

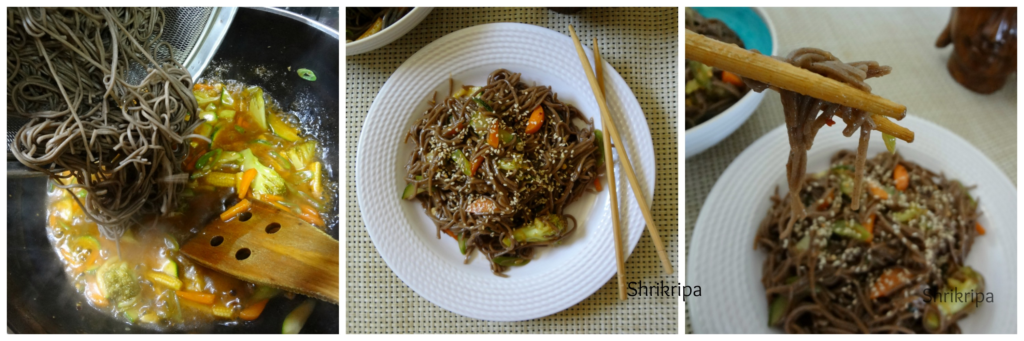
-Add ground masala paste and fry for a couple of minutes. Add cooked avarekai and add enough water.

-At this time, consistency of the curry should be a little watery, as cooking proceeds and after some resting time, it becomes thick and becomes perfect.

Ribbet collage 5

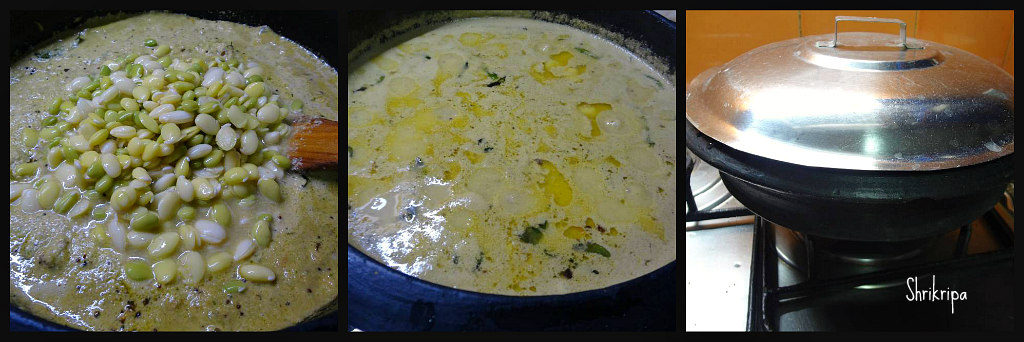
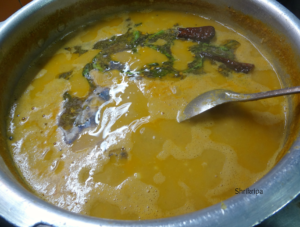
-Boil this mixture until you see a thin creamy layer at the top.

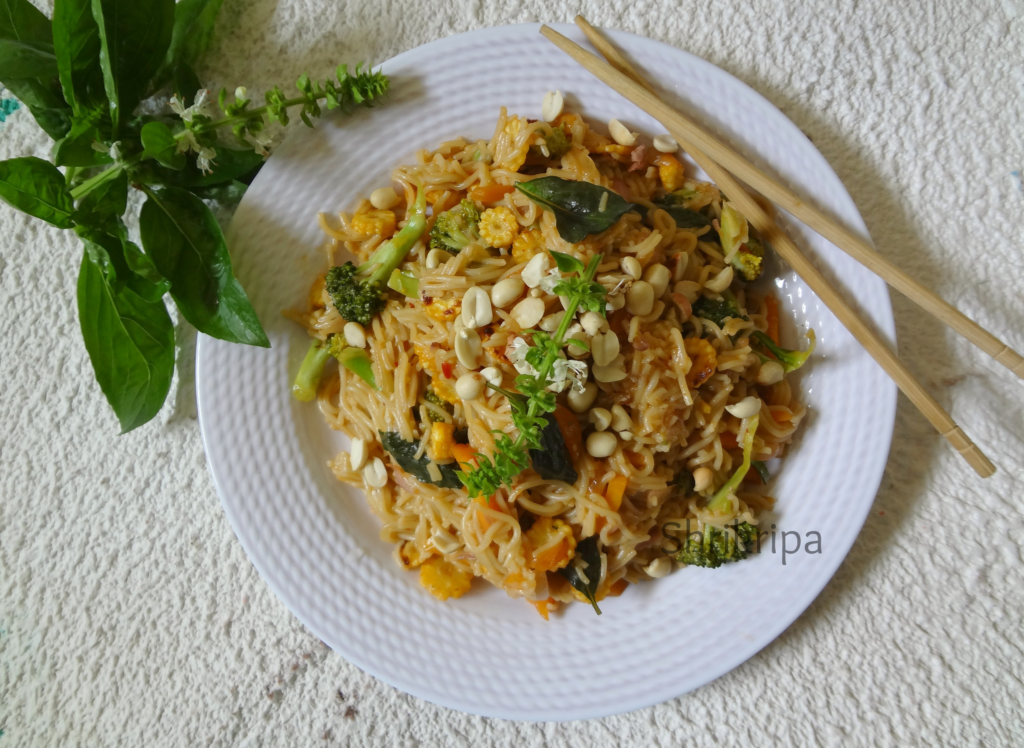
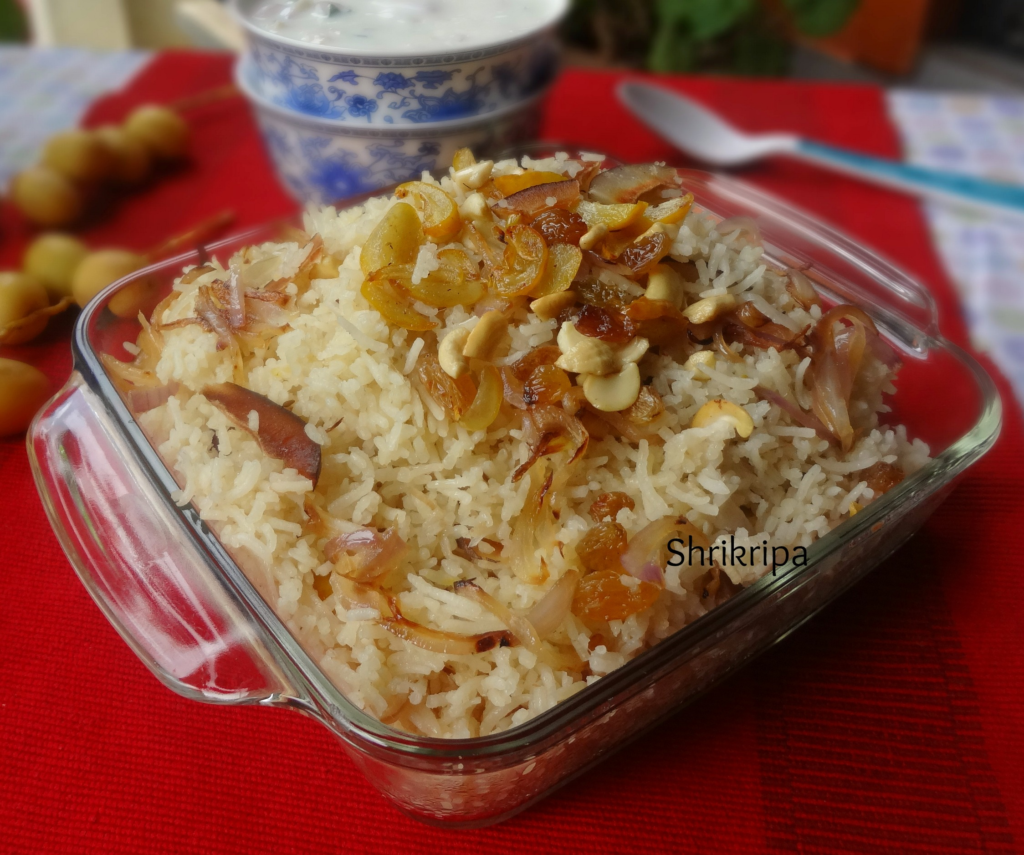
-Switch off and pour 2 tea spoons of ghee, give one mix and close the lid. Rest this for some time, and serve with dosas, chapati’s or plain rice or jeera rice.

DSC05491_Fotor

Note:

-I usually prepare this curry in the night, and re heat and serve with dosas in the morning.

-In this way, it absorbs all the flavours and sets properly.


Red Amaranth and Beet Pulav:

Red amaranth is very beautiful and a natural source of energy, rich in iron and a whole lot of micro nutrients and fibre. It is very high in calcium and very good for all ages, from infants to adults.

On the other hand, beets are also packed with anti-oxidants, Folic acid and Iron. Which is considered as a super food to fight anaemia.

When my home grown red amaranth is harvested, this rice dish is what we love to eat, by adding Beetroot chunks to enhance the nutritional value. One can enjoy this one pot super tasty dish with any form of yogurt based side dish or even with plain yogurt and pickle. One can carry this in a tiffin box as well. It is a very good idea to feed greens to those who don’t like them, without they even noticing 😉

This time, when I harvested red amaranth, I thought of using fresh ground masala and it really tasted divine, oozing with flavours.

second 2

Ingredients:

Basmati Rice – 3 cups

Beet root – 1 big

Red Amaranth – 1 Small bunch

Onions – 2 (sliced)

Ghee/oil– 3 table spoons+1 tea spoon

Cumin -1 tea spoon

Bay leaves – 2 (small)

Ginger garlic paste – 1 table spoon

Milk – 1 cup

Curd -1 cup

Brown Bread – 3 slices

For Fresh masala:

Coriander – 1 tea spoon

Cumin – ½ tea spoon

Cardamom -2

Cloves- 2

Cinnamon – 1”

Black pepper – 8

Nutmeg – 1 pinch

Dried Red chillies – 2

Fenugreek seeds – ¼ tsp

Method:

-Wash rice and soak for 15 minutes.

-Wash Beetroot, chop into bite size pieces.

– Wash Amaranth greens, chop.

-Dry roast fenugreek seeds. When it is slightly brown, add all the other ingredients under masala and fry.

Ribbet collage 1

-Make a powder and keep it.

-Now take one pressure cooker. Add ghee or oil, fry cumin and bay leaves.

Ribbet collage 2

-Add sliced onion, fry until it is brown.

-Add ginger garlic paste, fry for 2 minutes.

-Add beetroot, chopped greens, fry until green wilts.

Ribbet collage 3

-Next add fresh ground masala powder, drained rice, salt.

-Mix everything and add milk, curd , 4 cups of water and 1 tea spoon of ghee,close the lid.

-After one whistle, keep it in a simmer for one/two minutes and switch off the gas.

Ribbet collage 4

-Now make small square size pieces of brown bread and deep fry and drain out excess oil.

-When pressure releases, add bread croutons and lightly mix everything.

second 3

– serve with any raita or plain curd and pickle.


Pizza with Homemade Spinach Pesto:

Who doesn’t love Pizza?  I love Spinach and paneer in all forms. So, thought of clubbing my spinach pesto recipe into veggie pizza and prepared this for the kids. Should I say, even I loved it too: D

Usually I make pizza by chopping vegetables into bite size pieces and mixing it with the seasoning that one likes and mixing some chopped cheese too. It will surely give a more tastier pizza than normal veggie one.

In this way, veggies absorb more flavour and because of cheese it gives a little texture too.

pizza 3

Now we will see how I did this nutritious treat –

Ingredients:

For Spinach Pesto:

Spinach – 1 small bunch

Walnuts – 2 table spoons

Garlic salt – 1 tsp

Olive oil – 2 tsps.

Red chilli flakes – 1 tsp

For Pizza:

Pizza base – 2 numbers

Vegetables – 1 bowl (Paneer – 100 gms, yellow and red capsicum – ½ each, Boiled sweet corn -2 tbl sp)

Onion – ½

Hot and sweet tomato ketch up – 2 tbl sp

Mozzarella cheese – 2 tbl sp + 2 table sp (to garnish at the top)

Method:

  • Grind all the items under spinach pesto and make a smooth paste and keep aside. It is for pizza spread.
  • Now chop all the vegetables and onion.

Ribbet collage 1

  • Take one bowl, put all the chopped items, Tomato ketchup and 2 tbl spoons of grated cheese and paneer. Mix everything and keep it ready. This is for the toppings(fillings).
  • Pre-heat oven at 180 C
  • Take a Pizza base on lined baking tray, Spread Spinach pesto over the pizza base.

Ribbet collage 2

  • Top with veggie mixture, which we have mixed and kept ready.
  • Spread this topping equally and grate some more cheese and spread evenly on top.
  • Bake this for 10 to 15 minutes or until cheese melts and becomes bubbly.

pizza 1

  • Remove from the oven and cut and serve.

pizza 2

  • Usually it doesn’t require any seasoning, if you feel like adding some, you can add and enjoy.


Breadfruit/Deevi halasu sambar:

Breadfruit is seasonal much-loved veggie in our coastal region of Karnataka.

It is something we all grew up with – “a comfort food”

It can be consumed when it is mature, but still firm and can be cooked and eaten in so many forms.

This picture is not enough to bring out the glory of this sambar. This veggie is very soft, melt in the mouth type and combined with this sambar, it makes a heavenly gravy.

breadfruit main

Let us see how to prepare it –

Ingredients:

Bread fruit – 1

Salt

Red chilli powder – 1 tea spoon

Jaggery – 1 to 2 tsp

Toor dal – ¼ cup (cooked)

For masala:

Coriander – 1 table spoon

Cumin – ½ table spoon

Urad dal – 1 ½ table spoon

Hing – ¼ tea spoon

Grated fresh Coconut – 1 bowl

Tamarind – 1 tea spoon

Seasoning:

Coconut oil – 1 table spoon

Mustard – 1 tea spoon

Curry leaves – 1 spring

Onion – ½ (chopped)

Method: 

– Apply some oil to your hand. To some extent it will protect your hand from blackening

– Take fresh breadfruit, wash properly. Take one sharp knife and remove outer skin as thin as possible and reserve this to make chutney. Yup!! you heard it right: D

Ribbet collage 1

– Make four longitudinal pieces, remove inner pith (which is slightly harder and rubbery in nature)

-Immerse these pieces in bowl of water for 2 minutes.

– Take out and Make chunk like pieces.

– Cook these pieces with sufficient water, salt, jaggery, red chilli powder.   

Ribbet collage 2                     

–  Now take one kadai, add 1 tsp of coconut oil, put coriander, cumin, urad dal, hing and red chillies – fry in a low flame. When urad dal becomes red, switch off.

-Grind this masala by adding coconut, tamarind and required amount of water to fine paste.                            

-When breadfruit pieces are done, add cooked dal and ground masala. Check for the salt. Keep this on the stove top and boil this mixture.

-After it boils switch off and add seasoning by heating coconut oil, add mustard when it starts spluttering. Add curry leaves and chopped onion. Fry nicely till onion chunks are brown and add this over ready sambar.

-Enjoy this sambar with hot rice.


Citrus medica / Dudle huli Chithranna:

Dudle huli is a big lemon and is known as Citrus medica. Citrus medica is much bigger than normal lemon with thick outer rind and less sour and sweeter than normal lemon, excellent for thin Rasam, juice, pickles or Chithranna. This Chithranna is fragrant, rich in vitamin C and very tasty. We normally serve this in any festivals or weddings. It is a no onion no garlic recipe and we use mustard, dry red chilli and coconut for flavour. This is our traditional and much-loved recipe for Chithranna.

chithranna main

Ingredients:

Rice – 3 cups

Citrus medica – 1 (big citrus fruit)

Dried red chillies – 2 to 3

Mustard – 1 tsp

Coconut – ½ cup

Jaggery – 1 to 2 tsp

Salt

Oil – 1 tsp

Seasoning:

Coconut Oil – 3 tbl sp (any refined oil is ok)

Mustard – 1 tsp

Urad dal – 1 tsp

Cumin – 1 tsp

Hing – ¼ tsp

Curry leaves – 2 springs

Ground nuts – ¼ cup

Method:

-For cooking rice:

Boil water in a big vessel by putting 1 tsp of salt and oil. Add washed rice and cook for 7 to 8 minutes or until it is soft and firm and cooks. Drain cooked water and spread this rice in a colander.

– Grind masala by putting coconut, roasted red chillies, mustard, jaggery and dry run without adding any water.

-Seasoning:

-Take one thick bottomed kadai, add oil and heat. When it is hot, add mustard.

collage 1

-When it starts splutter, add urad dal and ground nut and fry until it becomes little dark. Next add cumin, hing and curry leaves.

-Now add ground masala and fry for 2 minutes. Add drained rice, juice of citrus medica and salt.

collage 2

-Mix well and switch off the gas. Check for the seasoning and adjust according to your taste.

– This is very ideal vitamin C rich option for tiffin box as well.


Thai Clay Pot Rice with Vegetables:

This recipe is my entry for BetterButter Contest in collaboration with SPRIG.

SPRIG is a brand that scours the world to get the finest gourmet ingredients into kitchens of people who love to experiment in their kitchen.

It was basically an introduction to SPRIG’s range of unique spice blends, to be used in our dishes covering cuisines from Europe to the Middle east to Asia.

To participate, at first there were four choices of spice blends and they made us select one spice blend from the lot and asked us to create a dish and recipe.

I chose Malacca: Oriental spice Blend.

This spice blend is a symphony of fragrant herbs and spices, inspired by the orient. It captures the rustic richness of South East Asian curries, with a twist. Flavourful chilies make for a delightful fusion, best enjoyed when sprinkled into curries, sauces, salad and stir fries. This versatile ingredient can be used as rub, marinade, glaze, paste, crumb, sprinkle or dressing!

We relish Thai food, lemon grass flavour, one pot meals. Being a Mangalorean, we love our dose of coconut milk too. So, I tried my hand in creating Thai flavoured rice, using clay pot. The dish turned into a super tasty, mildly flavoured one pot meal.

pic main 2


Ingredients:

Rice – 2 cups (small grain rice/ Jeera samba variety)

Vegetables – 1 bowl

Tofu – 100 grams

Onion – 1 medium

Ginger – ½ inch

Thai chillies – 3

Lemon grass – 4 sticks

SPRIG MALACCA spice blend – 2 table spoons

Thick Coconut milk – I tetra pack or 200 ML

Water – 3 ½ cups

Salt – as required

Oil – 2 table spoons (any refined oil)

Sesame oil – 1 table spoon.

Clay pot – for cooking

Method:

– Wash rice and drain the water and keep aside.

– Chop vegetables according to your choice.

pic 1

– I have used Broccoli, cabbage, three colours of capsicum and baby corn.

– Chop onion, slice chillies, sliver ginger and keep aside.

– Make 3-inch pieces of lemon grass, make a bunch and tie it with a small piece of cord.

-Take a clay pot and smear it with Sesame oil.

– Sesame oil will act as a non-sticky coat for clay utensil while cooking for long.

collage 1

-Now take oil for seasoning. When it is hot, add onion, chillies, ginger, lemon grass and fry until onion is glossy.

-Add all the vegetables and fry for a while.

-Now add tofu, Malacca spice, salt and mix everything thoroughly.

collage 2

– Next proceed with addition of drained rice and fry for 2 minutes.

-Add coconut milk, water.

collage 3

-Cook the mixture by closing the lid, in a very low flame for 20 to 30 minutes or until done by mixing twice in between.

-Serve hot by discarding lemon grass sticks. (Used to enhance flavour, since they can’t be swallowed)

pic main 1

NOTE:

  • If Thai chillies are not available, one can use any variety of chilli.
  • I have used bird eye chilli.
  • If sesame oil is not there, one can use refined oil to smear the clay pot.

Soba Noodles with Vegetables in Honey based sauce:

Once again testing period for me. Yes!! I was keeping and not at all interested to cook these dull Soba noodles. My sister gave me this pack of soba noodles “to experiment” when I visited her this summer. Last week, she had asked about Soba and told me, she is waiting for the foolproof recipe. I had no option but to cook. I was hesitant at the beginning, by thinking about my ever-choosy daughter’s palate.

On the eve of Independence Day, I was thinking about something special for our menu. So, I thought of cooking this special noodle for the first time and made my own mixture by using Honey as a base.

pic main

Honey did help to uplift the taste of soba noodles, which is otherwise very bland in taste.

First, we will see, what are Soba noodles. Soba noodles are Japanese noodles that are made from buckwheat flour. Buckwheat flour is greyish in colour so the noodles have that dull grey colour and it is gluten-free as well. Due to this, noodle is very brittle in nature.

As 100% buckwheat, gluten-free noodle tends to break, people do add some wheat flour when preparing their noodles. What I had was 100 % with buckwheat flour and needed extra caution while boiling and cooling.

Ingredients:

Soba noodles – 3 serving bundles

Vegetables – 1 bowl of your choice

white sesame seeds – 1 tablespoon

Corn flour – 1 tablespoon

Water – 3 tablespoons

Salt

Oil – 2 tablespoons

Sauce Mixture:

Sriracha sauce – 2 tablespoons

Rice/ plain vinegar – 2 tablespoons

Light soy sauce – 2 tablespoons

Honey – 5 to 6 tablespoons

Garlic – 1 ½ tablespoons (sliced)

Ginger – 2 teaspoons (grated)

Red chilli flakes – ½ teaspoon

Method:

 Make sauce mixture by Combining Sriracha, vinegar, soy sauce, honey, red chilli flakes, garlic and ginger in one bowl and keep aside to release its flavour.

pic 4

  Mix cornflour and water and keep aside.

   Dry roast sesame seeds and reserve this for garnishing.

  Boil water with one spoon of salt and oil. Put noodle, cook until al dente (it should cook and texture should be firm)

collage 1

  Drain the water, rinse the noodle in cold tap water.

  Collect one small cup of the drained water and keep it aside for next use.

   Chop vegetables according to your taste. Here I have used broccoli, beans, carrot, baby corn and zucchini.

   Take one wide Kadai, add oil. When it is hot, add chopped veggies and a little salt and fry for a while.

collage 2

  Add all the sauce mixture, cornflour mixed water and fry vigorously to avoid this to burn.

  If the mixture becomes very thick, add a little reserved cooked and drained water of noodles. Check for the salt. If needed add and adjust.

  When it starts boiling, add noodles and mix.

collage 3

Garnish with dry roasted sesame seeds and serve.


Vegetarian Thai Noodles: Gluten free and Vegan

This time when I had visited my sister, who stays in America, I got an opportunity to experiment with some new ingredients, veggies etc and I bought a couple of new items back home as well. This gluten free, Brown rice & millet ramen noodle is one of them.

When we were shopping, my eyes went to this noodle pack. I love to work with new ingredients and wanted to pick it up. After trying a couple of recipes, my daughter told me, how it should be. She asked me to prepare this as a little wet, soup kind. She said, regular kind of preparations tastes bland and it needs some flavoured soup to enhance the taste of this kind of sticky noodles and she was right. Ramen is a Japanese dish, consisting of a clear broth containing thin white noodles and sometimes vegetables, meat etc.

Finally, I came up with this, and got a green signal from my super-efficient critic!!! She said, hmmm yummy, go ahead and post: D

pic 10

Ingredients:

Noodles – 3 cakes

Shallots – 10

Baby corn -4

Carrot-1

Broccoli- couple of small florets

Ginger garlic paste – ½ tsp

Tomato sauce – 1tbl sp

Thai sweet chilli sauce – 1tbl sp

Sriracha sauce -1 tbl sp

Soy sauce -1 tbl sp

Cooked broth – 1 small cup

Salt

Sesame oil – 2 tbl sp

Basil leaves – 5 to 6

Roasted peanut halves – 1 table spoon

Method:

-Boil water with one spoon of salt and oil. Put noodle, cook until al dente (it should cook and texture should be firm)

collage 1

-Drain the water, rinse the noodle in cold tap water.

-Collect one small cup of drained water and keep aside for next use.

– Chop vegetables according to your taste.

collage 2

– wash basil and roast peanuts, remove skin and make halves and keep aside.

– Mix all the sauces in one small bowl and keep it ready

-Take one wide kadai, add sesame oil. When it is hot, add chopped shallots and fry for a while.

-Next, drop in all the veggies and fry for a while.

collage 3

-Add ginger garlic paste, fry until veggies are fried.

-Add all the sauce mixture and fry vigorously to avoid this to burn.

-Add reserved cooked and drained water of noodles. Check for the salt. If needed add and adjust.

collage 4

-When it starts boiling, add noodles and mix.

-Garnish with torn basil leaves and sprinkle roasted peanuts and serve.

pic 11

Note:

-You can use any noodles instead of gluten free noodle.

Kashmiri Pulav:

The Kashmiri Pulav what we see in restaurants have so many fresh fruits and dry fruits and are sweetish in taste as well. But in 2011, when we went to Kashmir, the care taker of our boat house made this wonderful Pulav which he served with tadka dal. That Pulav neither had fresh fruits nor so many dry fruits and it was not that sweet. It had raw yellow fresh dates, coconut chunks, cashew and raisins. My family liked this very much and wanted to note down the recipe to try it out. When I asked for the same.

pic 4

Our care taker Mahdha kaka was very happy to share his recipe and I want to dedicate this blogpost of mine to this humble man. 

SONY DSC

here we go for detailed account – 

Ingredients:

Basmati rice – 3 cups

Ghee – 150 Gms

Onion – 2 (sliced)

Ginger garlic paste – 1 tbl sp

Shahi jeera- 1 tsp

Bay leaf – 1

Salt

Saffron – 7 -8 strings

Hot milk – ¼ cup

Yellow dates, Raisins, cashew and dry coconut bits – as you wish.

 Method:

    At first wash rice, soak for 10 min and drain the water and keep aside.

   Soak saffron in hot milk and keep aside. Slice dates, coconut etc.

   Now take one thick bottomed pan, put little ghee, fry cashew, raisin, coconut slices and dates one by one and keep aside.

   Now fry half of the onion in to dark brown and keep aside.

   Pour remaining ghee, put Shahi jeera, bay leaf then remaining sliced onion and fry for a while.

– When it becomes brown add ginger garlic paste and fry until raw smell vanishes.

   Add drained rice, fry for a while.

   Now add 6 cups of water, salt and cook this rice by closing the lid and keeping it in a simmer.

  When rice is almost done, add soaked saffron with milk, fried onion, dates, raisins and cashew.

   Mix everything and keep it in a fire for little more time until all the water evaporates or until rice is done.

pic 7

         Enjoy this Kashmiri Pulav with Tadka dal.

Kanile Gashi /Bamboo Shoot and sprouted moong Gravy:

Kanile is nothing but Bamboo shoot. We coastal people, prepare some delicacies from this seasonal high fibre veggie, this curry is prepared by mixing with sprouted Green gram. which is very tasty and goes very well with Dosa or Rice. So, it is a seasonal treat for us.

We normally use fresh bamboo shoot and chop it in this manner. (please refer to the Post of How to chop Bamboo shoot)

pic 19

Ingredients:

Ready Bamboo shoot – 1 cup (you can use frozen or tinned too)

Sprouted green gram /moong – 1 cup

Salt

Red chilli powder – 1teaspoon

Green chilli – 1

Turmeric – ½ tsp

For Masala:

Coriander – 2 tsp

Cumin- 1 tsp

Red chilli – 3

Garlic cloves – 2

Fresh grated Coconut – 1cup

Tamarind – ½ tsp

Seasoning:

Coconut oil – 1tsp

Mustard – 1 tsp

Curry leaves – 1 spring

Red chilli -1

Method:

  • – Cook Sprouted moong and ready to cook bamboo shoots in sufficient water, by adding turmeric, red chilli powder, and slit green chilli.

pic 16  pic 15

  • – Roast coriander, cumin, red chilli and garlic by putting little oil for masala.
  • – Grind this into smooth paste by adding coconut and tamarind and sufficient water.

pic 17  pic 18

  • – Add this ground masala to cooked mixture and boil nicely.

pic 21

  • – Do the seasoning. Heat coconut oil ,splutter mustard ,add red chilli and curry leaves fry and pour over the curry.