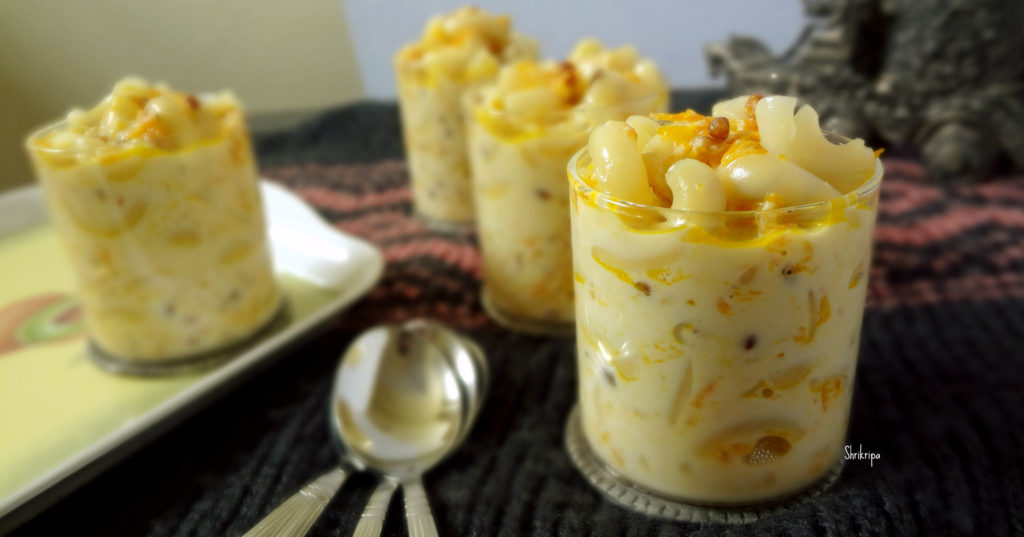
Pasta and Carrot Kheer:

My teenage daughter who loves to experiment in food as well as to try or taste new combinations gave an idea to mix her favourite pasta with carrot in payasam and here is the result. I want to dedicate this post to her.

I did follow any regular kheer recipe. To give an extra zing I added ghee fried Chironji and carrot.
DSC04835_Fotor

Recipe follows like this-

Ingredients:

Pasta – 1 small cup

Chironji –  2 table spoons

Carrot – 1 (grated)

Ghee – 1 table spoon

Milk – 1 litre pack

Sugar – As needed

Cardamom powder – ½ tea spoon

Method:

-First cook pasta. Boil water, put one tea spoon of oil and ½ tea spoon of salt in it.

Ribbet collage 1

-Drop pasta and cook until Al Dente and drain, keep aside.

-Take one thick bottomed wok, add ghee.

-Fry Chironji, then carrot, until it changes colour.

Ribbet collage 2

-Add milk and cook until milk becomes little thick and becomes little cream in colour or reduced to ¾ th.

Ribbet collage 3

-Add sugar and boil. Now drop in drained pasta, garnish with cardamom, mix and adjust the consistency by boiling more or adding more milk if needed.
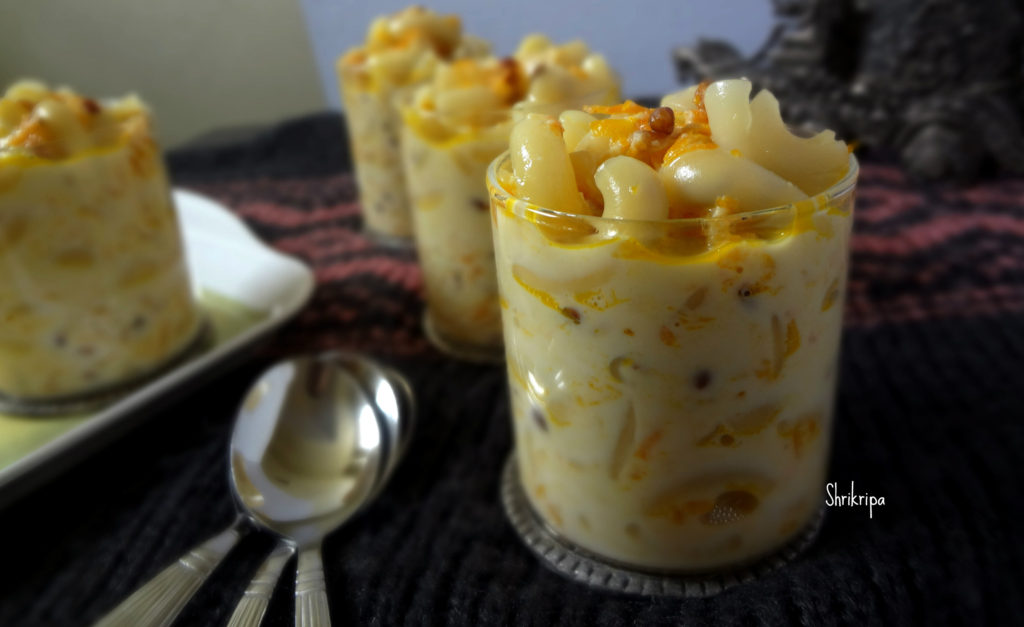
DSC04838_Fotor

-Serve hot and enjoy the treat with your loved ones.

Carrot Halwa (South Indian Style):

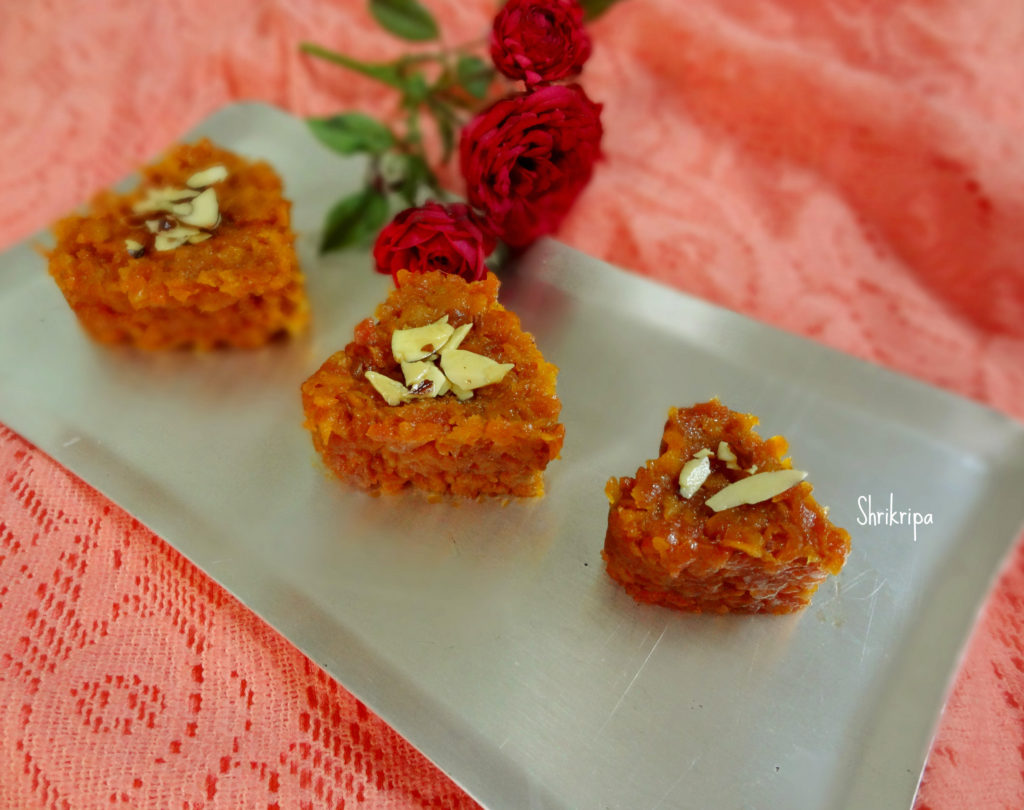
Carrot Halwa or Gajar ka halwa is a very popular Indian dessert. This halwa is everyone’s favorite in my place. They love it hot directly from the stove top as it is or with vanilla ice-cream.

It is a south Indian style preparation, which we follow in our homes. i.e. Without khoya/milk solids and it is cooked in whole milk.

DSC09043_Fotor

Now we will see my style of preparation,

Ingredients:

Red Delhi carrot – 1 kg

Regular carrot – ½ kg

Milk – ½ litre

Sugar – ¾  to  1 cup (according to your taste)

Ghee – ¼ cup  

Roasted Slivered almonds – 1  to2 tablespoon

Roasted cashew bits – 1 to 2 tablespoon

Cardamom powder – 1 tsp.

Method:

-Wash and peel the outer skin and grate the carrots.

carrot halwa 1

-Take one thick bottomed pan, heat 2 tablespoons of ghee and fry grated carrots for 10 min, till it completely wilts.

-now add milk, cook until milk evaporates and carrot cooks.

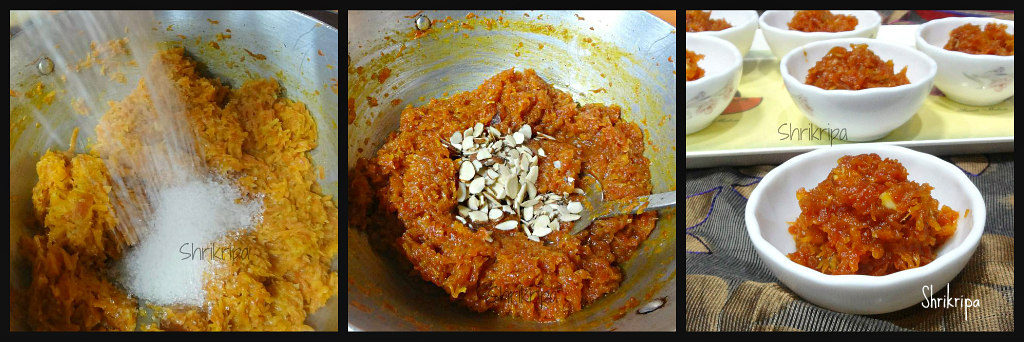
Ribbet collage 1

-now add sugar (here we must check for required sweetness, we usually prefer a little less sweet), and mix nicely by adding the remaining ghee until the mixture leaves the sides of the pan.

-now garnish this with cardamom powder, roasted slivered almonds and 1 tablespoon ghee. Mix this nicely.

Serve hot as it is or with vanilla ice cream and enjoy your winter treat.

Walnut – Chocolate chip Coffee Cake:

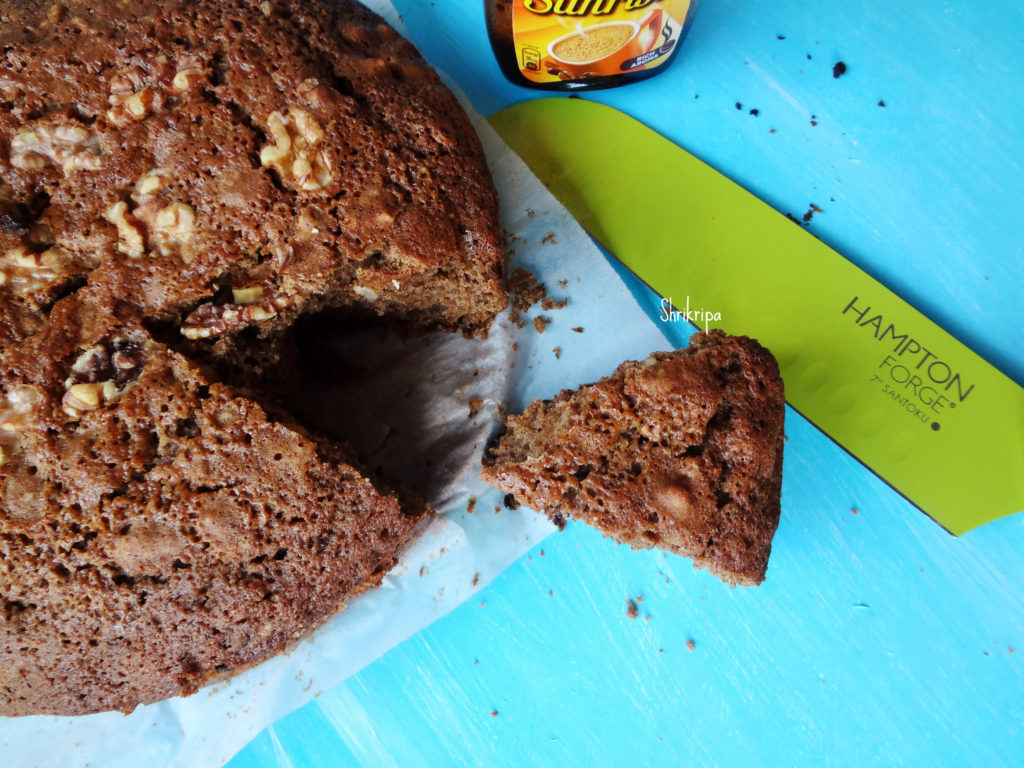
Coffee flavoured cake happened by chance. I had some unused Nescafe instant coffee and wanted to finish it ASAP. So, I thought of baking a cake. It is made up of healthy flour and a very good option as a snack.

While getting ready to assemble everything, I thought of adding chocolate chip and walnut as an attraction to kids and it worked out very well with finger millet or Ragi flour as well. Now we will see how I proceeded with the ingredients.

DSC06113_Fotor

Ingredients:

Whole wheat Flour – 1 cup

Ragi/ Finger millet flour – 1 cup

Baking soda – ½ tea spoon

Baking powder – ½ tea spoon

Salt – ¼ tea spoon

Walnuts – ½ cup

Choco chip – ½ cup

Butter – 100 grams

Eggs – 2

Sugar – 1 ½ cup

Hot milk – 1 cup

Instant Coffee powder – 1 to 1 ½ table spoon

Hot water – ¼ cup (you can take little less than ¼ cup)

Method:

-Pre heat oven at 180°C, line a baking tray with the butter paper.

-Take one bowl and mix all the dry ingredients like, flour, baking soda, baking powder, salt, walnuts and Choco -chips.

-In another bowl, beat melted butter, eggs, sugar, milk by adding one by one respectively.

Ribbet collage 1

-Make dark coffee by mixing powder and water. Mix in the liquid and beat.

-Now wet mix is also ready.

-Pour this wet mixture to dry ingredients and fold the batter by using any spatula.

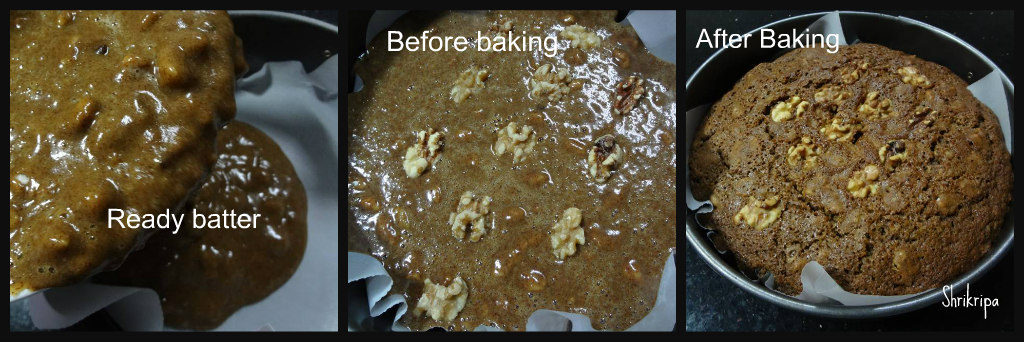
-Pour the batter in lined baking tray and keep this for baking until done.

Ribbet collage 2

-It takes anywhere between 40 to 50 minutes.

-Before removing, check with a knife by inserting, in the baked cake.

-Knife should come out clean.

-Remove the cake, cool before cutting, and serve.

DSC06109_Fotor

Note: For the Eggless Version, use 1/2 cup of flax gel and you can refer my earlier post for the preparation.

Crunchy Ice cream:

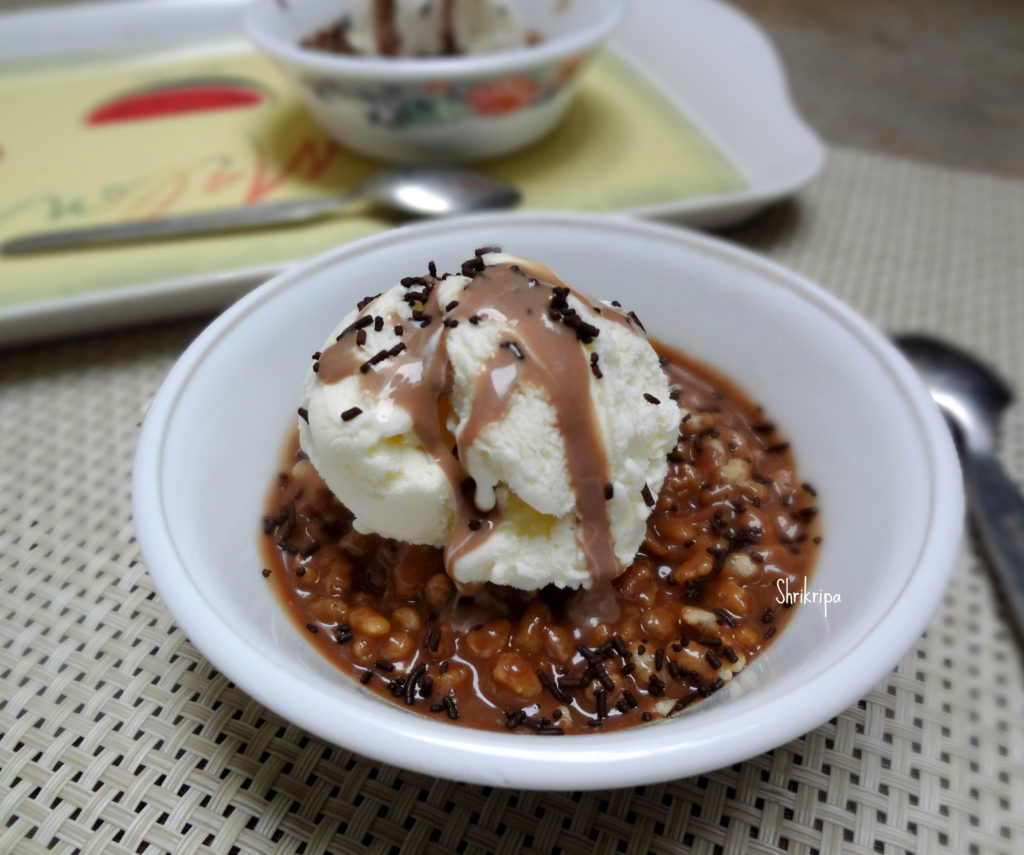
I am celebrating my blog’s first anniversary, what more reason do we need to celebrate than this? I chose to prepare our all-time favorite “crunchy ice cream” which I whipped up a couple of years back, after tasting this yummilicious blend of fresh cream, chocolate, Vanilla ice cream with crunchy rice crispies, which we enjoyed during our Malaysia trip at Dip n Dip’s This recipe is a crowd pleaser, child friendly as well as perfect for any family gathering and celebrations.

DSC02177_Fotor main

Ingredients:

Fresh cream – 200 grams

Cooking chocolate – 100 -150 grams

Sugar – 2 tsp

Rice crispy – 100 grams

Vanilla ice cream – as needed

Chocolate vermicelli or sprinkles – little

Method:

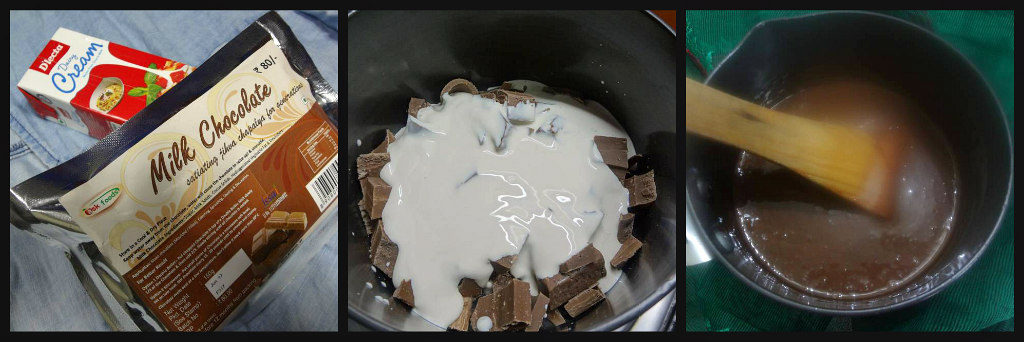
-Grate cooking chocolate or make small chunks.

Ribbet collage 1

-Take one sauce pan and boil fresh cream, cooking chocolate, sugar into sauce consistency.

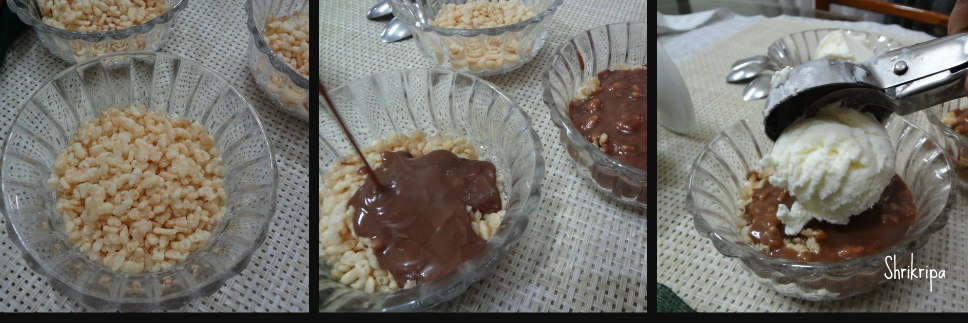
-Now Take 4 serving bowls. Pour Rice crispies at the base.

Ribbet collage 2

-Next, pour Hot chocolate sauce and place one ball of ice cream.

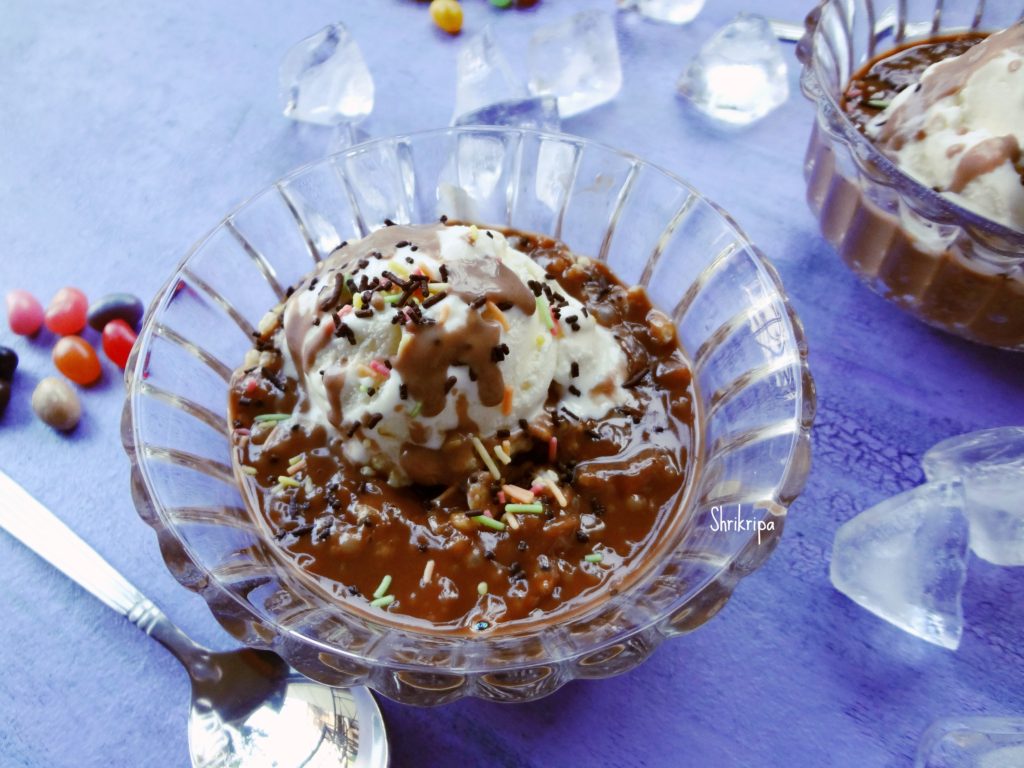
pic main_Fotor

-If you want, you can sprinkle some chocolate vermicelli/ sprinkles and some more sauce and enjoy with your family.

Choco Almond Biscuits:

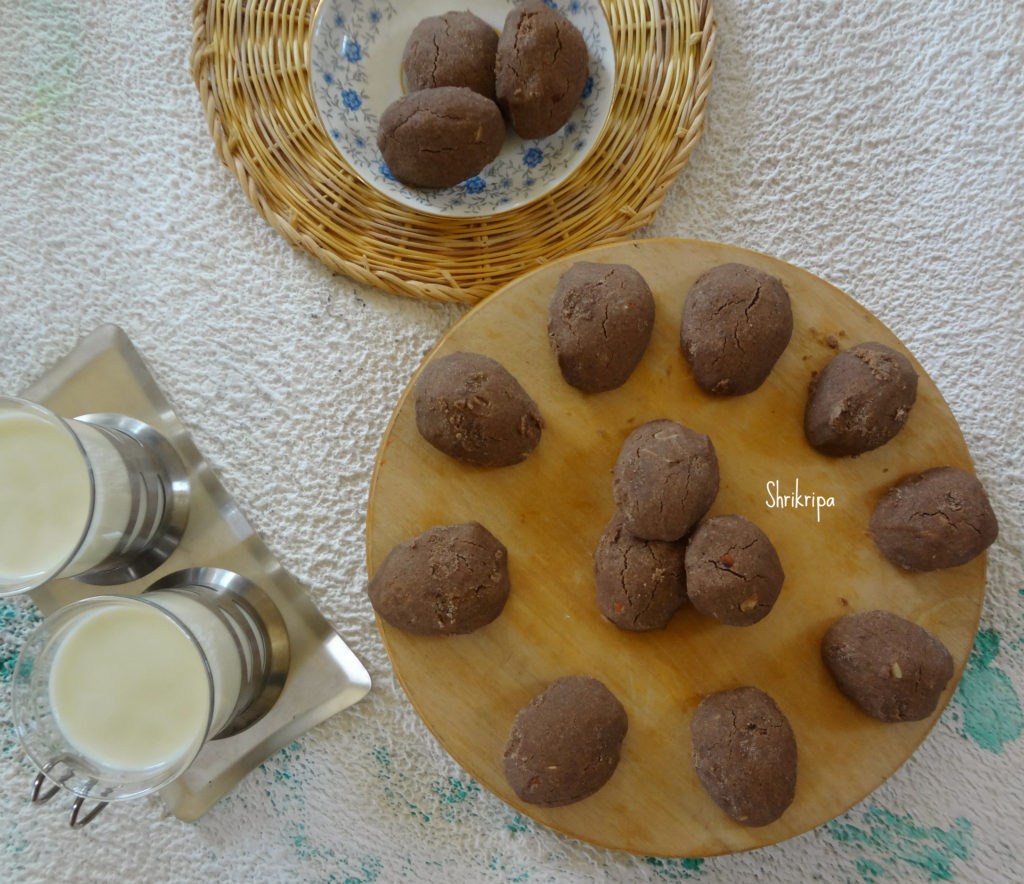
These are melt- in- the -mouth and loved by all, kind of cookies or biscuits. Added to all that, it is rich with all the healthy stuff. I got an opportunity to taste this goodie at “RAGA” Mangalore and it was prepared by Nalini akka who is a super talented and down to earth person. Our acquaintance started in 2012 through a Facebook group named “FOODIE” and I got to know her through her hubby Sadashiva Rao Mailankodi, who started our group and has shared this recipe on the group long ago. It was in my “to try” list and after tasting these cookies at their residence, I couldn’t wait much and prepared it immediately. I am posting it over here by thanking Nalini akka for this wonderful recipe.

pic 1

Ingredient:

Whole wheat flour – 3 cups

Almond – ½ cup

Cocoa powder – ¼ cup

Powdered sugar – 3 cups

Ghee – 1 ½ cup

Butter – 3 table spoons

Cooking soda – ½ tea spoon

Salt – a pinch

Method:

-Roughly Crush almonds.

-Mix all the dry ingredients like flour, cocoa powder, cooking soda and salt.

Ribbet collage 1

-Sieve couple of times or use dry wire whisk to combine uniformly.

-Now beat ghee, butter and sugar by hand or food processor.

-When it becomes like a cream, add flour and make a dough.

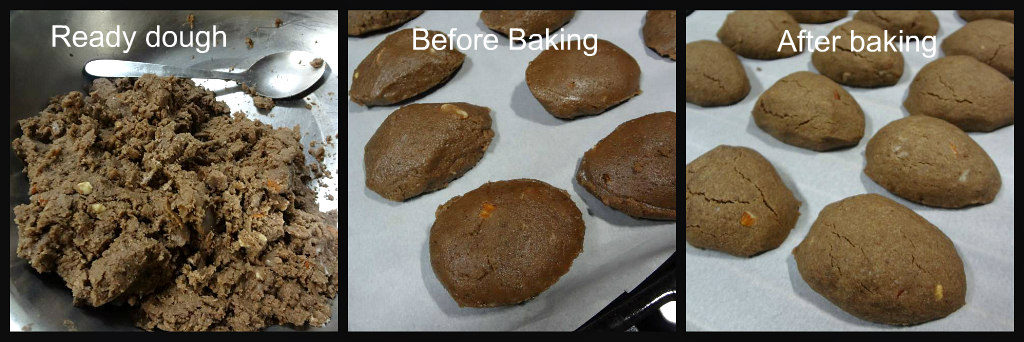
-Add in crushed almonds, mix well. Dough will be little crumbly and will not be like a smooth dough.

-Now shape these dough into whichever shape you like.

-Keep in a lined cookie tray and bake in a pre-heated oven at 170°C for 10 to 12 minutes.

– I have exactly followed her method to give shape by using bigger steel spoon. It was a cute oblong shape.

-After baking, cool and store it in an air tight container.


Besan Laddu:

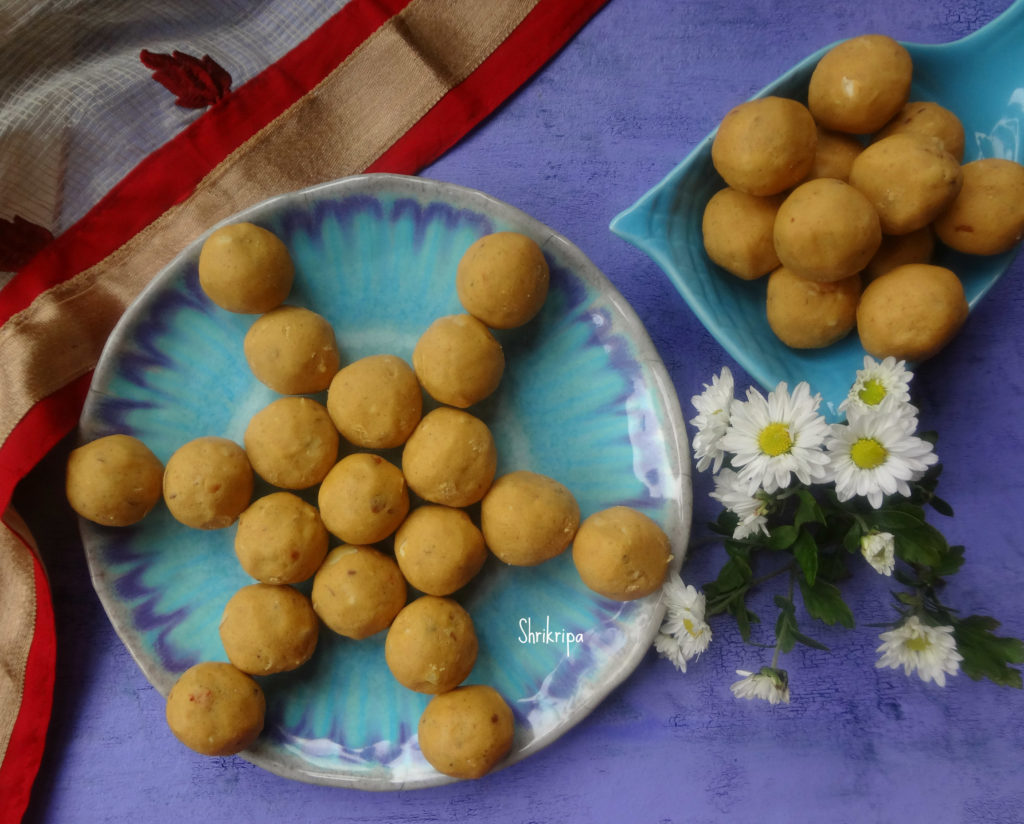
Besan laddu is one of the most popular Indian sweets prepared during the time of Deepavali or Diwali festival. Besan laddu is pretty simple and contains three main ingredients- Gram flour/ Besan, ghee and sugar. These melt in a mouth laddu’s are my family’s favourite.

pic main 1

Ingredients:

Gram flour/ Besan – 3 cups

Sugar – 2 ¼ cups

Ghee – 1 cup

Dry fruits – 1 cup

Cardamom powder – 1 tea spoon

Method:

-Chop dry fruits. I normally use half cup of cashew bits and half cup of slivered Almond bits.

-Dry roast almond and cashew bits and keep aside.

-Powder sugar and keep aside.

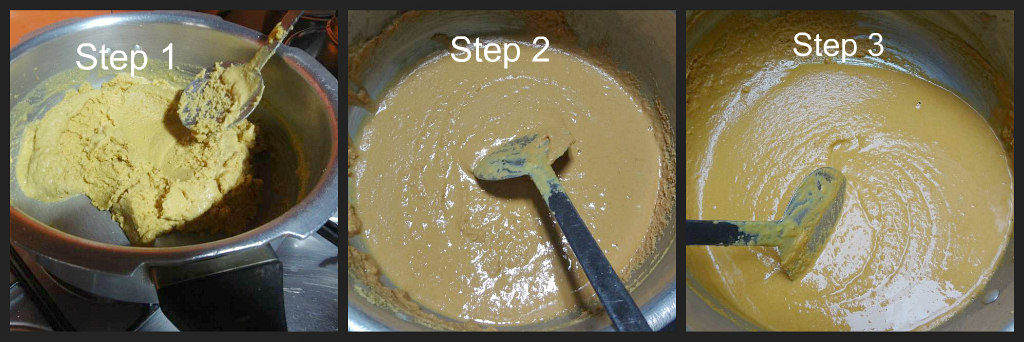
-Take one thick bottomed wok, roast Besan in very low temperature.

-When it is a little hot, start adding ghee little by little during the roasting process.

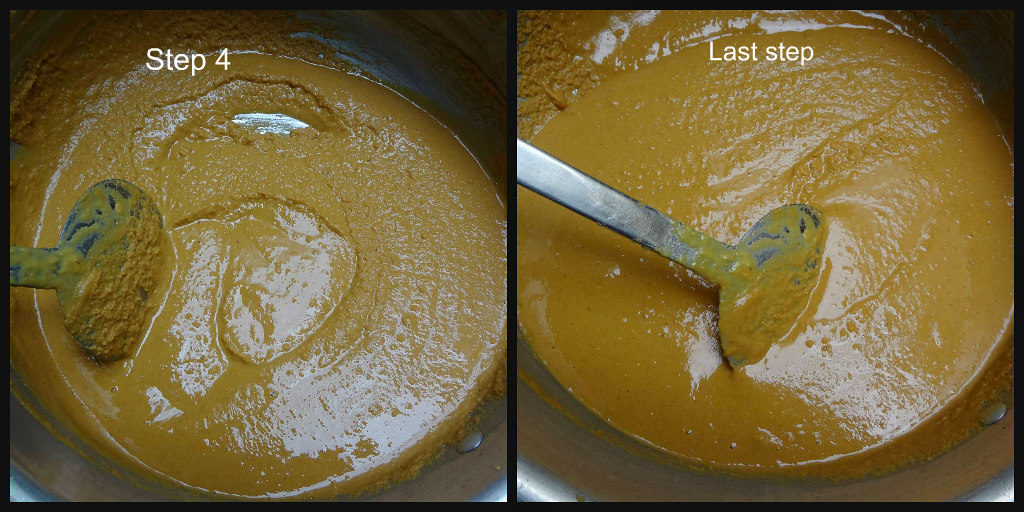
Ribbet collage 1

-Don’t add or pour all the ghee at one go. It will not help to roast evenly and it will make muddy consistency, and will affect in even roasting.

Ribbet collage 2

– I took exactly 30 minutes over a very small flame.

-When it roasts and after adding all the ghee, mixture becomes very runny and colour will turn into reddish brown.

-At this time your house will filled with roasted flour’s aroma. This is the time you should switch off the gas and leave this mixture to cool completely.

-It will take anywhere between 30 to 40 minutes.

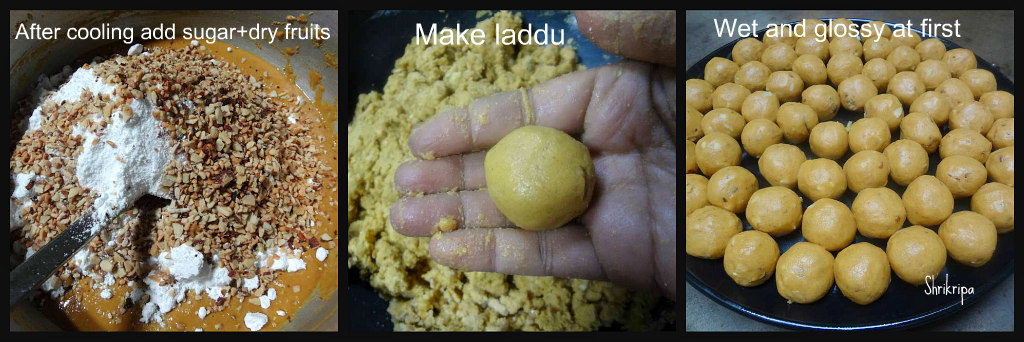
-Now add powdered sugar, cardamom powder and roasted dry fruits and mix everything properly.

Ribbet collage 3

-Now start using your hand and mix it once and start making small roundels by taking very little mixture at a time.

-At this time, you will feel that the laddus are a little wet and glossy and shining.

-Arrange these over a clean, dry platter. Because of the wetness, it tends to loosen its shape.

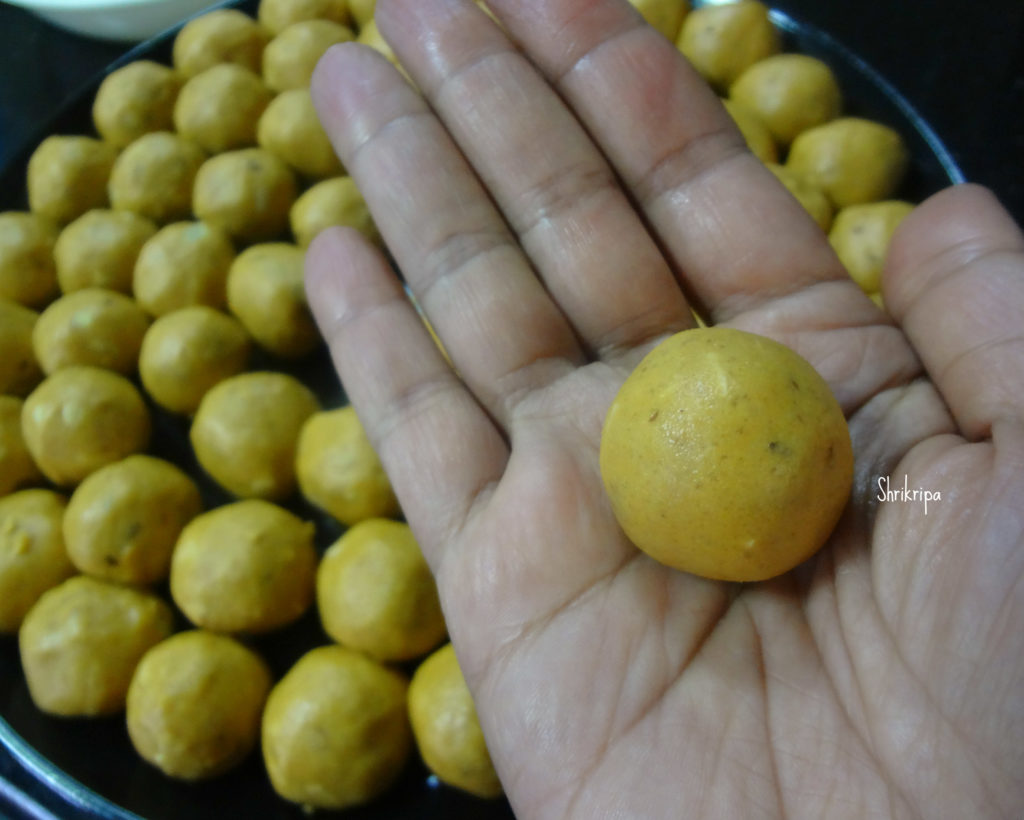
-After some time (one hour) laddu’s will be dry and glossy texture will vanish.

pic last

-I usually take these shapeless roundels and once again try to give shape and store it in an airtight container.

Kashi Halwa – Ash gourd Halwa:

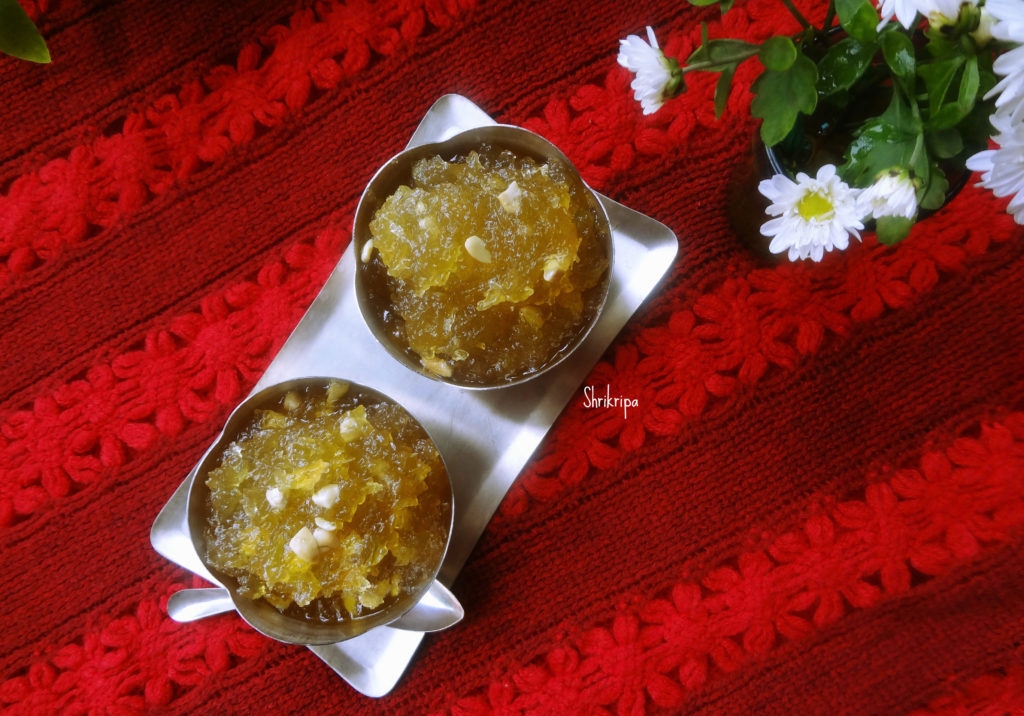
Ash gourd halwa is very popular in Coastal belt of South Canara region. It has many names like Kushmanda halwa, Dumroot,Kumbalakai halwa or Kashi halwa. All names are one and the same. Basically, grated Ash gourd is cooked until its water evaporates, further cooked with sugar and some ghee and flavoured with cardamom. Which is a very laborious job, but once you taste it, you will never regret making it.

halwa main

We will see how to prepare this tasty dessert –

Grated Ash gourd – 3 cups (tightly packed)

Sugar – 1 ½ cup

Ghee – ½ to ¾ cup

Salt – a pinch

Cardamom powder – 1 tea spoon

Roasted Cashew nut pieces – ½ cup (as needed)

Method:

-Wash Ash gourd, peel outer skin and remove inner core with seeded part. (Core part can be used to make Sweet Dosa or Plain Dosa batter)

Ribbet collage 1

-Grate ash gourd and collect gratings and water which is oozing out while grating.

-Put all this in a thick wok and keep it in a fire. Cook until water dries up.

Ribbet collage 2

-When water dries up, add salt, enough sugar, and cook. Once again you will see lots of liquid.

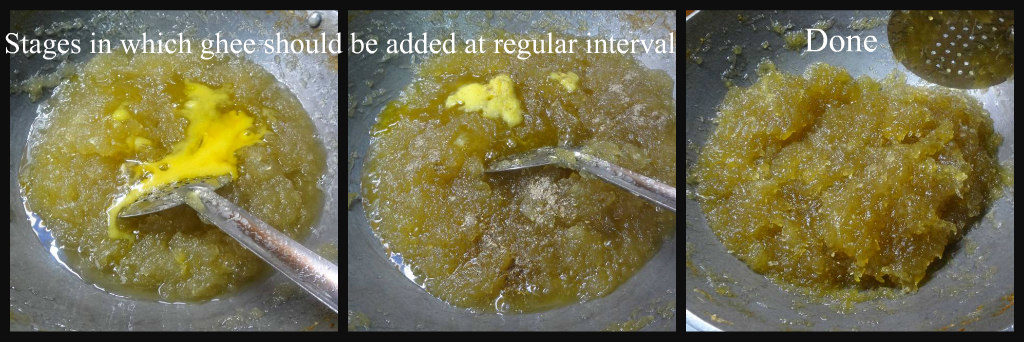
-Don’t worry, mix in-between and wait until it is dries up. Now it is time to start adding ghee at intervals.

Ribbet collage 3

– Now onwards it needs continuous stirring and in-between add 2 table spoons of ghee at a time.

-Keep on stirring until mixture leaves the sides and becomes like a mass.

– When it is done, you will notice three things. When you flip the mixture from the bottom, you will notice little whitish parts (like roasted), when you drop the mixture it will not stick to the spoon and drop like a mass and ghee oozing out at the edges.

Ribbet collage 4

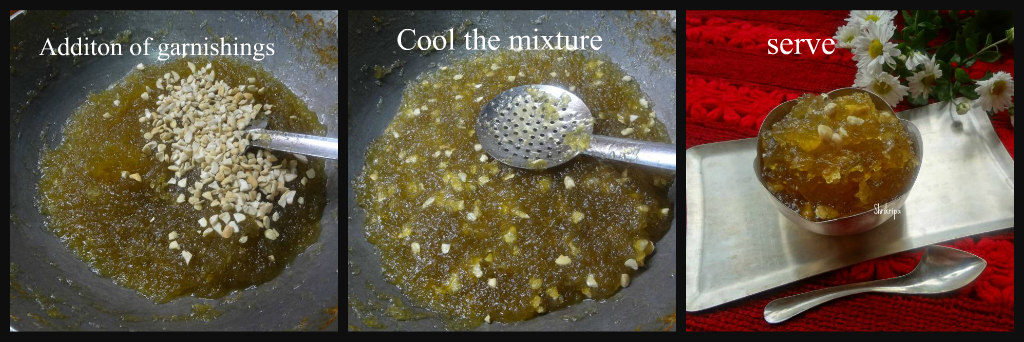
-This is when it is perfectly done and time to add Roasted cashew nut pieces, cardamom powder mix thoroughly and switch off the gas .

Ribbet collage 5

Now leave this ready Halwa to cool or Serve Hot.

-When it attains a room temperature, store this in an air tight container.


Avalakkki/Poha Chiwda:

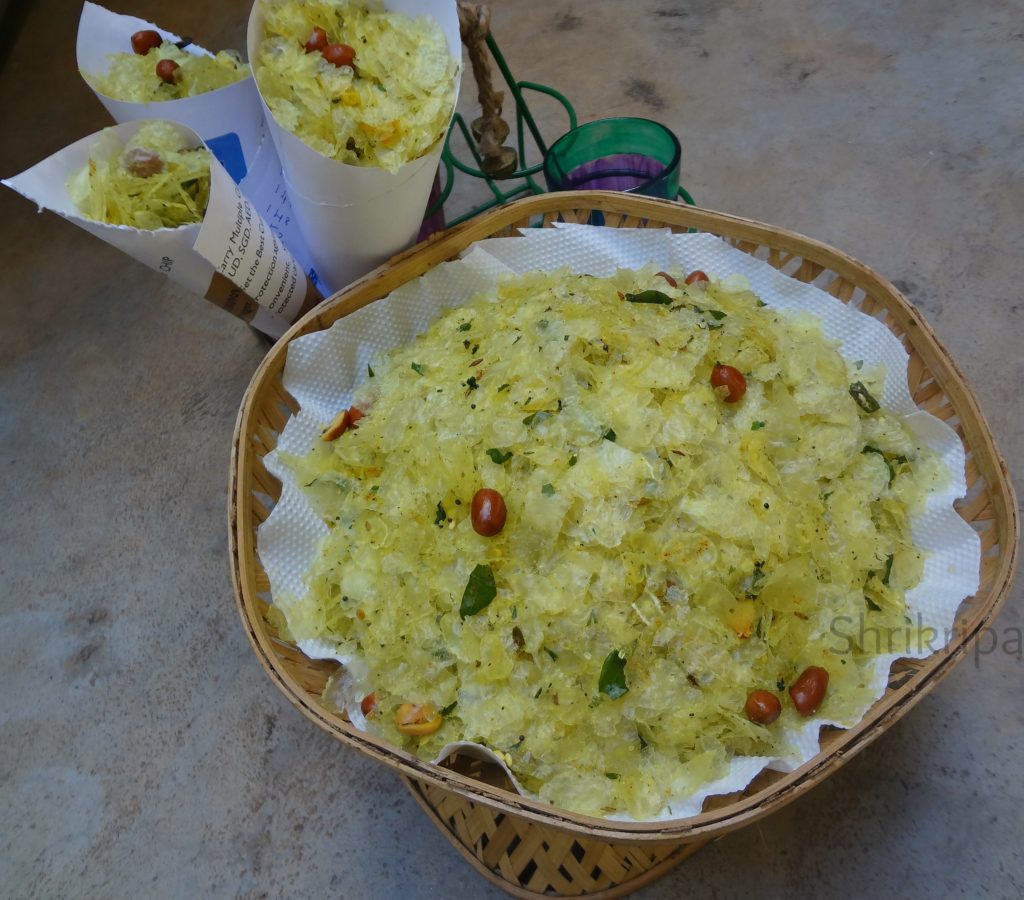
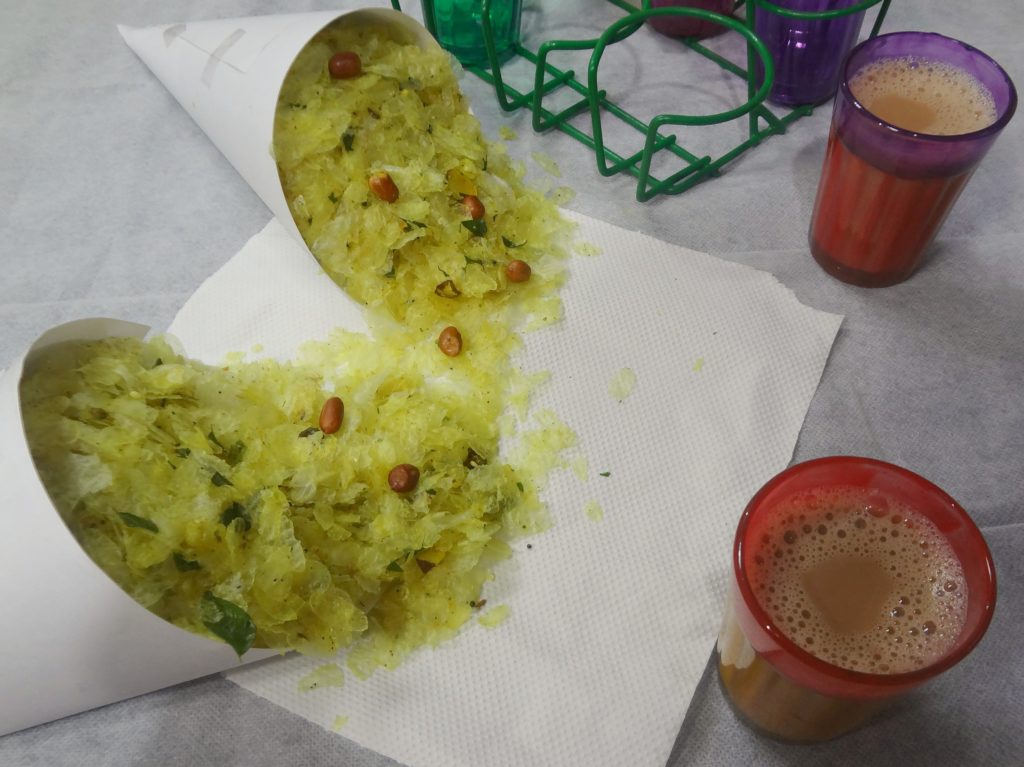
Chiwda or Chivda is an integral part of Diwali festival. It is nothing but savoury rice flakes or Poha. This is not the usual deep fried one. It is a melt in the mouth kind, is very low in calories and is a light snack. My mom used to make this with Nylon Poha or super thin Poha.

Chiwda main

This is how my mom used to make it-

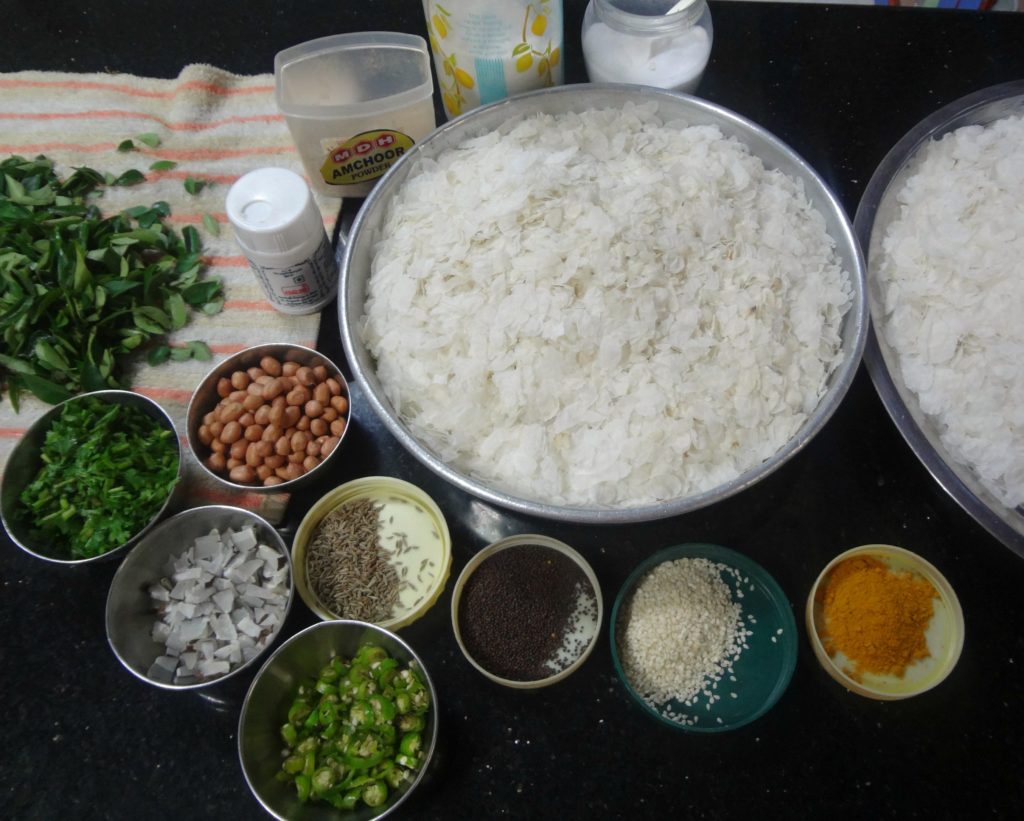
Ingredients:

Nylon Poha /Paper thin poha – 500 Grams

Tamarind powder or Amchur powder – 2 tsp.

Salt – to taste

Sugar powder – to sprinkle.

Seasoning:

Oil – 4 tbl sp

Peanuts – 4 tbl sp

Mustard- 2 tbl sp

Cumin- 1 tbl sp

Hing – 1 tsp

Curry leaves – 7 -8 springs

White sesame seeds – 2 tbl sps

Turmeric powder – 2 tsp

Green chillies – 3 -4 Chopped

Dry Coconut bits –  3 tbl sp

Coriander leaves – 3 tbl sp

Method:

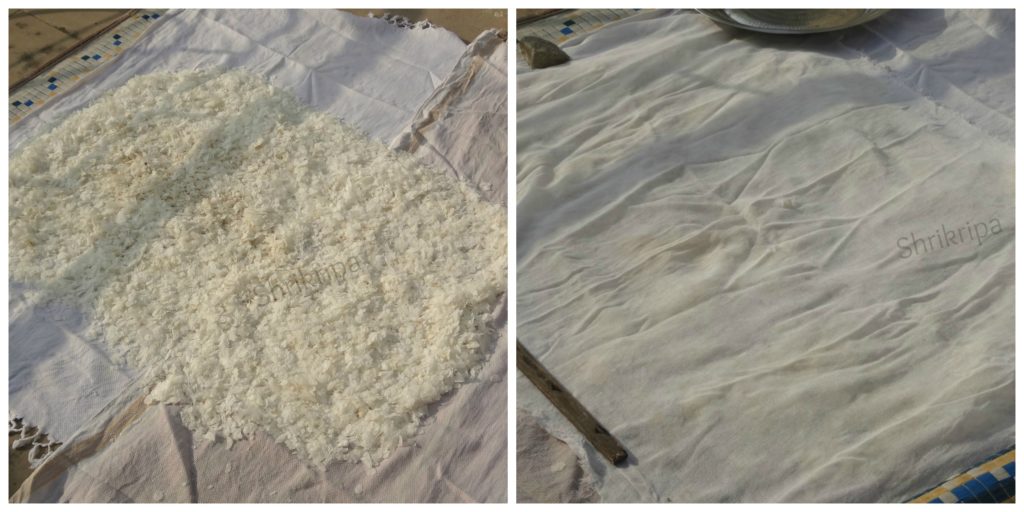
-In the morning keep beaten rice /Poha under the sun by spreading on a thin clean cloth.

chiwda 1

-If you want you can cover this Poha by using another thin cloth to avoid dust accumulation while drying.

-Keep this for two to three hours or until it becomes crunchy.

– When it is ready, remove from outside and keeps everything ready for seasoning.

chiwda 2

– Chop green chillies, curry leaves, coriander leaves.

– Slice coconut and make bite size pieces.

-Make sugar powder and keep aside.

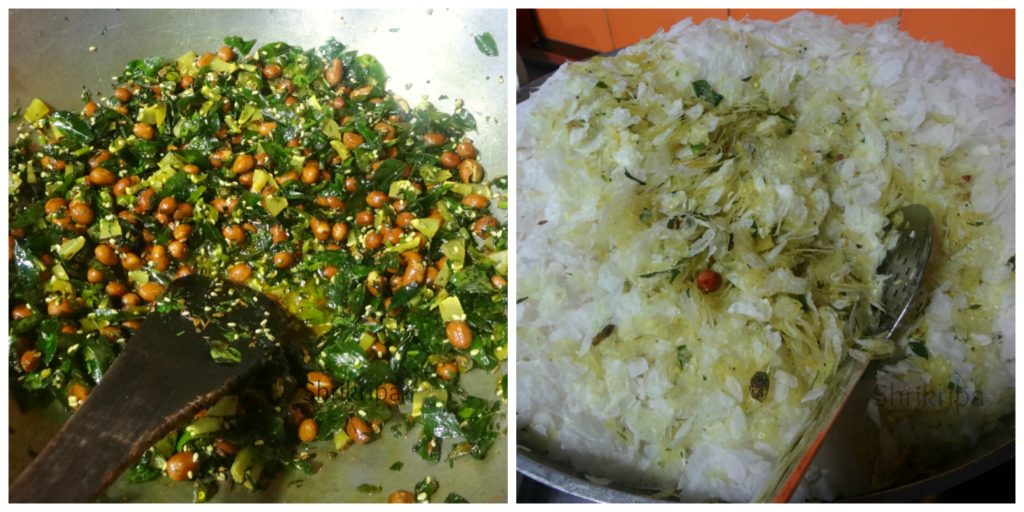
-Now take one big kadai, put oil. When it is hot add peanuts.

chiwda 3

-When it is half done, add mustard. After it splutters go on adding Cumin, hing, curry leaves and green chillies one by one.

-When curry leaves become crisp add coconut bits and fry a little.

-Lastly add chopped coriander leaves and fry nicely until coconut bits becomes brown.

-Now add all the powders- turmeric, salt, tamarind and sugar.

-Switch off the gas, add sun dried Poha and mix thoroughly until it holds all the masalas.

chiwda 4

– Don’t put lot of pressure while mixing, if you do so, crunchy Poha will break and will not hold the shape.

-After mixing, cool and store this in an airtight container. This stays good for one month or more.

Enjoy this with evening tea.

NOTE: If you don’t have access to sunlight, you can roast this in kadai after doing seasoning. Keep it for some time in a low fire and make Poha crispy or use microwave for roasting before seasoning.

Shankarpali/Diamond biscuits:

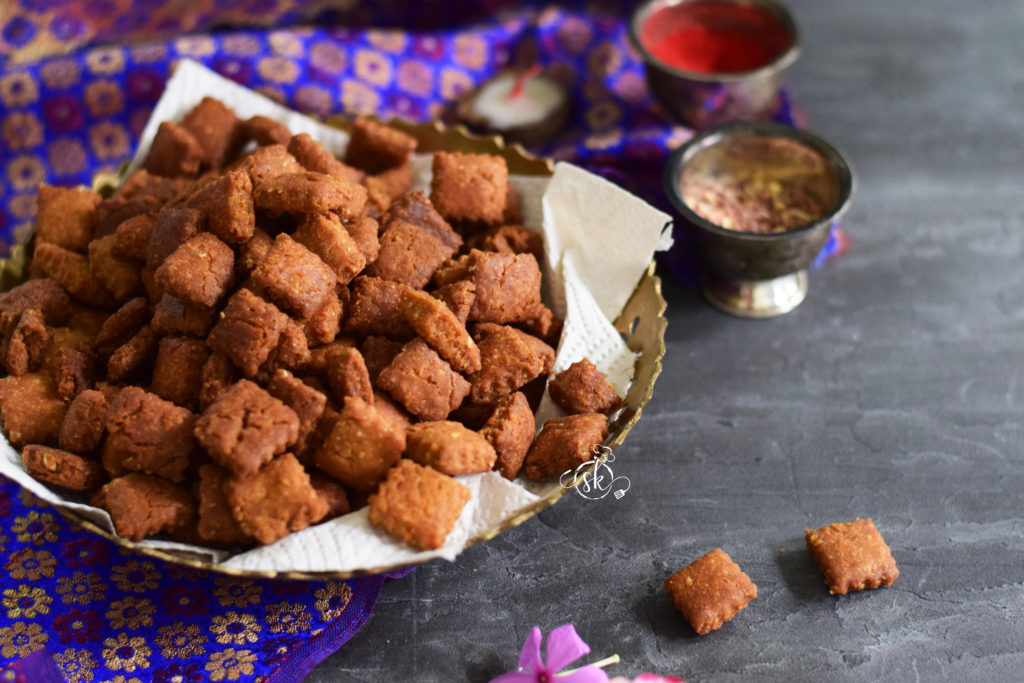
Shankarpali is a traditional Maharashtrian, deep-fried snack. It was introduced to us by our neighbour aunty. It is a very light, flaky, melt-in-the-mouth, a small, irresistible cookie that is deep-fried and not baked. It has a good shelf life, and one can enjoy it even after Diwali.

Traditionally, Shankarpali is made by using All-purpose flour. Here, I have used Whole wheat flour and oat flour and did not feel any change other than the colour of the final product.

If you want to use All-purpose flour, follow this recipe, replace the flour, and proceed.

Ingredients:

Milk – 1 cup

Ghee – ½  cup

Sugar – ¾ cup ( I have used Brown sugar)

Salt – 1 tsp

Cooking Soda – ¼ tsp

Flour – 3 ½ to 4 cups (as required) ( All-purpose flour OR Whole Wheat and Oat Flour)

Oil – to deep fry.

Method:

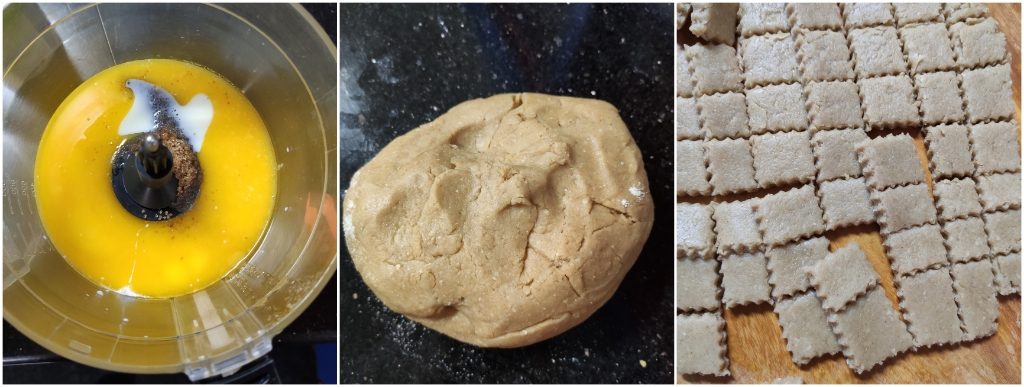
-Take one bowl or food processor, beat milk, ghee and sugar until frothy.

-In another bowl, take 2 cups of whole wheat flour and ½ cup of oats flour, salt, cooking soda and dry mix everything.

-Add the mixed flour to the liquid ( beaten milk and sugar), add some more whole wheat flour and make a soft, pliable dough by adding whole wheat flour little by little.         

– Cover this bowl and keep it aside for 15 minutes. Meanwhile, Keep the oil on a low flame to deep frying.

-Take a small portion of the dough, roll it into a thick ¼ inch circle, like a Roti. Remove the outer curved portion and make a square. ( it is optional to get only square pieces)

-Take a pizza cutter or any other zigzag cutter and cut this flattened disc. Now deep fry it on a low flame.

-When it becomes light brown, take it out and spread it on a tissue paper laid plate.

-When it is cool, store this in an airtight container.

NOTE: Keep the gas flame to a simmer and maintain the temperature of the oil. If oil is overheated, the shankarpali would turn into deep brown/ half-done and charred.


Gluten free Masala Cookies:

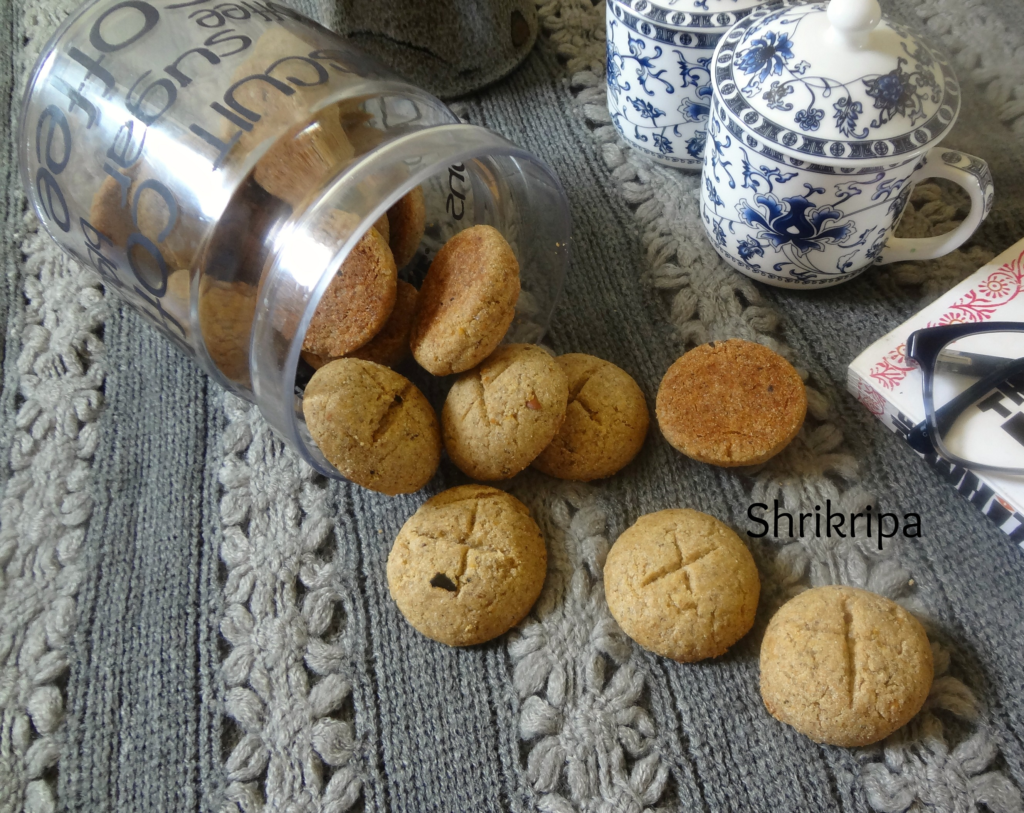
This masala cookie is low in sugar and perfect as a snack for toddlers or elders. This recipe works out with any permutation combination of flours. I have worked with the addition of Amaranth flour with banana flour. As well as the Combination of whole wheat flour, oats flour and banana flour as well. Every time, it gives crunchy outside, soft inside cookies, and if you are feeding diabetic people, it is a healthier option when compared to packaged biscuits. 

pic main

Ingredient:

Amaranth flour /Rajgira Atta – 1 cup ( you can use 1/2 cup of whole wheat + 1/2 cup of oats flour as well) 

Plantain/Raw banana flour – ½ cup

Butter – 100 grams

Salt – 1tea spoon

Baking powder – ¼ teaspoon

Baking soda – ¼ teaspoon

spice blend –1 to  2 tablespoons (a blend of spices like cinnamon, pepper, ginger or as per the choice ) 

Desiccated coconut – 2 tablespoons

Sugar – 3 tablespoons

Curd –2 tablespoons

Method:

  • Pre-heat oven at 170-degree C.
  • Take one bowl, mix all the dry ingredients such as flours, salt, baking soda and powder, spice blend dry mix/sieve a couple of times and keep it ready.
  • Cream butter, sugar and curd (2 tbl spoons) by using a food processor or hand. Add dry flour, desiccated coconut and make a firm dough.

  • Line the cookie tray with butter paper.
  • Drop the dough into the cookie tray using a table spoon to shape and get the uniform cookies.
  • Mark X at the top of the cookie to get a design by using the tip of the knife.
  • Bake this in a pre-heated oven for 15 – 20 minutes. Pull out and cool.
  • Store this in an airtight container. This measurement yields around 18 -20 cookies.