Kithul Flour- Sweet and Savoury Drinks:

Kithul tree is found all over south India while travelling in and around our native, at fields,  ghat section or any hilly area. Kithul palm, commonly known as Solitary Fishtail palm, sago palm, Toddy palm, jaggery palm etc.
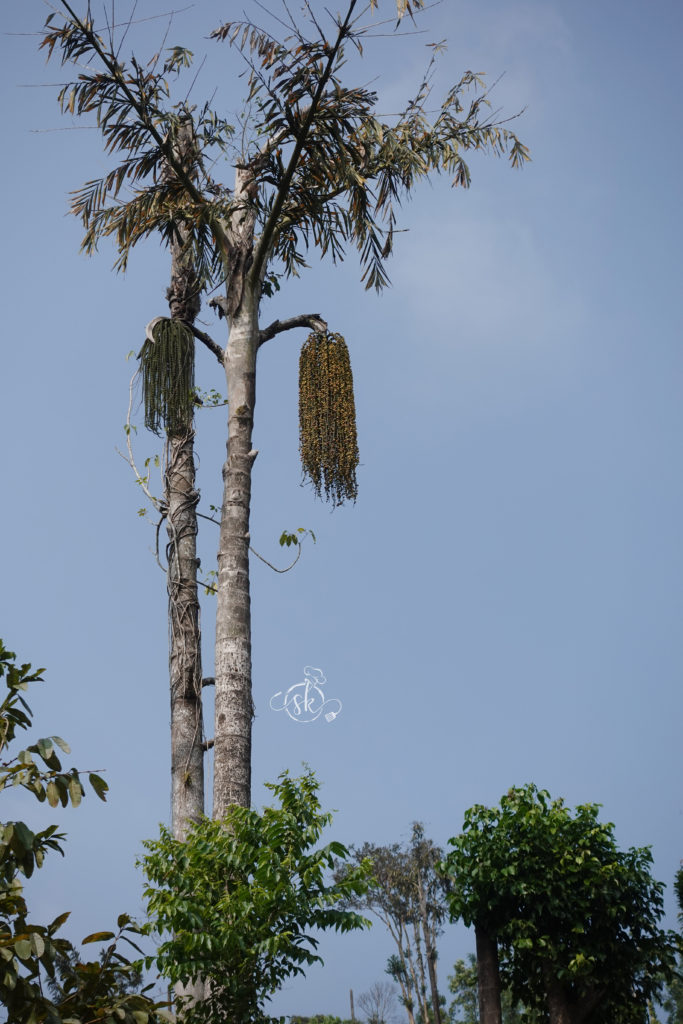
Scientifically, Caryota urens is a species of flowering plant in the palm family from the Indian Subcontinent and South-East Asia.       

 In Kannada, it is called as ಬೈನೆ ಮರ /baine tree.

In and around Mangalore, it is known as ಈ0ದು /Eendu.

It is famous for Folk medicine in our region.

What is Kithul flour?
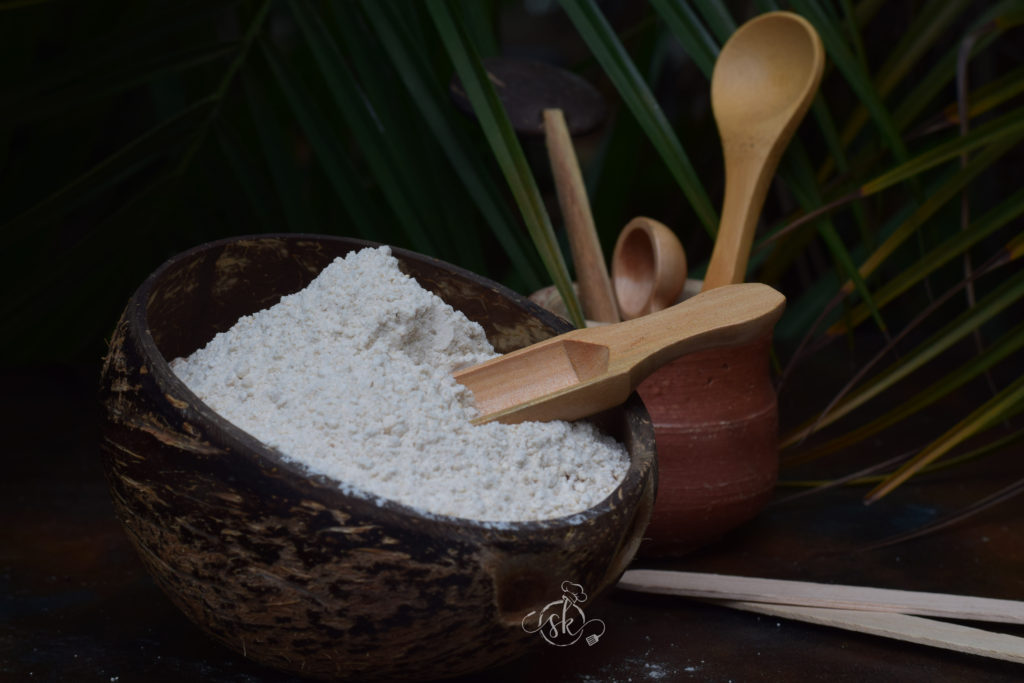
Starch extracted from the pith of the Kithul tree is “Kithul Flour” and known for its benefits in traditional “grandmom’s remedy” to control many ailments such as reducing body heat during summer, remedy for Sevier acidity, stomach ulcers, headache due to stomach ailments etc. in our villages. It is high in fibre and antioxidants. Hence, it helps to regularise gut health.

Extraction of Kithul flour is a tedious process; hence, we need to be extra cautious while buying the product.

Luckily, I have found a farmer who follows the traditional farming method and manages to prepare Kithul flour conventionally.

Kithul flour Porridge: One of the most popular breakfast porridge/puddings in Srilanka.
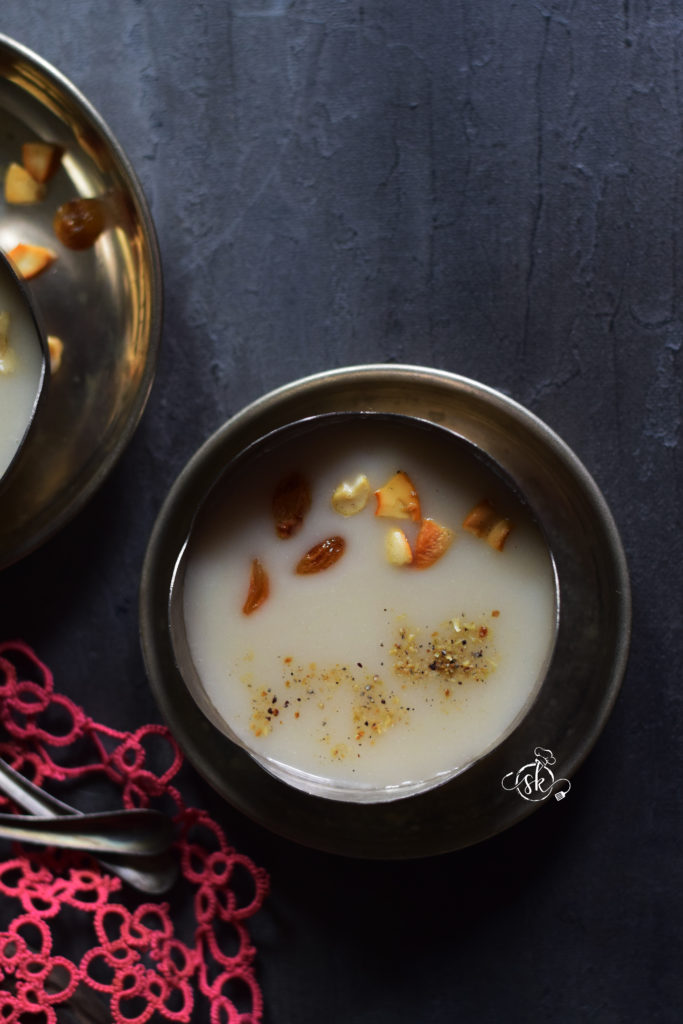
Rich in fibre and healthy Sri Lankan breakfast porridge, usually prepared by cooking kithul flour with sufficient water, then enhanced the taste by adding coconut milk, jaggery and crushed cashews or grated nutmeg.

The benefits of usage of this flour are endless.-

-Stops lose motion.                                                                   
-Reduces body heat and mouth ulcers.
-Reduces the painful periods
-Regulates acidity and improves gut health.
-improves the nerve health

Method: which I followed is straightforward.

-Take a glass of water, and add a spoon of Caryota powder and a pinch of salt or sugar or jaggery. Boil the mixture until the content is cooked and turns shiny.

-Adjust the consistency by adding hot milk. Garnish with cardamom powder and roasted cashews.

If you don’t like sweet and prefer to have it savoury, one can also make the salted version.
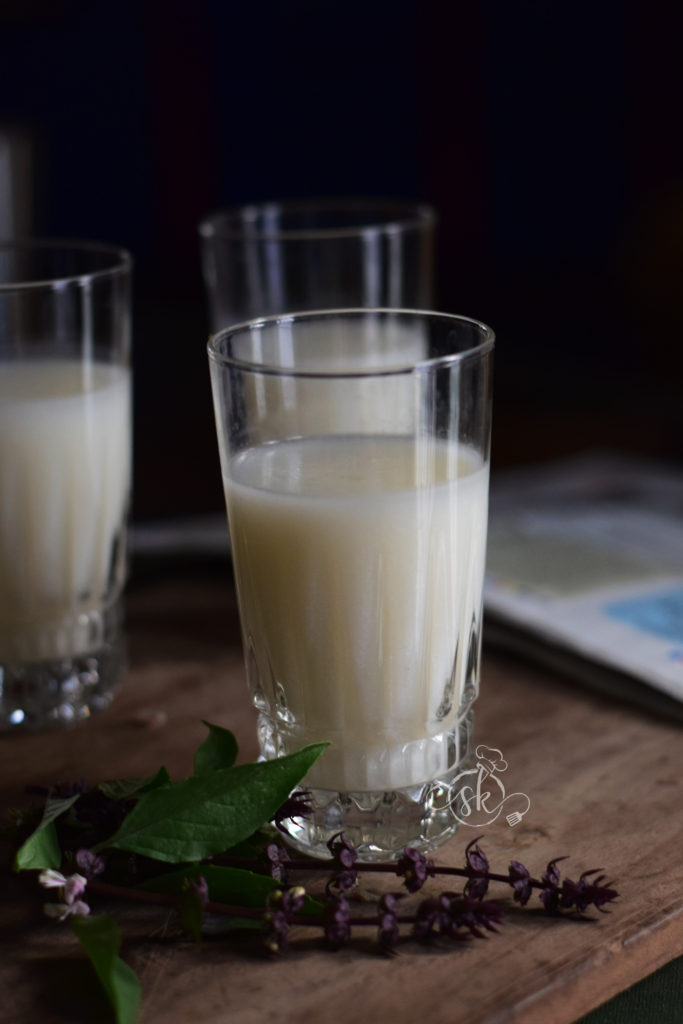
Boil 1 tsp of kithul flour with water, add sufficient salt and cool a bit. Add buttermilk and make a chaas / thin version of buttermilk like consistency. You can add crushed jeera or jeera powder, chopped coriander or hing.

I prefer cumin and salt. Drink as a thirst quencher and enjoy this summer drink with an added benefit for your health.

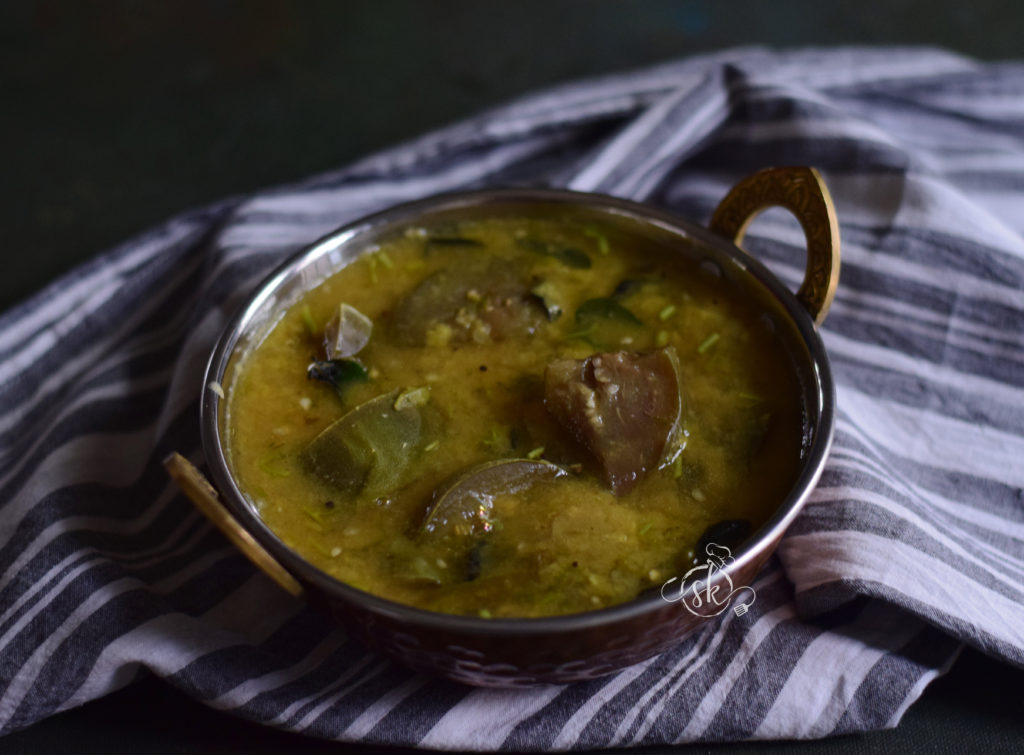


Badanekai Gojji Sambar/ Brinjal Dal :

Our Native Brinjal has its charm and a fan base. People who like it relish it in many ways. I have already shared the palya, and this dal is one more item, which is our family favourite and mild at the taste. Here, we use either Gulla or a native variety of big green brinjal.

It needs hardly any ingredient but tastes fantastic and soothing in the summer heat. It is No coconut, vegan curry. 

Ingredients:

Brinjal – 1 ( big)

Toor dal – 1 cup ( cooked with turmeric and mashed)

Green chillies – 5 to 8 ( slit)

Salt – as per taste

Jaggery – as per taste

Roasted methi powder – ½ to 1 spoon

Tamarind – small lemon sized

coriander leaves – 2 tbl spoon (Chopped)

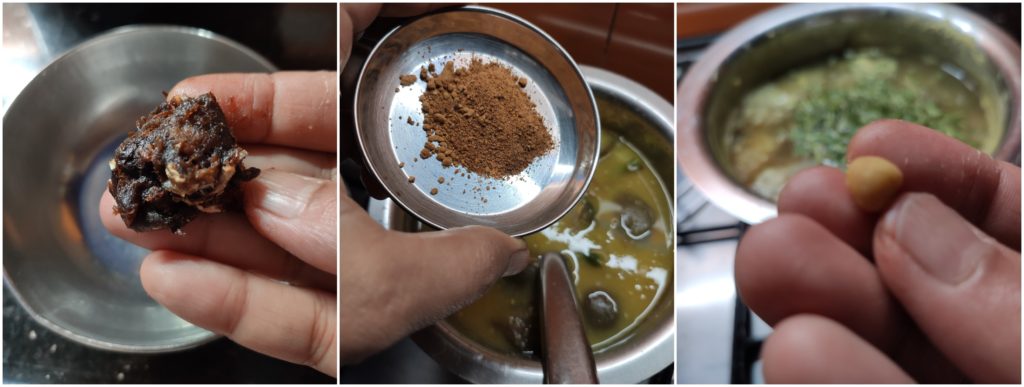
Seasoning: Coconut oil – 1 tbl spoon, Mustard – 1 tsp, Hing – peanut size ball, red chilli – 1, curry leaves – 1 spring.

Method:

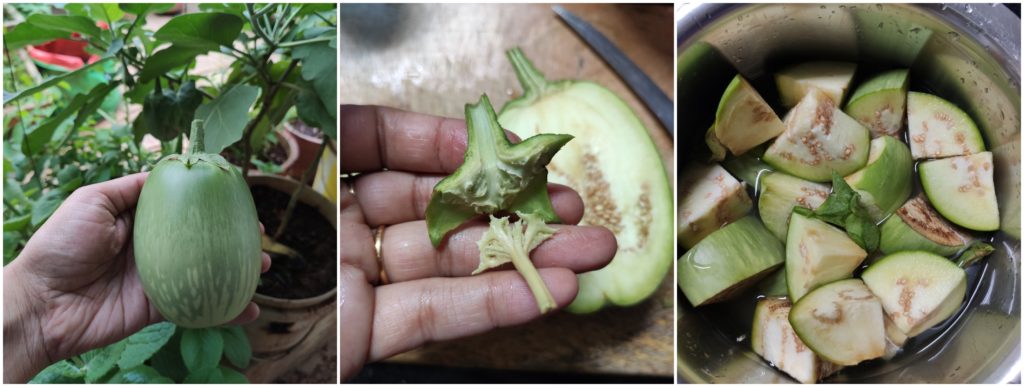
-Here, we use full brinjal, even its stalk. So, the chopping procedure is, Halve the brinjal, even the stalk. Make four slits lengthwise. And dice it. Remove the inner woody part of the stalk and discard.

-Put those brinjal pieces in water and immerse.

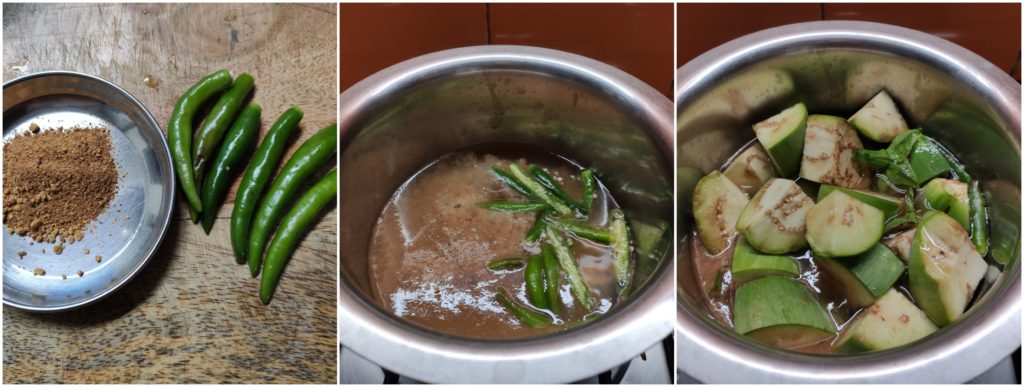
-Now, take one vessel, Boil tamarind, 2 cups of water, salt, jaggery, slit green chillies. When it starts boiling, add brinjal pieces by draining the immersed water.

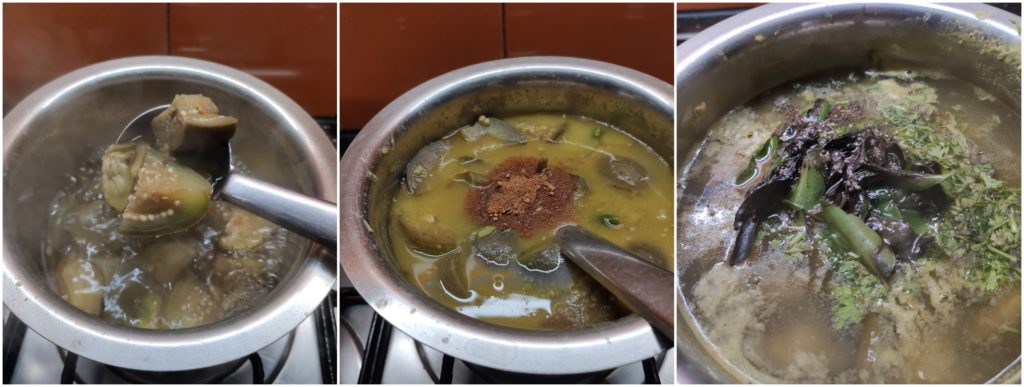
-When brinjal pieces turn soft, add mashed dal, roasted methi powder, adjust the salt and, jaggery and chillies according to your taste.

-Boil nicely, garnish with coriander. Do the seasoning by heating oil, splutter mustard, hing, red chilli and curry leaves.

-Enjoy with hot rice and papad.

NOTE: You can check the quantity of all the essential ingredients in the Above picture.


Badanekai palya/ Brinjal dry curry:

Usually, Brinjal/ Eggplant of Mangalore/Udupi region is known as “UDUPI GULLA”. No! We have two varieties.

Both are Heirloom, native variety.

How to differentiate our native varieties of brinjal? It is so easy.

Here, I am talking about our “Oora Badane”, “Native Brinjal” of Mangalore. 

Much bigger (almost like purple brinjal, used in Bhartha). The outer skin is shiny pear-shaped; the outer skin is thinner, pale green with white lines.

It is fleshy and used in our style of Bhartha ( Roasted sweet and sour Gojju), Palya, Sambar and kayi Huli.

We all know that GI tagged “Udupi Gulla”, which is small, darker in the shade, matte-finished outer skin with a couple of thorns at the woody stalk. ( which is at the backside in the picture) 

For this palya, we use fleshy, seasonal native brinjal. This one side dish, which my husband craves for and asks to make, and he relishes with Ghee smeared Chapathi.

The recipe is simple and needs freshly ground masala or readily available Rasam powder.

Ingredients:

Round Brinjal – 1

Onion – 2 ( medium)

Green chillies – 2

Salt

Tamarind – gooseberry size

Turmeric – ½ tsp

Jaggery – as needed

For the masala powder:

¼ cup – grated coconut

2 -Red chillies

Coriander -1 tsp

Cumin – ½ tsp

For the seasoning:

Coconut oil – 2 tbl spoons, mustard – 1tsp, urad dal – 1tsp, Chana dal – 1tsp, hing – 1 pinch and curry leaves – 1 spring

Chopped coriander – to garnish.

Method:

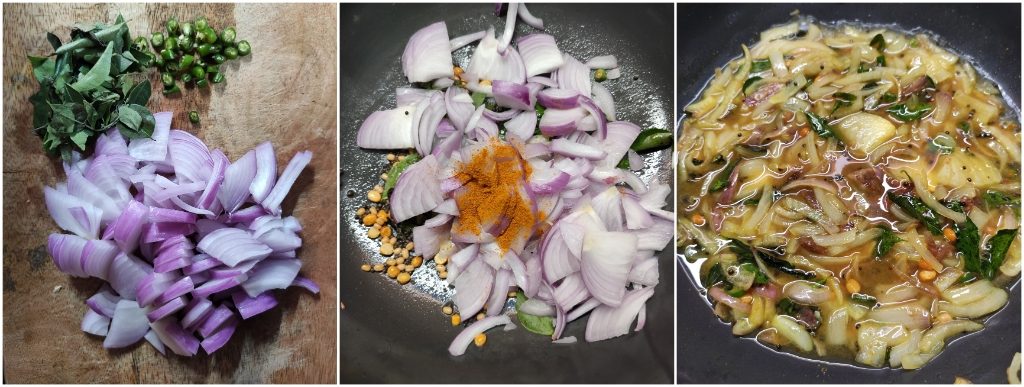
-Slice onion. Chop green chillies. Soak the tamarind in a small cup of hot water.

-Roast the coriander, cumin, red chillies in a drop of oil, make a coarse powder and keep it aside.

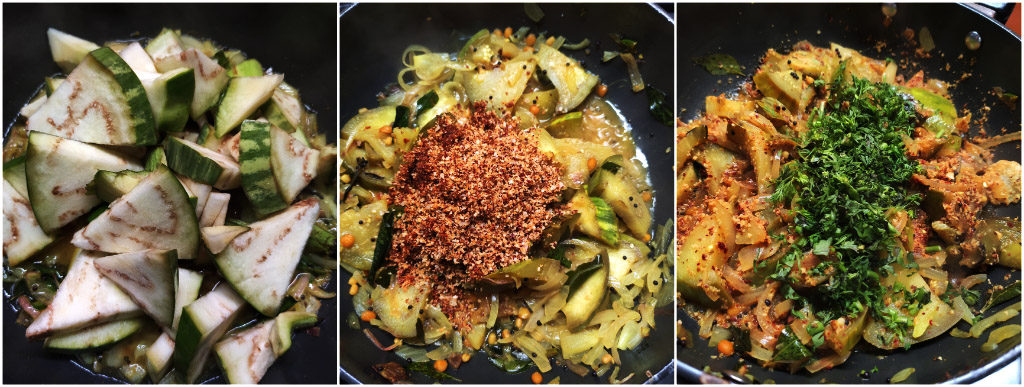
-Now take a bowl with water and immerse the chopped brinjal. Brinjal pieces should be slightly bigger and ¼” thicker. (Please refer to the pictures)

-Now, we would do the seasoning, take one Kadai, heat oil, splutter mustard, add urad dal, chana dal, hing and fry until it is slightly brown. Add curry leaves.

-next, add onion and green chillies and fry until it is transparent and wilts.

-Extract tamarind water pour-over. Add turmeric, salt, jaggery. When water starts boiling, add brinjal and mix everything properly.

-Close the lid and cook the veggie on a low flame. Add freshly dry ground coconut masala, mix everything, once again close the lid and cook further to absorb the flavour.

-Switch off the gas and garnish with the chopped coriander leaves. It pairs well with Roti or rice.

NOTE:

If you are using the rasam powder, add little coconut and proceed with the procedure with the Rasam powder.

-Freshly made masala and the usage of cold-pressed coconut oil does give the authentic taste.

Rice flour Ubbu rotti / Ukkarisida akki rotti:

Rotti is an integral part of our breakfast menu. In Karnataka, every region has a different method to make Akki rotti/Rice rotti. Mangaloreans prefer to make Red boiled rice rotti by grinding the soaked rice, I have already shared the recipe, and the link is HERE.

After some exposure to Bangalore, I learned this shortcut method to make equally satisfying no preparation or soaking, an instant and quick method, which uses readily available rice flour.

One can use a Rotti press or coupe of wooden planks or roll like a chapati/ pulka.

Ingredients:

Rice flour – 2 cups

Water – 2 ½ cups

Salt – as needed

Oil – 1 tsp

Method:

-Boil water in a thick bottom vessel by adding salt and oil.

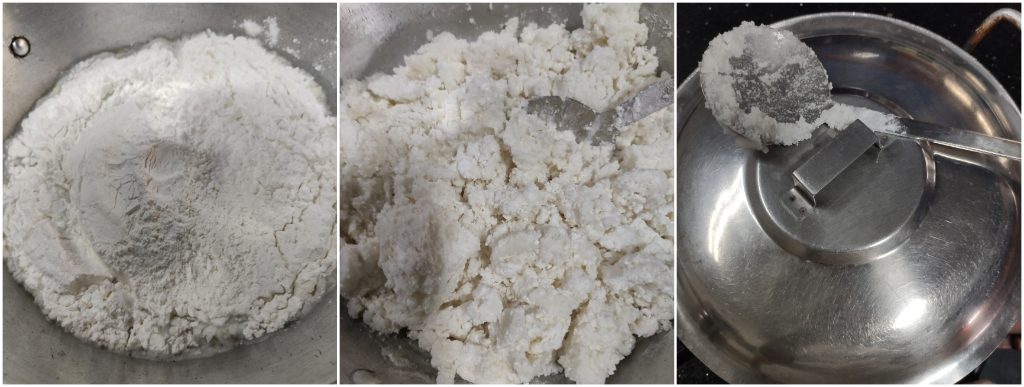
-When it starts boiling, switch off the gas, add rice flour mix everything, close the lid and leave it for 5 to 10 minutes.

-The build-up Steam would help you get a smooth, crack-free dough to make perfect rotti.

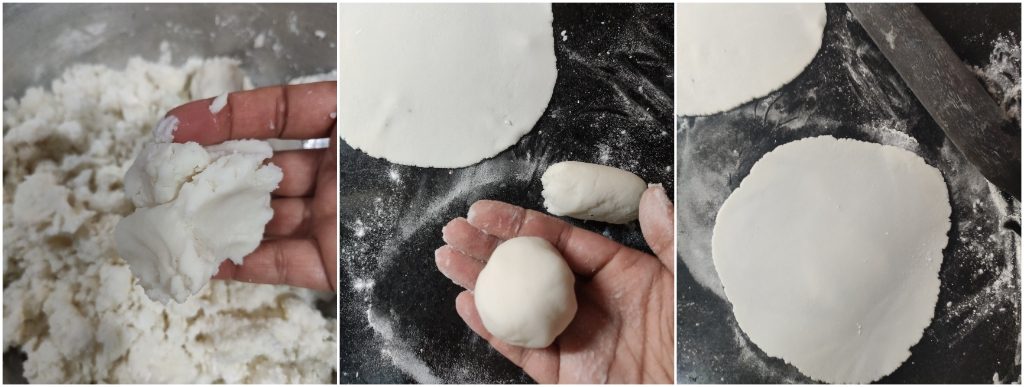
-After 10 minutes, Open the lid start kneading the dough. Take out the little dough, make the roundel and start making the flat disc.

-To make the disc, take two thick plastic or butter paper sheets. Use Roti press and keep the lemon-sized ball between two papers and press.

OR

-Roll like a chapati/ Pulka by dusting the dry flour.

-Cook on tawa, just like whole wheat pulka —Cook both sides by flipping. Then, place it on gas fire to puff.

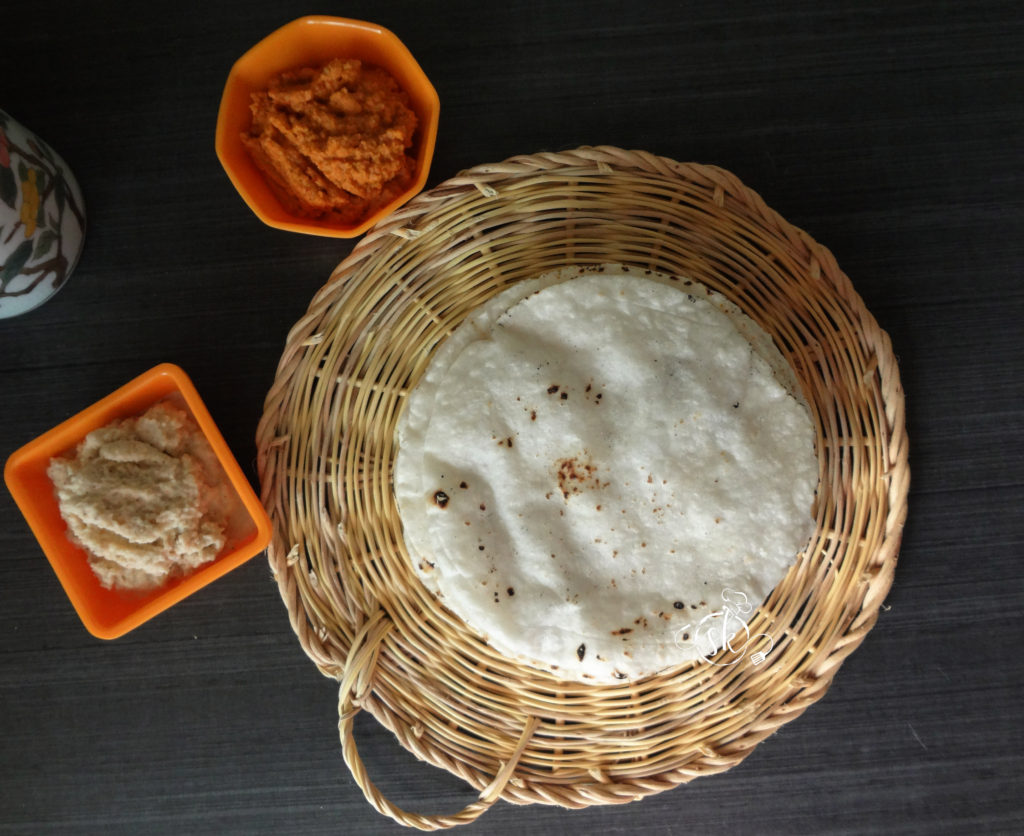
-If you wish, you can apply coconut oil or ghee on top of the puffed rotti. Serve with Chutney of your choice of curry.

NOTE:

While kneading the dough, If you feel it is dry, breaking and not holding together, please add little hot water and adjust it until it turns out pliable.

-Each rice flour acts different, and the water absorption happens accordingly. 


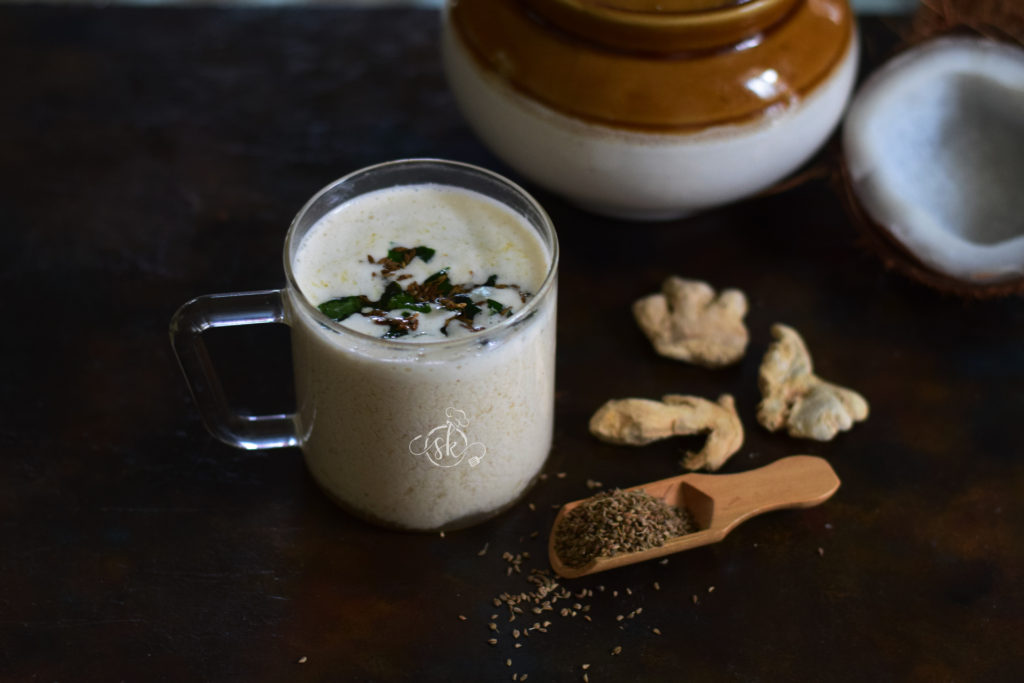
Omum and dry ginger Tambli:

Omum/ Ajwain/ carom seeds are the lesser-known spice of our Indian Kitchen. Our moms turn their hands whenever we complain about bloating or Indigestion and feed us Omum water by infusing it with water. It has been known for its benefits in treating bloating and diarrhoea due to intestinal inflammation for ages.

As we all know, Carom seeds have Anti-inflammatory, antibacterial, antifungal properties. We are here, Combining Carom with dry ginger, which has the capacity of cleansing our digestive system and nourishing our body. The taste of the tambli is so refreshing and soothing.

—such a simple preparation.

I learnt this recipe from my Foodie friend, Lakshmi Akka.

Ingredients:

Carom seed/ omum – ½ tsp

Grated dry ginger – ¼ tsp

Ghee or coconut oil – ½  tsp

Grated Fresh Coconut – ½ cup

Buttermilk – 1 serving spoon

Method:

Take ½ tsp of ghee or oil, fry omum and dry ginger.

-Grind fried items, coconut, salt and water to make a smooth paste.

-Add buttermilk adjust the consistency by adding water.

-If you like seasoning on tambli like me, please go ahead and heat some ghee add cumin and curry leaves. Pour on Tambli and enjoy it as a soothing drink or with Hot Rice.

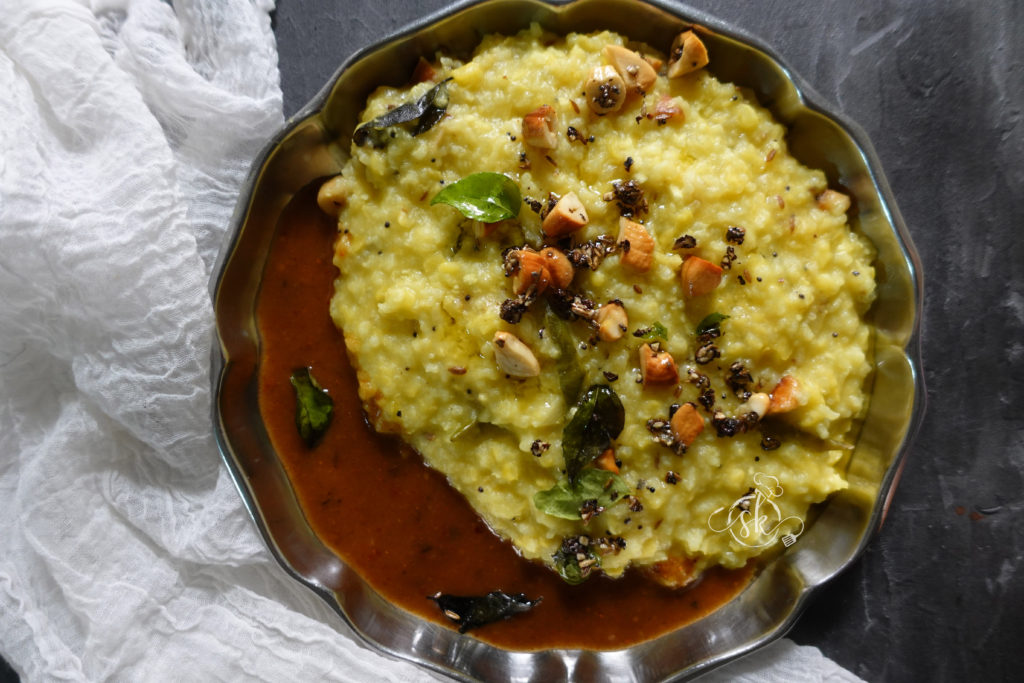
Khara Pongal/ Ven Pongal :

Ahh..what to say about humble Pongal? It is one of the comfort food for any South Indian. It is most prevalent in Tamilnadu as a Ven Pongal and a Khara Pongal at Bangalore.

Be it breakfast or as popular Tiffin Item or Lunch or Dinner in a chilly winter season, with added healing properties of ginger, black pepper, hing and loads of ghee to soothe your soul.

It is one of the wholesome, one-pot meals. As the Makarasankranthi festival is around the corner, I would love to share the recipe I follow at home and loved by my family.

Ingredients:

Rice – 1 cup

Moong dal /green gram dal – 1 cup

Ghee – 2 tbl spoons

Cumin – 1 tsp

Hing – ¼ tsp

Green chillies- 2 (slit)

Ginger – 1′ ( julienne)

Curry leaves – 1 spring

Turmeric – 1 tsp

Milk – 1cup

Water – 7 cups

Salt

Fresh coconut gratings – ½ cup

Tempering: Ghee – 1 tbl sp, mustard, cumin- 1 tsp, black pepper – 1 tsp – 2 tsp, curry leaves – 1 spring, chopped cashew nuts – 1 to 2 tbl spoons.

Extra ghee – to serve ( optional)

Method:

-Dry roast yellow moong dal for 2 to 3 minutes. Cool it. Wash rice and dry roasted moong together and soak it for some time, or you can use it directly.

-Take a cooker, add 2 tbl sp ghee, add cumin, hing, green chillies, ginger, curry leaves and turmeric and fry for 2 minutes.

-Now drain the rice and moong dal, add-in, mix everything and add water, milk and boil.

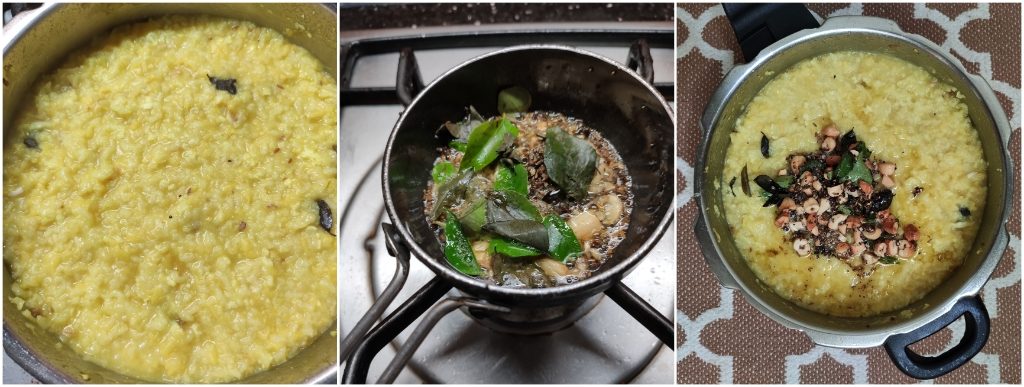
-When water starts boiling, add salt, coconut, close the lid, and cook for three whistles.

-Crush black pepper and cumin by putting them together in a mortar and pastel. Keep it ready.

-After opening the lid, make tempering by heating ghee, splutter mustard, add crushed pepper and cumin, curry leaves, cashew bits and fry until the cashew becomes light brown. Pour over the tempering on ready Pongal.

-Mix everything, serve with tamarind gojju, sambar, Raita or chutney.

NOTE: I usually use Broken rice, which is used explicitly for Pogal and available in all the local Rice traders here in Bangalore.

If it is not available, I would prefer to use Jeeraga samba rice/ small grain rice/ sannakki.


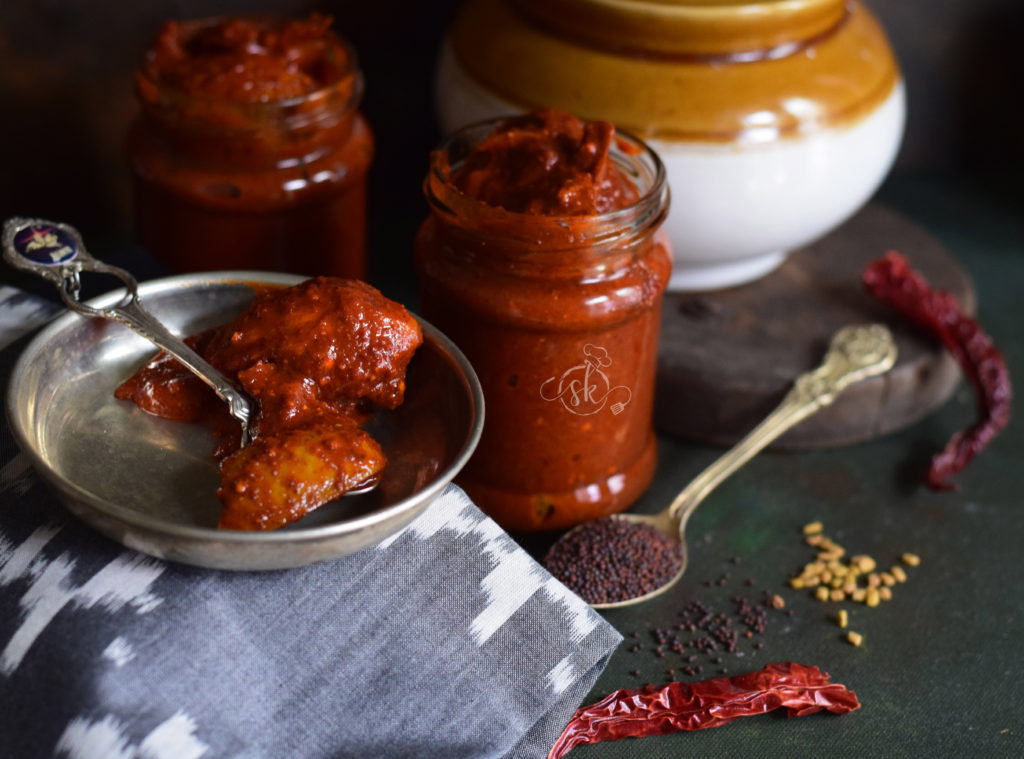
Ambate /Hog Plum pickle :

We call Hog plum “Amtekai” in Kannada and “ambate” in our local language. In our region, you will find two varieties of hog plums. One is Wild variety, also known as Indian sour hog plum, and the other is grafted or Kashi Amtekai/ hog plum.  Grafted variety is nothing but Hog plums which we usually find in South America or Southeast Asia. Also known as Ambarella or Golden apple, which belongs to Spondias Dulcis.

The wild variety, Spondias pinnata, is commonly known as Amtekai/ Amra/Amda/Hog Plum/Junglee Aam in India. Because of its sour taste, it is usually used in pickle making or as a souring agent in some traditional curries. When it matures, a seed becomes woody, and skin becomes thin.

After a long time, I found these beauties in the Mangalore store, which I frequently visited. A lot of preparation goes behind the making of a pickle. I observed that the recipe flowed down from generation to generation. A spoonful of this pickle, which is spicy and tangy, is enough to perk up a bland meal, or as a south Indian, it is a divine combo with thick curd rice.

Ingredients:

Hog plum – 500 gms

Salt – 2 cups

Water – 2 cups

For the pickle Masala:

Dried Red chillies – 100 grams ( I have taken ½  of Byadagi and  ½ of Guntur to balance the heat)

Mustard – 25 grams

Methi – 1 tbl spoon

Hing – ½ tsp

Turmeric – 2 tsp

Method:

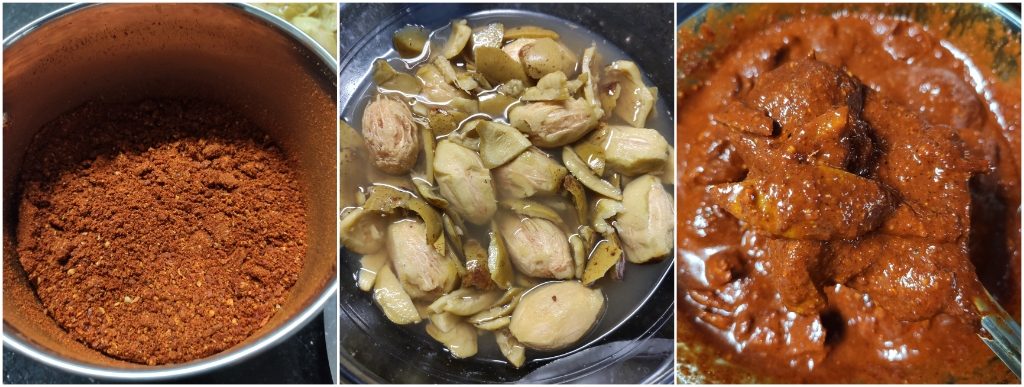
-Wash, drain the hog plums. Put it under the sunlight for 2 hours.

-Now, crush and separate the skin from the inner hard seed. Keeping under the sun would help loosen up the skin from the core.

-Now, prepare saltwater. Take 2 cups of salt, 2 cups of water and boil nicely.

-Switch off the gas, add the hog plum pieces, inner core and leave it to cool. In this way, hog plum would soften quick and absorb the salt properly.

To make Pickle Masala:

-Dry Roast Methi seeds until dark brown, then mustard seeds until it pops, then hing, turmeric.

-Put 1 tsp of oil and roast chillies until it puffs and becomes crisp. Cool everything and make powder.

-Add this powder to a cooled hogplum added salt solution, and mix properly. Store it in a dry glass bottle, leave it aside for a couple of days to mature and absorb all the flavours.

-Then, store it in a refrigerator to extend its shelf life. When it is ready, enjoy it with curd rice.

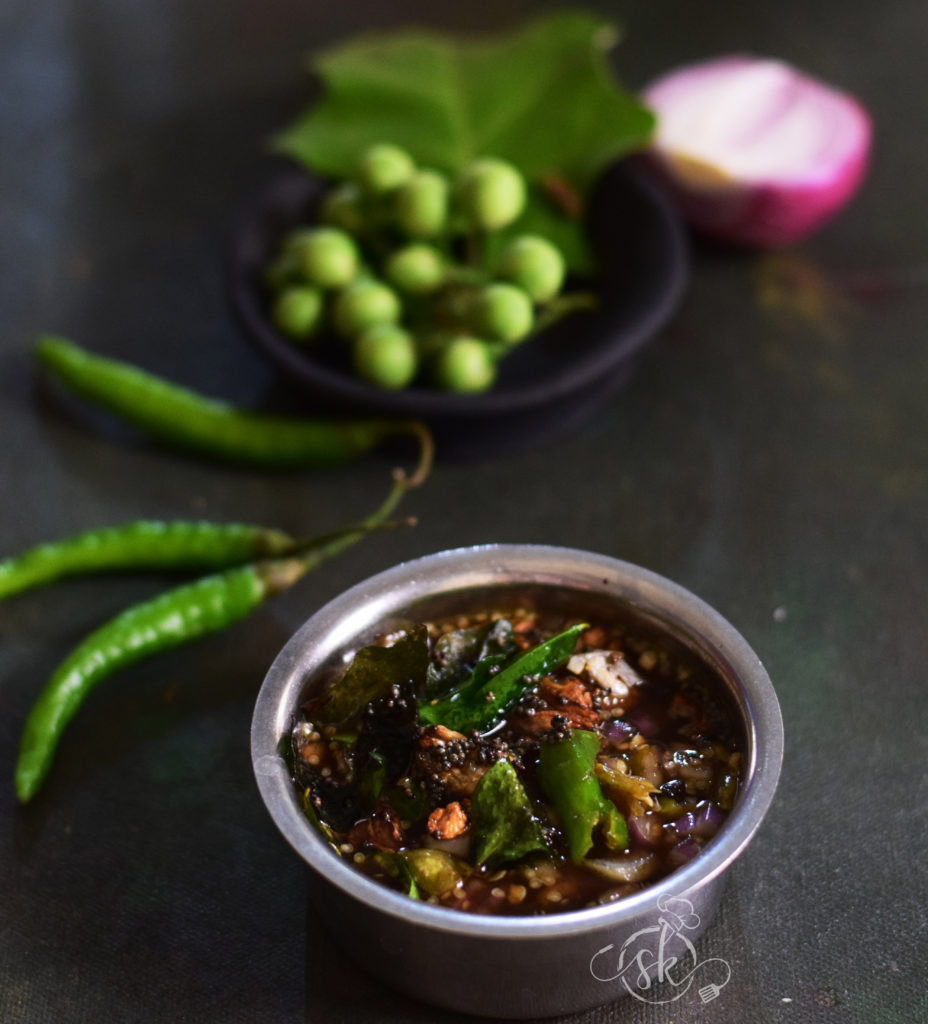
Kudane gojji/ Turkey Berry gojju :

Kudane, Thai brinjal, is widely used in our coastal region. We use it in its fresh, raw form, not dried. Earlier, it grew as a wild plant, and people never cultivated it. When my mother in law offered a sapling, I was excited and took the plant with me. Now, it is a part of my terrace garden and yields well.

Solanum torvum is its Scientific name. It also has many other names such as wild eggplant, baby brinjal, Devil’s fig, sundakai in Tamil and Usthi kai in Telugu.

 It is not only a nutritional powerhouse; it can heal our gut ( various intestinal issues ) and increase haemoglobin levels. It is one more locally-grown veggie, much neglected by us.

The taste of the turkey berry is more on a bitter side. Berry has to be processed in a particular way to eradicate its bitterness and to enhance the flavour. There are two ways to process.

The cleaning process is simple. The first one is to remove the stalk, crush it gently, and immerse it in water until you are done crushing every berry. Now, just before cooking, wash it a couple of times; in this way, most of the woody seeds settle at the bottom. Collect those cleaned berries, and proceed to cook according to the recipe, the recipe is HERE

If you opt for the second process, you need to fry those berries after washing them with Ghee or Oil. Then, mash a little and proceed to cook.

Now, let us know the recipe of Gojji / gojju. It is raw curry, no cooking recipe. If you are a person who is fond of sweet-sour-hot curry, this is for you.

Ingredients:

Fresh Turkey berries – 15 – 20

Ghee or coconut oil – 1 tsp.

Tamarind – small gooseberry size.

Onion – ½ (chopped)

Green chillies – 2 Or Bird eye chillies – 4 -6

Jaggery – grated

Salt – to taste

Seasoning: Coconut oil – 1 tsp, mustard – ½ tsp, crushed garlic – 6 – 8, curry leaves – 1 spring.

Method:

-Soak tamarind in ¼ cup of water.


-Remove stalks from the berries, wash properly.

-Take one small Kadai, put ghee or Oil, fry those berries until it turns light/ pale and starts bursting. Switch off the flame.

-Take one spoon, mash a little by using the back of the spoon.

-Now, extract tamarind juice, add it to the crushed berries. Add in salt, jaggery, chopped onions, crush the green chillies and check the taste and adjust.

-Now, heat oil, splutter mustard, fry garlic until it is brown. Add curry leaves and pour over the gojju. Serve with plain rice or with curd rice.


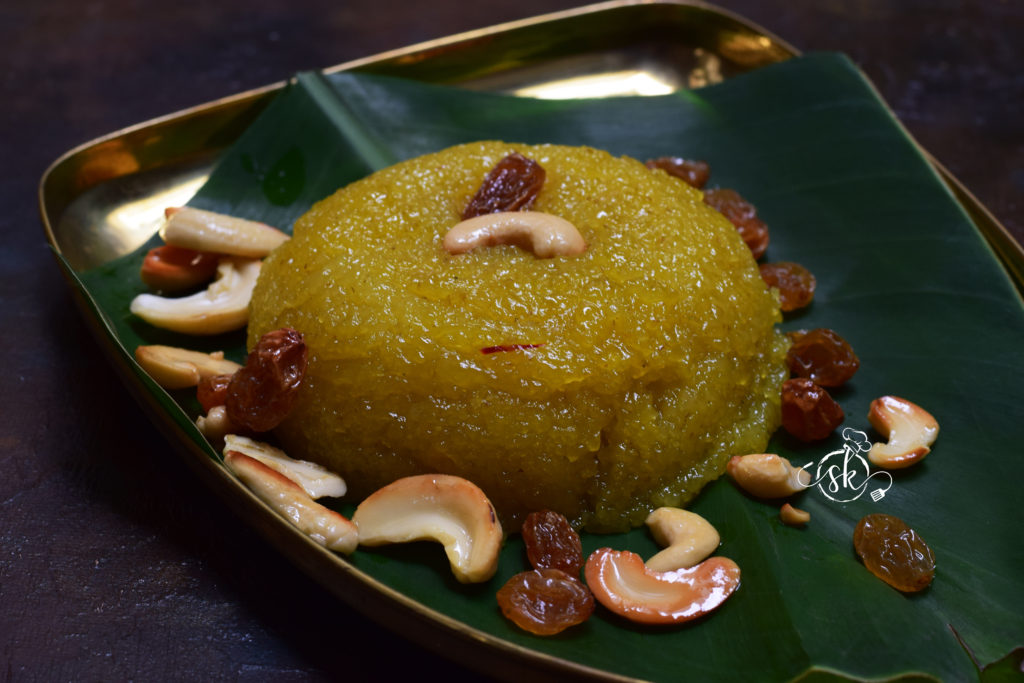
Kesari bath:

Kesari bath is made in many ways. Traditionally, it is made with Bansi Rava, and that is how my husband likes it. Since it is our Anniversary, presenting one of the much-cherished desserts and an integral part of our wedding menu.

Today, I am celebrating five years of blogging and 23 years of our togetherness with the much-loved sweet of my Husband, Kesari bath.

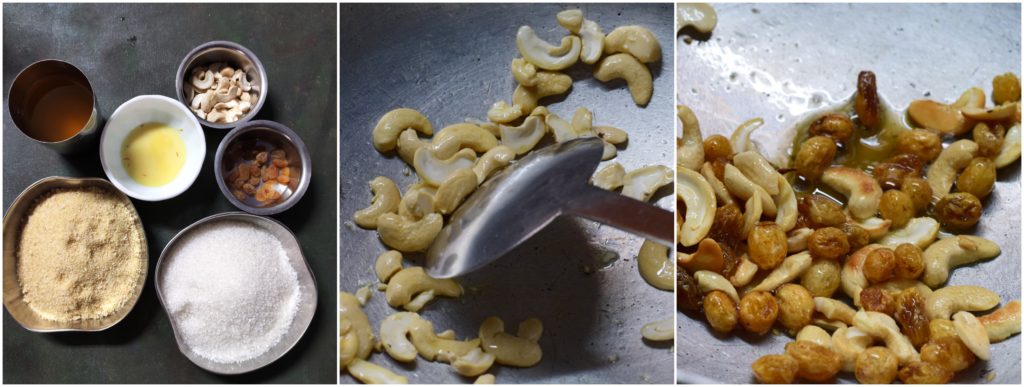
It is a simple sweet, with minimal ingredients like Bansi Rava, Sugar, Saffron and ghee, garnished with ghee fried cashews and raisins. Earlier I used to eyeball the measurements and prepare. The traditional measure and this foolproof recipe, which we cherish, is by my friend Madhu.

For measurements, use any tumbler of your choice.

Ingredients:

Bansi Rava- 1cup

Water-3cup

Sugar – 1 ½ to 2 cups ( Acc to your sweet level)

Salt – ¼ tsp

Cardamom powder – 1 tsp

Saffron – 10 to 12 strings (soak it in hot water or milk)

Ghee- ½ cup or a little more, as needed.

Cashews 10-15

Dry grapes- 15-20

Method:

-Take a small cup, add saffron, pour little hot milk or water, and allow soak.

-Keep water to boil in a saucepan.

-In a pan, add a tablespoon of ghee, fry cashew and dry grapes and keep aside.

-In the same pan, roast Bansi Rava till a pleasant aroma comes and turns grainy.

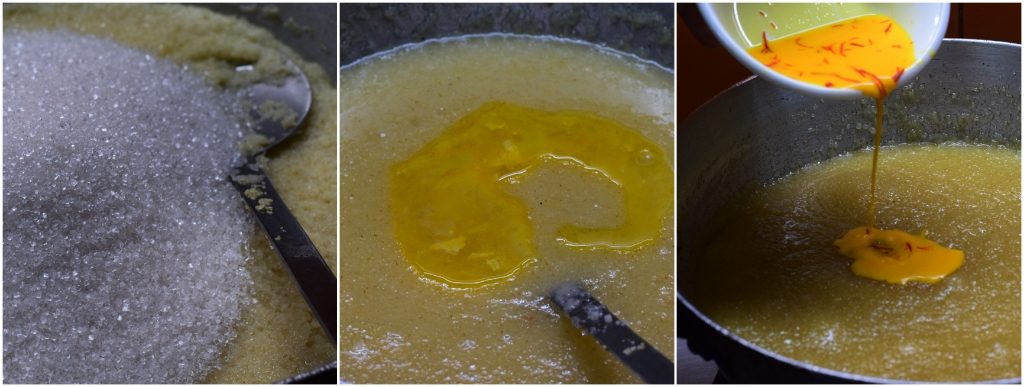
-Add salt and pour boiling water and allow to cook on a low flame.

– Once Rava is cooked, add sugar stir well to make sure there is no lump.

-While stirring, In every small interval, add ghee and proceed to stir.

– After 10 minutes of stirring, you can add saffron laced milk and mix well.

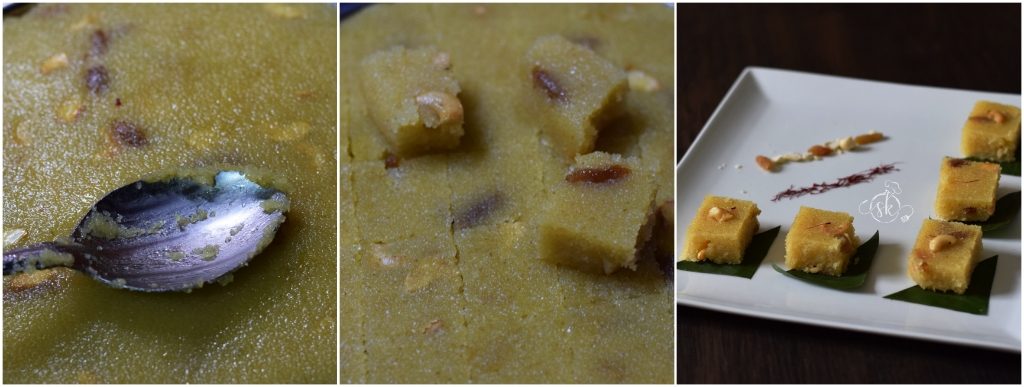
– Keep adding ghee little by little and mix well. Cook this mixture until ghee starts leaving from the sides.  Finally, add cardamom powder,  dry fruits mix well.

Serve hot.

NOTE:

If you wish to make square pieces out of it, when the Kesari bath is done, Spread the content on a ghee applied plate.

Allow to cool, mark the shape, get the perfectly shaped pieces, and store them in an air-tight container.

Taro Root/ Arbi Fry:

A perfect side dish to enjoy with humble curd rice or Rasam rice. It is flavourful, healthy, and easy to make a side dish.

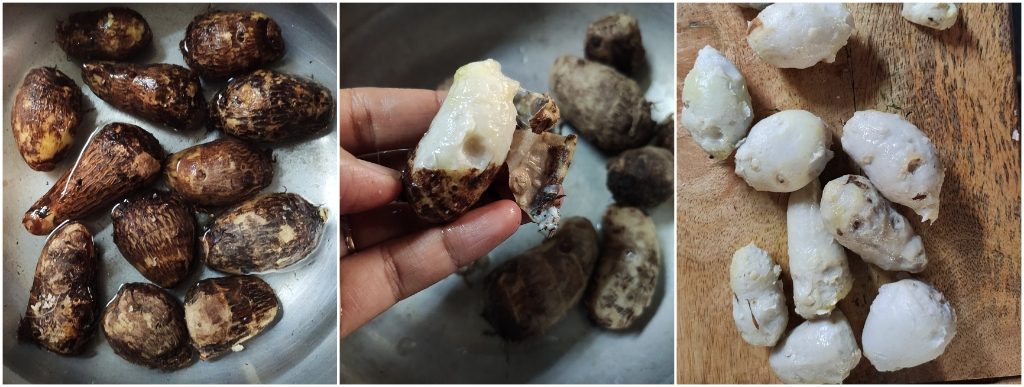
Now prepare the Taro root or Arbi;  if you are new to the usage of Arbi, please go through my detailed description of handling Arbi, how to cook etc., in “Understanding the roots and tubers.” And go down until Tubers, and you would find the Taro/Arbi under Number 7, and it is HERE.

Now, the procedure for Arbi Fry:

Ingredients:

Arbi root – ¼ kg

Salt – as needed

Turmeric – ½ tsp

Red chilli powder – 1tsp

Tamarind powder or paste – ½ tsp

Coriander powder – ½  – 1 tsp

Hing – one pinch

Garam masala powder – ½ – 1 tsp

Curry leaves – 1 – 2 springs

Oil – 2 – 3 tablespoons

Rice flour – 1 to 2 tablespoons

Method:

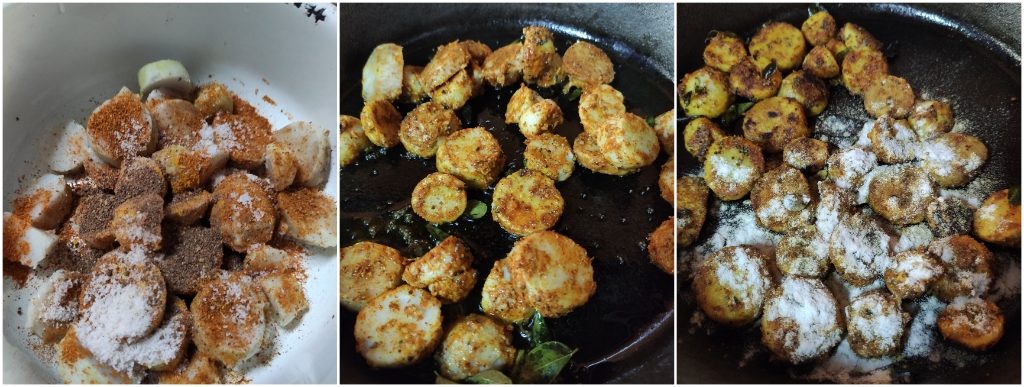
-Wash the Arbi root, cook for one whistle in a pressure cooker. Peel the skin and slice it ( ½ inch thick pieces).

-Take one bowl, put these slices, all the masalas from salt to garam masala from the ingredient list. Let it sit for half an hour to 1 hour.

-Take one iron skillet, heat oil, put curry leaves, then marinate taro, toss-up and down in a slow flame.

When it is slightly crisp, sprinkle some rice flour and toss further and enjoy with your meal to make it crispier.

Tips: For example, while roasting Arbi, adding little rice flour when 3/4 is done gives it a crisp texture and does not get sticky and mushy. And the necessity to use excess oil also does not arise, thus making it healthier.