Gluten free Masala Cookies:

This masala cookie is low in sugar and perfect as a snack for toddlers or elders. This recipe works out with any permutation combination of flours. I have worked with the addition of Amaranth flour with banana flour. As well as the Combination of whole wheat flour, oats flour and banana flour as well. Every time, it gives crunchy outside, soft inside cookies, and if you are feeding diabetic people, it is a healthier option when compared to packaged biscuits. 

pic main

Ingredient:

Amaranth flour /Rajgira Atta – 1 cup ( you can use 1/2 cup of whole wheat + 1/2 cup of oats flour as well) 

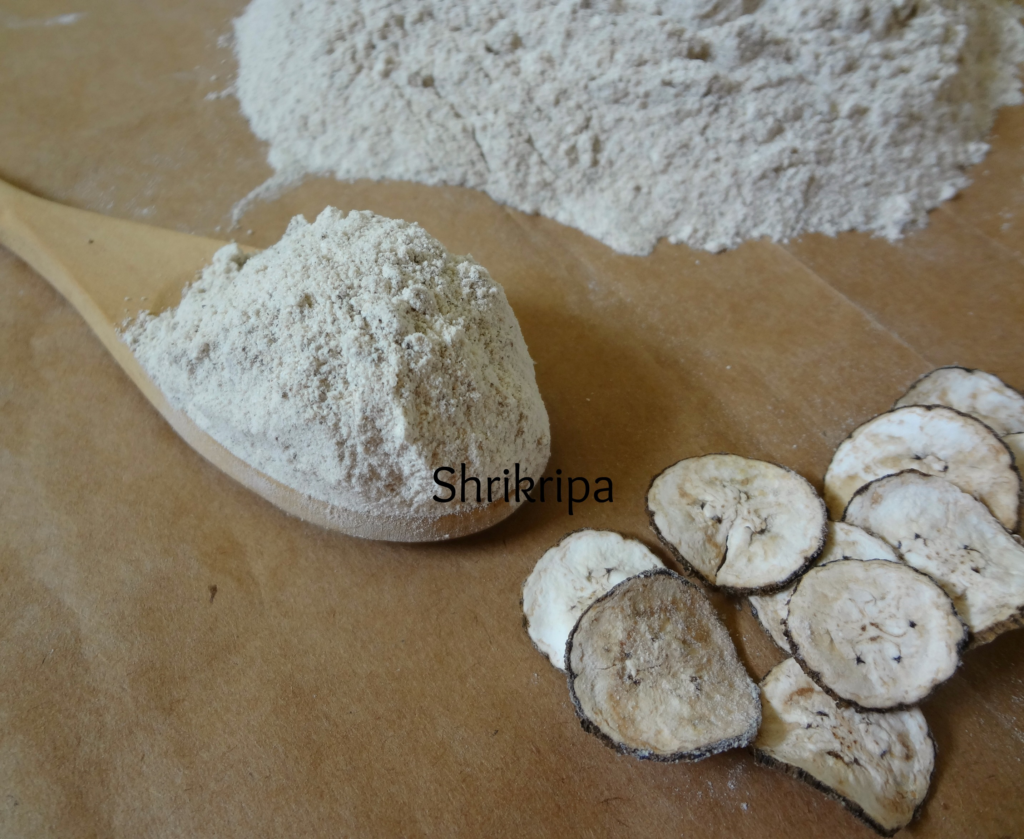
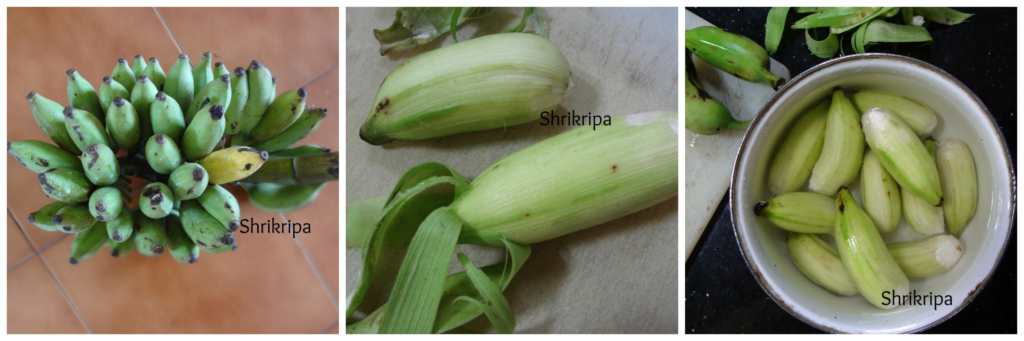
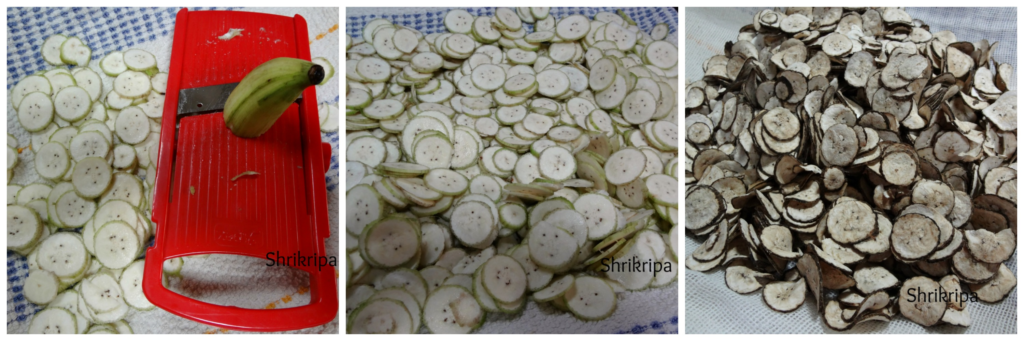
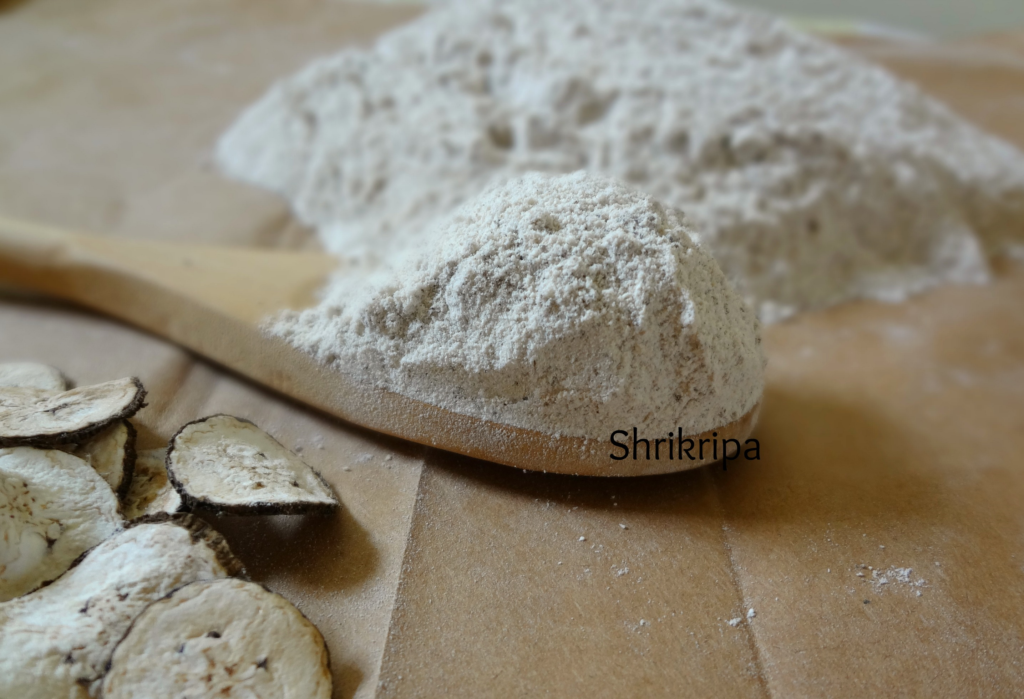
Plantain/Raw banana flour – ½ cup

Butter – 100 grams

Salt – 1tea spoon

Baking powder – ¼ teaspoon

Baking soda – ¼ teaspoon

spice blend –1 to  2 tablespoons (a blend of spices like cinnamon, pepper, ginger or as per the choice ) 

Desiccated coconut – 2 tablespoons

Sugar – 3 tablespoons

Curd –2 tablespoons

Method:

  • Pre-heat oven at 170-degree C.
  • Take one bowl, mix all the dry ingredients such as flours, salt, baking soda and powder, spice blend dry mix/sieve a couple of times and keep it ready.
  • Cream butter, sugar and curd (2 tbl spoons) by using a food processor or hand. Add dry flour, desiccated coconut and make a firm dough.

  • Line the cookie tray with butter paper.
  • Drop the dough into the cookie tray using a table spoon to shape and get the uniform cookies.
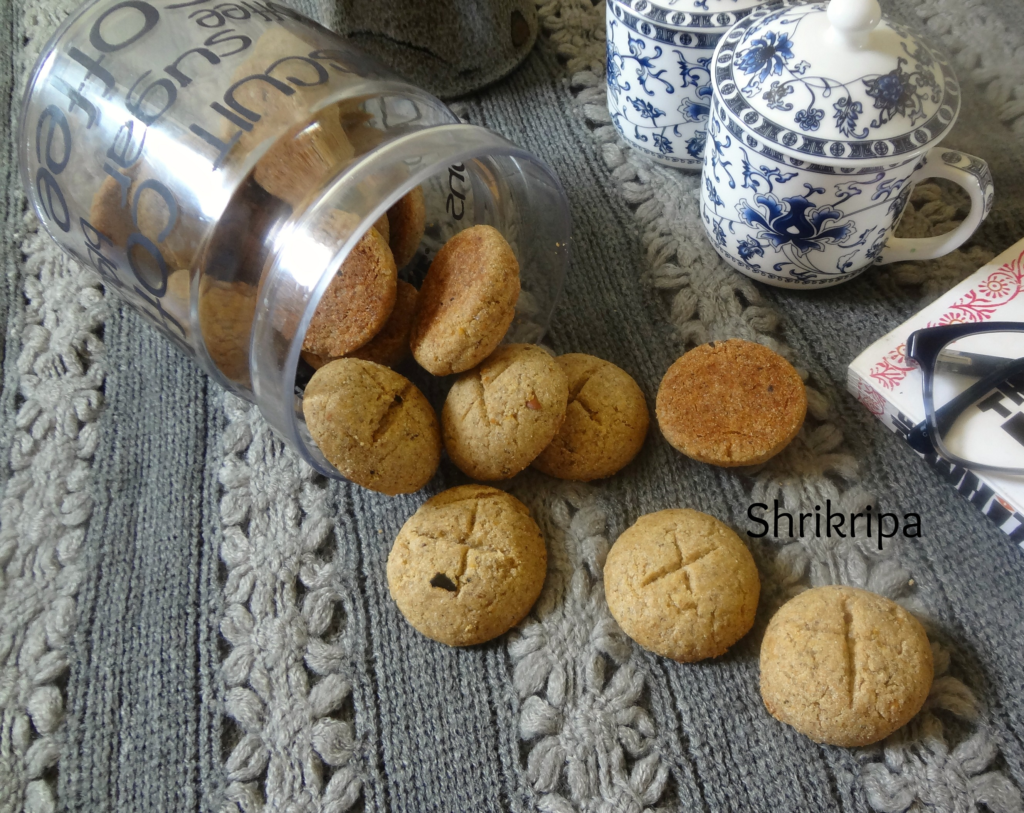
  • Mark X at the top of the cookie to get a design by using the tip of the knife.
  • Bake this in a pre-heated oven for 15 – 20 minutes. Pull out and cool.
  • Store this in an airtight container. This measurement yields around 18 -20 cookies.

Plantain/Raw banana flour:

Plantain flour is a powdered form of dried banana, which can be a good raw material for any healthy baking or cooking, for people who follow Paleo, Vegan, gluten-free diet and it is diabetic friendly and organic too. Last month when I was thinking about gluten-free baking and options regarding its flours, what immediately comes to mind is our day to day available ingredient- the cheaper, more nutritious alternative to commercially available gluten-free flours. I have seen banana flour as baby food in my native and people prepare this flour at home and feed their babies as a healthy top food. Keeping that in my mind, I headed towards preparing homemade banana flour. I took small varieties of homegrown bananas from my native and started my journey.

pic 1

Ingredients:

Raw bananas – 1 kgs

Method:

-Select firm and raw bananas.

-wash, peel outer skin and immerse in plain water.

collage 1

-Take one wide, big plate. Line with one clean towel.

-Slice bananas directly on towel. Keep this in bright area, either near window sill or under sunlight.

collage 2

-If you keep under sunlight, it will take 2 days to dehydrate and become crisp.

-If you keep indoors, it will take 4 days to dehydrate.

-After it becomes crisp and dry, powder this in a dry grinding jar in a mixer grinder.

-Sieve the mixture and collect the fine powder.

pic 2

-Such a simple method and you will be ready with your gluten-free healthy flour for any of your bakes or for cooking!

Aviyal/Avial OR Avilu:

Aviyal is a mixed vegetable dish cooked in coconut gravy by adding some curd/yoghurt, Raw coconut oil and lots of curry leaves. It is an integral part of any festival cooking and It is believed that Bhima, one of the Pandava’s, invented this dish, during their exile period. Avial is a must dish during Onam Sadhya in Kerala. Aviyal is one of the favorite dishes of my family. I learnt this recipe from my mom-in-law. This is how we do this recipe in our family.   

pic mainIngredients:

Ivy gourd – 250gms.

Brinjal – 1

Snake gourd -1

Raw banana -1

Yam -250 grams.

Ridge gourd-1

Yard long beans -250 grams.

Bitter gourd -1

Coloured cucumber – 1

Raw mango-1 or Hog plum -4

Fresh grated Coconut – From one coconut.

Butter milk – 1 cup

Coconut oil – 6 tsp.

Jeera/cumin -1 tsp.

Dry red chilli – 2

Green chilli -4 to 5

Red chilli powder – 1tsp.

Turmeric Powder – 1tsp.

Curry Leaves- 5 springs.

Salt 

Procedure:

1. Cut all the above-mentioned vegetables in a matchstick manner (slightly big pieces).     collage 1     

2. Take all the vegetables and slit green chilies in a heavy bottomed vessel. To this add little red chilli powder, turmeric powder, salt and little water and cook till the veggies are done.                           

3. In the meantime, prepare coconut paste by adding grated coconut, jeera, dry red chilli in a mixer jar. Add little water, grind and keep it aside.

4.When veggies are cooked add this coconut paste along with butter milk. Mix nicely.

5.To this mixture add lot of curry leaves and pour raw coconut oil. Press everything using back of the ladle, close tightly using a plate and continue cooking till it boils nicely.                            

6.Once it starts boiling, switch-off the gas and delicious avial is ready to serve.

7. You can enjoy this Avial with rice, roti or Neer Dosa.                  

 NOTE: -Try to add all the mentioned vegetables as much as possible.

            – Usage of coconut oil will give the authentic taste.


Sheer Khurma/ Sheer Khorma:

Sheer Khurma is also known as Sheer Khorma. The term represents Milk with dry dates. It is Vermicelli kheer with lots and lots of dry fruits and dry dates. It is a traditional sweet dish, which is served during Eid Ul Fitr.

I wanted to try this recipe from so long. I took my house-help’s help to gather how it is made and she described to me how her mom used to make this on festival days. She guided me on how to chop all these dry fruits as well.

sheer ori

Ingredients:

Milk – 1.5 litres.

Ghee – 2 to 3 tbl spoon (to fry all the dry fruits)

Sugar – to taste (used almost ½ cup)

Dry dates – ¼ cup (sliced length wise)

Almond – ¼ cup (slivered)

Cashew – 2 table spoon (bits)

Pista – ¼ cup (chopped)

Raisins – 2 table spoons

Chironji – 2 table spoons

Vermicelli – ¼ cup

Saffron – 8 to 10 strands

Cardamom – ½ tea spoon.

Method:

pic 1

-Take ghee in a thick bottomed kadai and roast vermicelli, remove and keep aside.

– Fry all the dry fruits one by one.

Soak saffron in 2 table spoons of hot milk and keep aside.

 Take roasted vermicelli and dry fruits together in this same kadai and pour milk and boil.

  Cook this until you see a creamy texture and vermicelli is perfectly done.

  It takes anywhere between fifteen to twenty minutes.

 Now add in sugar and check for the sweetness and adjust the quantity and boil.

 Lastly add soaked saffron and cardamom powder.

pic 2

You can serve this as a hot dessert or chilled.

Banana Berati / Plantain Preserve:

Whenever you have large stock of over ripe bananas, this is one such procedure one can follow and finish off all the stock and preserve this for future use. This preserve stays good almost a year or more in the freezer. It is a very handy when you want to make banana payasam/kheer or HalwaHere I have used yellow small variety of banana from Mangalore and we call this as Kadali.

pic main

Ingredients:

Over ripe banana – 22

Sugar – 1 bowl 

Method:

 Put all the peeled bananas to mixer grinder and make a smooth paste.

  Measure this by using any bowl of your choice. If this paste is 3 cups in quantity take one cup of sugar in that same measurement cup.

  So, your ratio of banana paste and sugar will be 3:1.

Take one thick bottomed kadai, put this paste and keep gas flame in a very low flame and cook for a while.

collage 1

       When it changes its colour to milky white, then to a pale colour and when you smell the banana flavour in the air, add sugar and mix this in a regular interval.

   After some time, it will turn into a pinkish or reddish colour and it will start to leave the sides of the kadai. Now it is the time to remove it from the fire.

collage 2

   Keep as it is and when it reaches room temperature; store it in an airtight container or a zip lock.

   You can do this in a microwave as well. Only thing, you should remove the glass bowl at regular intervals and give a stir and proceed as given above.


Menthe Kodilu/ Methi Sambar:

This is one of our traditional recipes and if you like a little sweetish tangy taste, this is the perfect combo for kotte kadubu / idly or semige.

We don’t use onion or garlic on any auspicious day and this side dish is usually prepared on such days and we relish this as a side dish with kotte kadubu/ Moode.

Here menthe is fenugreek and kodilu stands for sambar in our language. This is a very simple coconut based little sweetish gravy and needs very less ingredient and tastes good.

pic main

Ingredient:

Fresh grated coconut – 1 big bowl.

Dried red chillies – 3 to 4

Methi / fenugreek seeds – ½ tsp

Turmeric – ½ tsp

Coconut oil – 1tsp

Tamarind – ½ tsp

Jaggery – 2 tbl spoon

Salt

Seasoning:

Coconut oil – 1 tsp

Mustard – 1 tsp

Curry leaves – 1 springs

Red chilli – 1

Method:

 Take 1 spoon of coconut oil in a small kadai, heat.

 When it is hot, drop methi and fry for a while.

 When it is light brown, add red chillies and fry until it swells.

  Add coconut gratings, turmeric and fry for 2 to 3 minutes.

collage 1

  Cool this mixture and grind this into smooth paste by adding sufficient water, salt, jaggery and tamarind.

Now take that same kadai, in which we have fried chillies and coconut. Pour ground batter, adjust the consistency by adding water.

Boil this for a while and check for a salt and jaggery. If needed adjust that as well.

Do seasoning by heating oil, mustard, red chilli and curry leaves and pour this over boiled kodilu.

Moode/ Kotte kadubu:

Moode or kotte kadubu is a local delicacy of Coastal Karnataka. We especially prepare this on the eve of any festivities. Now a day It is an integral part of any weddings in our region.

Moode or kotte is leaf cup which we prepare either by using jack leaves, Kedige flower leaves (Kewda, Fragrant Screw Pine, Umbrella tree, Screw pine) or Plantain leaf. It is based on availability and accessibility to leaf.

It is basically normal idly batter which is poured in these cups, which is made by any one of these leaves and steam cooked in a water bath and served with chutney or any sambar.

I usually prepare this by bringing these leaf cups, from One of the many Mangalore stores, spread across Bangalore, during festival season. Sometimes I do prepare by lining a stainless-steel cup with small pieces of plantain leaves. This also works just fine like any other leaf cup.

pic main

Ingredients:

Idly Batter – Fermented

Tall steel glasses

Plantain leaves – as needed

Method:

Hold plantain leaves on gas flame and wilt a little. It will help while folding or rolling the leaves.

If you don’t wilt it, it will tear very easily.

collage 1

Take one wet cloth and wipe plantain leaves (you should move your hand from centre rib to edge as ridges moves in the leaves) and clean the leaves.

 Remove extra thick centre ribs (fibre) by holding your left palm to support over the leaf and pull the fibre by right hand.

-Cut this into small rectangle pieces.

 It is now ready to roll and place inside the steel glass.

collage 2

Keep idly steamer ready, when water starts boiling, pour the batter to the moulds.

In these cups, usually 2 to 2 ½ serving spoons of batter will hold.

 If batter is more, cooking time should increase according to that.

Keep it in a steamer, cook in a high fire for 10 minutes and when you feel the steam is uniformly distributed inside the steamer, reduce the flame and cook for 40 to 50 minutes in a very low flame.

After it is done, switch off the gas, don’t open the lid and keep it for some more time.

When you want to serve this, open the lid, remove the glass mould and pull the banana leaves out and serve with pouring little ghee and any side dish of your choice.

collage 3

Usually on festival days, we make coconut based sambar or chutney and totally avoid garlic and onion on any auspicious day.

Our traditional side dish is called menthe kodilu and we relish these kadubu’s with menthe kodilu or sweetened cardamom flavoured coconut milk(kayi halu) and coconut chutney .

Idly/Idli Batter:

Idli is very basic, staple breakfast of south India. It is very healthy steam cooked rice and lentil cake which is very nutritious too. Each place has their own rice and lentil ratio or proportion and grinding technique also changes from region to region. In Mangalore, we soak rice and dal separately and grind very fine paste of urad dal and either we mix rice rawa or we are grinding the rice, we keep it a little coarse, hence this batter will be a little coarse. After fermenting the batter, the next day we proceed to make idlies by using either idly stand or idly cups. In our region, idly cups are regular and very common in every house hold and we use special type of idly steamer and invariably we use this for so many kinds of steam cooking.

pic 14

Ingredients for idli batter:

Idly rice or Idly rawa – 2 cups

Urad/Black gram dal – 1 cup

Poha – 1 fist full

salt

Method:

-Wash and soak rice in one vessel. If you are using idli rawa, you can wash idly rawa and put very little water and keep aside.

collage 1

-Wash Urad dal and poha in another vessel and soak for 3 to 4 hours.

-At first, drain excess water from urad dal and put this into wet grinder.

-Grind this into smooth paste by adding water in-between while grinding.

-When urad dal batter becomes fine and smooth, its consistency becomes almost double and colour of the batter looks milky white.

collage 2

– When you think urad dal batter is ready, add soaked rice or rice rawa by draining its soaked water.

-You can use this water while grinding or adjusting the consistency of the batter or to wash wet grinder at first to remove the dough that is stuck on the stone.

-Grind this into small rawa consistency by adding salt and remove this ready batter into big vessel. If you are using rice rawa ,allow batter to mix for couple of minutes and then remove.

-I usually grind urad dal first, then mix in drained rice so that batter mixes uniformly and becomes light and airy. 

– Batter consistency should be a little thick and when u hold and drop the batter it should not drop very easily and it should stick to the spoon.

pic 7

-Close the lid and keep this batter for 8 to 10 hours or more (according to outside weather where you live) for fermentation.

-Next day morning fill idly steamer or pressure cooker with sufficient water, place the porous plate at the centre of the vessel and keep this on the fire.

collage 3

-Mix fermented batter vigorously, if needed add water and adjust the consistency keep it ready.

-Rinse the idly moulds in fresh water once, it will act as a non-sticky layer between idly and mould.

-When water starts boiling, pour one spoon of batter into respective moulds and steam cook.

collage 4

-If you are using cups, cook this in a steamer for 15 to 20 minutes. Cups holds more batter than idly stand.

-If you are using idly stand, 7 to 8 minutes of steam cooking is sufficient.

-When it is done, switch off the gas, open the lid and remove moulds outside.

-Once it is cool, remove idly and serve with chutney or sambar or with your choice of side dish.

NOTE:

-Use wet grinder to get awesome soft idlies.

– Use soaked and drained water from the dal or rice while grinding. It will enhance the taste.

-Always mix and pour the batter to the moulds, only after water starts boiling.


Soba Noodles with Vegetables in Honey based sauce:

Once again testing period for me. Yes!! I was keeping and not at all interested to cook these dull Soba noodles. My sister gave me this pack of soba noodles “to experiment” when I visited her this summer. Last week, she had asked about Soba and told me, she is waiting for the foolproof recipe. I had no option but to cook. I was hesitant at the beginning, by thinking about my ever-choosy daughter’s palate.

On the eve of Independence Day, I was thinking about something special for our menu. So, I thought of cooking this special noodle for the first time and made my own mixture by using Honey as a base.

pic main

Honey did help to uplift the taste of soba noodles, which is otherwise very bland in taste.

First, we will see, what are Soba noodles. Soba noodles are Japanese noodles that are made from buckwheat flour. Buckwheat flour is greyish in colour so the noodles have that dull grey colour and it is gluten-free as well. Due to this, noodle is very brittle in nature.

As 100% buckwheat, gluten-free noodle tends to break, people do add some wheat flour when preparing their noodles. What I had was 100 % with buckwheat flour and needed extra caution while boiling and cooling.

Ingredients:

Soba noodles – 3 serving bundles

Vegetables – 1 bowl of your choice

white sesame seeds – 1 tablespoon

Corn flour – 1 tablespoon

Water – 3 tablespoons

Salt

Oil – 2 tablespoons

Sauce Mixture:

Sriracha sauce – 2 tablespoons

Rice/ plain vinegar – 2 tablespoons

Light soy sauce – 2 tablespoons

Honey – 5 to 6 tablespoons

Garlic – 1 ½ tablespoons (sliced)

Ginger – 2 teaspoons (grated)

Red chilli flakes – ½ teaspoon

Method:

 Make sauce mixture by Combining Sriracha, vinegar, soy sauce, honey, red chilli flakes, garlic and ginger in one bowl and keep aside to release its flavour.

pic 4

  Mix cornflour and water and keep aside.

   Dry roast sesame seeds and reserve this for garnishing.

  Boil water with one spoon of salt and oil. Put noodle, cook until al dente (it should cook and texture should be firm)

collage 1

  Drain the water, rinse the noodle in cold tap water.

  Collect one small cup of the drained water and keep it aside for next use.

   Chop vegetables according to your taste. Here I have used broccoli, beans, carrot, baby corn and zucchini.

   Take one wide Kadai, add oil. When it is hot, add chopped veggies and a little salt and fry for a while.

collage 2

  Add all the sauce mixture, cornflour mixed water and fry vigorously to avoid this to burn.

  If the mixture becomes very thick, add a little reserved cooked and drained water of noodles. Check for the salt. If needed add and adjust.

  When it starts boiling, add noodles and mix.

collage 3

Garnish with dry roasted sesame seeds and serve.


Instant Oats-Rava Idli:

This is how I prepare oats idli/idly at home. This recipe is so handy, healthy and a very good option to finish off our stock of sour curd. I usually roast rawa and oats the previous night and proceed directly to prepare in the morning, so that one can save time and it also gets enough time to cool down properly. I don’t use any seasoning and make it exactly like our regular normal idly and serve either with hing or onion and coconut chutney.

pic main

Ingredients:

Quick cooking oats – 1 ½ cup

Normal rava/semolina – 1 cup

Sour Curd – 2 cups

Water -1 cup

Eno fruit salt – 1tsp

Salt

Ghee /clarified butter – 1 table spoon

Method:

          Take one tawa and roast rava by adding ghee.

          When rawa becomes white, sandy in texture, add oats and proceed frying it for 2 to 3 minutes and switch off the gas.

collage 1

          Cool this properly. (I usually do this the previous night)

          Mix curds, water, required amount of salt (around 1 tsp) and Eno.

          Add roasted rawa and oats mixture. Consistency should be like regular idly batter.

          Set cooker for steam cooking, by adding 1 to 2 cups of water and keep it on a fire.

          Rinse idly moulds or stand with clean water (This will help as a non-sticky coating)

collage 2

          Pour 1 serving spoon of a ready batter, steam cook for 8 to 10 minutes.

          Serve with any chutney of your choice.