Beaten rice/Poha laddu:

Wish you all my lovely readers a very happy Krishna janmashtami. As beaten rice is one of the favourite things of lord Krishna. Beaten rice is also known as poha in Hindi and Avalakki in Kannada.

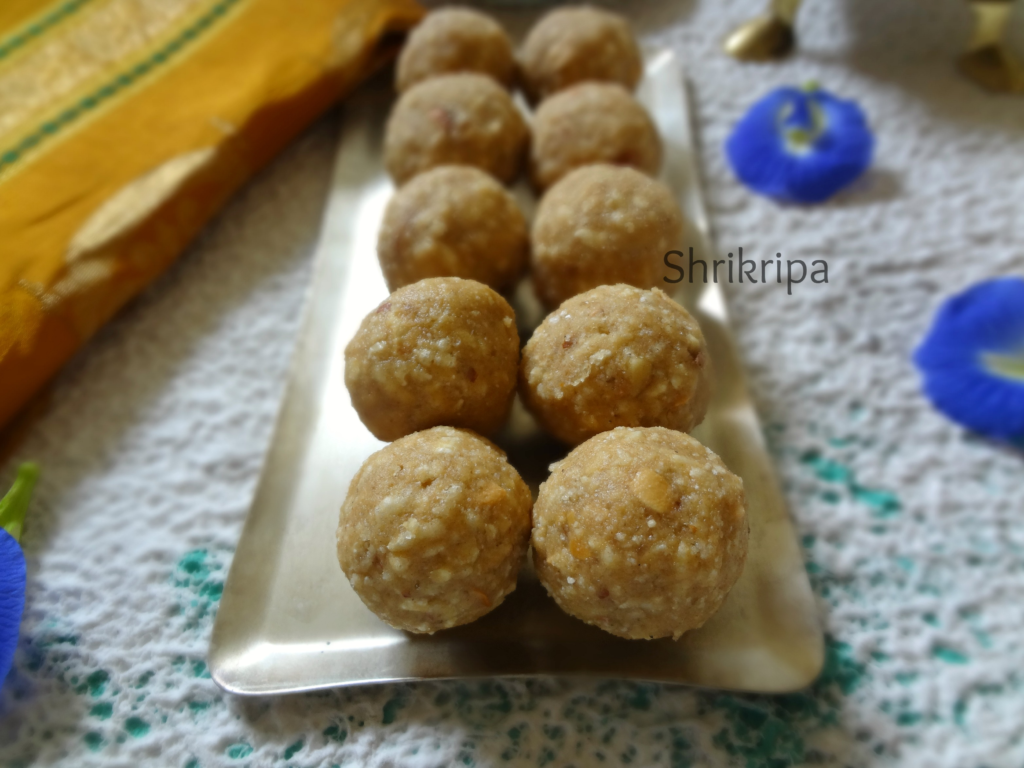
This ladoo is one of my twin daughter’s favourite things in this whole wide world. I learnt this addictive crunchy ladoo recipe from my sister’s Mother-In-Law. Now let’s get started with the recipe.

pic main

Ingredients:

Whole wheat flour-1 cup

Chickpea flour/Besan -1 cup

Thick beaten rice – 2 cups (thicker variety, which is used for deep frying in savoury making)

Sugar- 2 ½ cup

Clarified butter (ghee) – ½ to ¾ cup (as required)

Dry fruits – 1 cup (We like chopped almond and cashew)

Cardamom powder – 1tsp

Method:

1.       Dry roast wheat flour and chickpea flour separately in a thick bottomed vessel and keep small flame in a gas stove, so that flour will not get burnt and fry uniformly.

2.       Fry dry fruits with little ghee and keep aside.

3.       Deep fry beaten rice and put it in a tissue.

collage 1

4.       Take all these things (roasted flour, dry fruits, fried beaten rice, and cardamom powder) in a large bowl, to this add powdered sugar and mix everything nicely.

5.       To the above mixture add melted little hot clarified butter or ghee and mix it with clean hand.

collage 2

6.       Once you can make ladoo stop adding clarified butter and continue making ladoo.

pic 7

7. After it cools down, store this in a clean, dry airtight container and enjoy whenever you feel like.


Chavli kai palya /Cluster beans and chana dal dry curry:

Like any other veggie, even most neglected high fibre, low calorie, nutrition filled Cluster beans also has many names like, Gorikayi, chavlikai, Guvar, Kothavarangai, Goru chikkudi etc. in different Indian languages.

It is a type of green beans, which is short, flat and little bitter in nature. It is a “power house of goodness” but neglected in-between  all kinds of veggies.

Yes, it needs some other vegetable, dal or potato to enhance its taste or to tone down the bitterness. Here in this recipe, we use soaked Chana dal and little bit masala to enhance the taste and this recipe is handed down to me by my dear aunty who is a super human being.

pic 12

It is a perfect side dish for any kind of Indian flat breads or with hot rice.

Ingredients:

Cluster beans – ½ kg

Chana dal – 1 cup

Onion – 2

Fresh Coconut gratings – 1 fist full

Seasoning:

Oil – 3 to 4 tbl sp

Mustard – 1 tsp

Red chillies – 2

Hing – ¼ tsp

Curry leaves – 1 string

For masala:

Green chillies – 6 to 7

Cinnamon – 1” piece

Ginger – 1” piece

Garlic – 8 cloves

Coriander leaves – 10 strings

Method:

-Wash, soak chana dal in water for half to one hour.

-Cut cluster beans in to bit size pieces after washing and removing both the ends.

collage 1

– Cook soaked dal and chopped beans for 2 whistles in two separate vessels by adding very little water.

– Put aside one serving spoon of cooked chana dal and pulse remaining amount of dal.

– Dry grind all the items under masala and keep aside.

collage 2

– Chop onions.

– Take one thick bottomed tawa, Put oil, splutter mustard, hing, red chillies and curry leaves.

– Add onion, turmeric and fry nicely.

collage 3

– Add ground masala,required amount of salt and fry nicely.When its raw smell vanishes, add roughly ground dal and fry for a while.

collage 4

– Lastly add cooked cluster beans and dal which we have kept aside.

-Cook this until water becomes dry and garnish with fresh coconut. Mix nicely and heat this mixture for a couple of minutes.

collage 6

-Serve either with rotti, phulka or hot rice.

Healthy Chocolate Brownie:

Here healthy refers to ‘No maida’ and personally I prefer to include healthy flours instead of maida and experiment with the same. Today I made this multi millet flour brownie. These brownies turned out to be a soft, fudgy and delicious and no one cribbed about the altogether elimination of all-purpose flour in this bake. It was so delicious, and my dear hubby was all into praise!!! That was the highlight and I don’t get this every day. Yes!!! I need to work hard for it.: D He usually doesn’t prefer to compromise on basic taste. Today I did achieve to get that “classic brownie” taste without any compromising.

This is an excellent,an easy recipe which you can prepare in advance when you are entertaining guests and have many other stuffs to prepare. It is a perfect dessert option along with an ice cream. Re- heat before serving to give an extra zing with cold ice cream.

Ingredient:

Sprouted finger millet/ragi flour – 1 cup

Mix millet flour – 1 cup

Walnuts – 1 cup

Eggs – 2

Cooking Milk chocolate slab – 300 grams

Cocoa powder – 2 table spoons

Butter – 100 grams

Curd – ½ cup

Light brown sugar – 1  cup

Method:

  • Assemble all the materials and keep it ready.
  • Put butter and cooking chocolate in a sauce pan and melt.

  • Add sugar and switch off the gas.
  • Cool this mixture for 2 minutes.
  • Add in beaten eggs and curd. Mix thoroughly.

collage 2

  • This is your wet ingredient and keep it aside.
  • Break walnuts into tiny chunks.
  • Now mix all the dry ingredients, two flours, cocoa powder and walnut chunks in one bowl.

collage 3

  • Dry mix all the dry ingredients and pour wet ingredient mixture into this bowl and fold in.
  • Pre-heat oven at 180 C

collage 4

  • Pour this batter in a greased, butter paper lined baking tin for 40 to 50 minutes or until knife comes out clean while checking the doneness.
  • After it is done, remove from the oven and cool.

 -Serve hot brownies as it is or with vanilla ice cream.

Note: If your cooking chocolate has sugar, please reduce the sugar quantity to ¾ cup.

Kanile Uppinakai/ Bamboo shoot-Lemon Pickle:

As I mentioned earlier in my “How to Chop Bamboo Shoot” Post, usually, while chopping bamboo shoots for any curries, we use Bamboo shoot’s knots or their nodes in pickle making. Usually, pickles require some souring agent to give a balanced taste. So, the Bamboo shoot needs some souring agent to enhance the taste and the shelf life. That is why we use lemon, Houglum or raw mango as an accompaniment. This image has an empty alt attribute; its file name is DSC_0631-blog-1-1-1024x762.jpg  Here, I have used Lemon with bamboo shoots. Bamboo shoot – 1 bowl (chunks from the 4 to5 nodes) Lemon -12 Water -1 lit Salt- 250 grams Byadagi Red chilli -100 grams (around 56) 25 grams of mustard 1.5 tsp – methi 1.5 tsp – turmeric powder 1/4 tsp – hing Method: -At First, Cook Bamboo shoots chunks in adequate water for one whistle in a cooker. Discard that water; air dry those bamboo shoot chunks.
-Wash lemons, wipe and quarter lemon, remove seeds and keep it ready. -In the meantime, Boil water and salt until you find a crystal-like, white, shiny surface. -Now, put lemon pieces into hot, salted water and allow to cool. When the saltwater turns cool, the lemon peel becomes pale in colour. This image has an empty alt attribute; its file name is Picsart_24-09-05_13-35-40-332-1024x387.jpg -Add cooled, drained bamboo shoot pieces to lemon and salt water. Allow to soak and marinate overnight. -Next day, prepare masala. Dry roast methi until dark brown and allow it to cool. -Dry roast mustard, remove it and allow it to cool. -Add a little oil and roast red chillies in the same kadai. When red chilli is puffed and roasted, switch it off, add turmeric powder, and mix well. pic 33 -When everything becomes cool, make a powder in a mixer jar, add a pickle masala powder. -Drain the salt water,from the marinated lemon and bamboo shoot, and mix the pickle masala and required amount of drained salt water and mix everything well. This image has an empty alt attribute; its file name is Picsart_24-09-05_13-34-56-437-1024x387.jpg -Close the lid and allow them to absorb all the flavours for at least a day. Then, mix this pickle again, bottle it in a clean, dry bottle, and store it under refrigeration. It stays good for 6 to 8 months under refrigeration.

Bendekayi/Okra Palya:

Bendekai/lady’s finger/okra/bhindi- so many names for this simple, high fibre, low calorie vegetable. Some people just avoid this slimy vegetable without knowing how to cook. It is just simple, if you know the right technique.

We normally don’t use any onion, garlic or tomato in festive cooking. In Mangalore, we prefer this simple coconut based side dishes for any weddings or festivities.

Here we use tamarind base to cook Bendekai to remove its slime. To avoid sliminess , you should remember 2 to 3 things. First thing, drops the veggie, only after tamarind water starts boiling. secondly, don’t over mix the veggie, while cooking. Thirdly, don’t cover the lid, while cooking lady’s finger. These are all the tricks I learnt from my elder’s while learning cooking from over the years.

You can use any varieties of lady’s finger for this recipe. Here I have used local variety from Mangalore which I have grown and harvested from my terrace garden. It is Red Okra and after cooking, it becomes like any other okra.

pic 1

Ingredients:

Ladies’ finger – ½ kg

Tamarind – 1 tsp

Salt

Jaggery

Red chilli powder – ½ tsp

To grind:

Fresh Coconut – 1 small cup

Red chillies – 2 to 3

Mustard – ½ tsp

Hing – very little

Seasoning:

Coconut oil – 1 tbl sp

Mustard – 1tsp

Urad dal – 1 tsp

Red chilli – 1

Curry leaves – 1 string

Method:

-Wash and cut the bhindi into half inch pieces.

collage 2

-soak tamarind in one cup of water.

-Roast red chillies and hing in a drop of coconut oil.

-Dry grind coconut, roasted red chillies, hing, mustard and keep it aside.

– Take one tawa, do the seasoning by putting oil, mustard seeds, urad dal, red chilli.

collage 3

-When mustard starts spluttering, add curry leaves and pour tamarind water (squeeze soaked tamarind in water and use)

-Add required amount of salt, jaggery and red chilli powder.

-When it starts boiling, add chopped Bendekai and cook this in a low flame.

-when water drains or Bendekai cooks, add ground coconut mixture and mix thoroughly and keep this in a simmer for couple of minutes.

pic 3

-serve this as a side dish with hot rice or Chapati.

Homemade Vegetable stock /Broth:

Vegetable stock is always handy while preparing clear soups or any other soups, as a base and is one of the main key ingredients for any Chinese gravy and one pot meal etc.  I especially like my vegetable stock in soups and Chinese gravy. It gives a depth and enhances the flavour of the dish in any sorts of cooking. Making this at a home is very easy job and not at all time consuming. It can be stored in the fridge for up to one week.

vegetable stock main

Here comes my recipe – Take a cooker, add roughly chopped veggies and herbs like Lemon grass, leek outer leaves and leaf tops (you can use fresh ones in a leek soup), carrot, tomato, beans, cabbage, cauliflower stalk or couple of heads, Coriander stalk (stalk gives very nice aroma) celery stalk -2, pepper corns -5 and garlic cloves -4.      

stock      

Add water (till veggies immerse in water) pressure cook for two whistles, when pressure releases, strain it and collect the stock, keep it in handy for soup making or cooking.

Note:

-You can add or delete any of the ingredients. I personally like lemon grass flavour and try to incorporate it every time.


Vegetarian Thai Noodles: Gluten free and Vegan

This time when I had visited my sister, who stays in America, I got an opportunity to experiment with some new ingredients, veggies etc and I bought a couple of new items back home as well. This gluten free, Brown rice & millet ramen noodle is one of them.

When we were shopping, my eyes went to this noodle pack. I love to work with new ingredients and wanted to pick it up. After trying a couple of recipes, my daughter told me, how it should be. She asked me to prepare this as a little wet, soup kind. She said, regular kind of preparations tastes bland and it needs some flavoured soup to enhance the taste of this kind of sticky noodles and she was right. Ramen is a Japanese dish, consisting of a clear broth containing thin white noodles and sometimes vegetables, meat etc.

Finally, I came up with this, and got a green signal from my super-efficient critic!!! She said, hmmm yummy, go ahead and post: D

pic 10

Ingredients:

Noodles – 3 cakes

Shallots – 10

Baby corn -4

Carrot-1

Broccoli- couple of small florets

Ginger garlic paste – ½ tsp

Tomato sauce – 1tbl sp

Thai sweet chilli sauce – 1tbl sp

Sriracha sauce -1 tbl sp

Soy sauce -1 tbl sp

Cooked broth – 1 small cup

Salt

Sesame oil – 2 tbl sp

Basil leaves – 5 to 6

Roasted peanut halves – 1 table spoon

Method:

-Boil water with one spoon of salt and oil. Put noodle, cook until al dente (it should cook and texture should be firm)

collage 1

-Drain the water, rinse the noodle in cold tap water.

-Collect one small cup of drained water and keep aside for next use.

– Chop vegetables according to your taste.

collage 2

– wash basil and roast peanuts, remove skin and make halves and keep aside.

– Mix all the sauces in one small bowl and keep it ready

-Take one wide kadai, add sesame oil. When it is hot, add chopped shallots and fry for a while.

-Next, drop in all the veggies and fry for a while.

collage 3

-Add ginger garlic paste, fry until veggies are fried.

-Add all the sauce mixture and fry vigorously to avoid this to burn.

-Add reserved cooked and drained water of noodles. Check for the salt. If needed add and adjust.

collage 4

-When it starts boiling, add noodles and mix.

-Garnish with torn basil leaves and sprinkle roasted peanuts and serve.

pic 11

Note:

-You can use any noodles instead of gluten free noodle.

Patholi / Sweet rice dumpling, steamed in turmeric leaves:

Patholi is an offering which we make on the day of “Nagara Panchami”, or the snake festival in our house hold. Monsoon is the season in which we get lot of greens in abundance.     Maybe that is the reason this dish is made in turmeric leaves.

Patholi is coconut and jaggery filled steamed kadubu or steamed rice cake, usually folded and steam cooked in turmeric leaves. Turmeric leaf gives beautiful aroma and good taste and this pleasantly aromatic dish is favoured by everyone in our family.

pic main 2

Ingredients:

Dosa rice /white rice – 2 cups

Grated coconut – 1 ½ cup

Grated Jaggery – ½ cup (to taste).

Ghee/ Clarified butter – 4 tsp.

Salt to taste

Turmeric leaves – 8 to 10

Method:

– Wash rice and soak it for 2 to 3 hours.

– Wash turmeric leaves and keep it aside.

collage 1

– Grind this soaked rice in to smooth paste by adding ½ cup of coconut, water and salt and little jaggery.

– Now keep thick bottomed kadai, pour this ground batter and add some water to make thin consistency. Now add 2 tsp of ghee and start heating this mixture by continuous stirring. When it becomes little thick and forms a mass, switch off the gas and keep it aside to cool to handle it further.

patholi 1

– In the meantime, make sweet coconut-jaggery mixture. In thick bottomed vessel add jaggery and ½ cup of water and heat. If you find some impurities in jaggery syrup, sieve this liquid and heat further and add fresh grated coconut and cook until it is sticky and forms mass. Add remaining ghee to this and mix. Now stuffing is ready.

– Method to make Patholi:

– Take little water in a bowl to dip your hand in between, while applying rice batter over turmeric leaf.

– Now take lemon sized rice batter ball, apply as thin as possible by using your hand by dipping your hand in bowl of water in between.

collage 2

– After applying ,spread coconut –jaggery mixture to half of every leaf in which batter is spread (please refer pictures)

– Now fold this in to half and keep this in a idly steamer and cook for 20 to 30 minutes or until done.

patholi 3

– Serve with ghee.

Marakesavu Pathrode:

Pathrode, name itself will make any Mangalorean drool. That too if it is marakesavu leaf, fun is even more. Marakesavu is non-itchy, seasonal colocasia leaves. It is one more classic monsoon special from Mangalore. Pathrode is usually served with coconut oil either plain or pan fried by slicing.

pic main

Marakesavu is commonly known as hitchhiker elephant ear and botanical name of this leaf is Remusatia vivipara. Leaf is large, oval, leathery textured, glossy on both the sides. Foliage disappears in winter and emerges after the first rain during monsoon. Grows widely on big tree trunks or in-between the stones, mainly emerges from the moss bed. The name itself suggests about its habitat. Here, “Mara” is Tree and “Kesavu” is colocasia.

collage 1

We will see the Procedure-

Ingredients:

Dosa rice – 3 cups

Fresh Coconut – 1 ½ cup

Dried red chillies – 12 (Roasted)

Hing – ¼ teaspoon

Salt

Jaggery – 1 table spoon

Tamarind – 1 table spoon (if normal colocasia use little more)

Marakesavu – 3 bundles

Coconut oil – for serving

Method:

Wash the leaves, remove stem and trim.

  Wash and soak rice for 3 hours.

  Fry red chillies by putting very little oil.

collage 2

Grind soaked rice, coconut, tamarind, jaggery, salt, roasted red chillies into smooth paste by adding sufficient water.

  Batter consistency should be like Dosa batter.

  Now, we are ready to make Pathrode.

collage 3

  Take biggest leaf from the lot, place upper glossy part downwards and apply ground batter on back side of the leaf. (pc:step 1)

 After applying on the first leaf, keep second one (slightly smaller than the first one)

Proceed with the application. After applying on second leaf, keep the third leaf then fourth one and proceed.(pc: step 2&3)

collage 4

  Now lift sideways, and fold. Make it like a mat. Apply some batter on these folds as well.

  Roll from the tip and proceed until the end and apply some batter on outer shell and keep this in a water filled idly steamer.

collage 5

  Cook this for 45 minutes to one hour, depending on the quantity of the content inside the vessel, in a low fire.

collage 6

  Serve fresh with coconut oil by slicing these cooked rolls or apply coconut oil and fry these in an iron tawa on both the sides and enjoy as it is for breakfast or with lunch or dinner.

NOTE:

-Tamarind is a key ingredient while making Pathrode.

– If it is Mara Kesavu, it is non-itchy and quantity of the tamarind doesn’t matter.

– If you are using normal colocasia leaves, tamarind plays a very crucial part, in removing the itchiness of the leaves. Use little more quantity than normal.

– You can prepare this same recipe by using big spinach leaves as well.

Tadka dal- Seasoned lentil :

Tadka dal is a simple, nutritious side dish from northern India. Tadka dhal is a blend of a couple of lentils, cooked and seasoned with ghee as well as butter. It is a very good side dish and goes very well either with roti, plain rice, jeera rice or Kashmiri Pulav.

pic 1 Ingredients:

Toor dal/ Pigeon peas – ½ cup

Masoor dal/Red lentil – ½ cup

Ghee – 1 tbl sp

Cumin – 1tsp

Turmeric – ½ tsp

Onion – 1 small

Garlic – 4 to 5 cloves

Ginger – ½ inch

Tomato – 1 big

Coriander powder – 1 tsp

Cumin powder – 1 tsp

Red chilli powder – 1 tsp

Salt

To Garnish – Chopped coriander, sliced garlic – 3 cloves, butter – ½ tbl sp

 Method: 

-Wash both the dals, cook with sufficient water.

– Take chopped onion, garlic and ginger in a small mixer jar and make rough paste and keep aside.

– grind tomato as well and keep aside.

-Now take one kadai, put ghee. When it is hot add Cumin then ground onion mixture, turmeric and fry until it is light brown.

-Now add ground tomato and fry this until raw smell vanishes and add Coriander, Cumin and Red chilli powders.

– Add cooked dal, salt and sufficient water. Boil.

-Garnish with chopped coriander leaves.

-Fry chopped garlic in little butter and add this into dal.

pic 2

 Enjoy this Dal with Kashmiri Pulav, plain rice or roti.