Sorekayi Kottige / Bottle gourd steam dumpling:

Sorekayi is nothing but humble bottle gourd, which we usually neglect to use in our daily diet, which incidentally has numerous health benefits. In our native, bottle gourd is mainly used to treat stomach illness or jaundice. It is believed that, it has the power (anti-inflammatory properties) to heal our Liver and intestine during the illness. Bottle gourd has close to 90% water content and is great on the stomach and light on digestion. Apart from this, bottle gourd juice is very good for weight watchers, diabetics and for a healthy heart too. We have so many traditional preparations of bottle gourd and all are very low in calories and tasty too.

DSC06039_Fotor

Ingredients:

Dosa rice – 2 cups

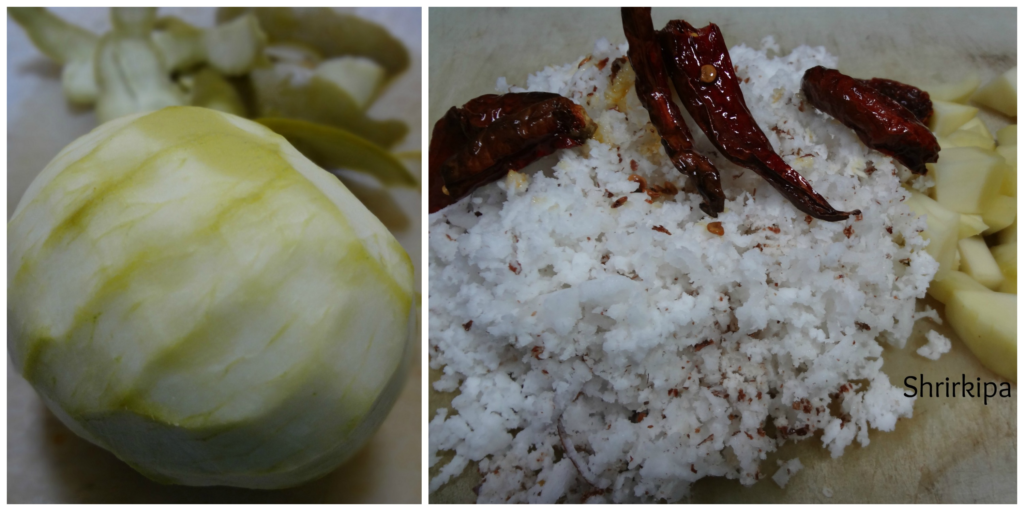
Bottle gourd – 1 or 2 (according to size)

Salt

Banana leaves or turmeric leaves – to wrap

collage 1

Method:

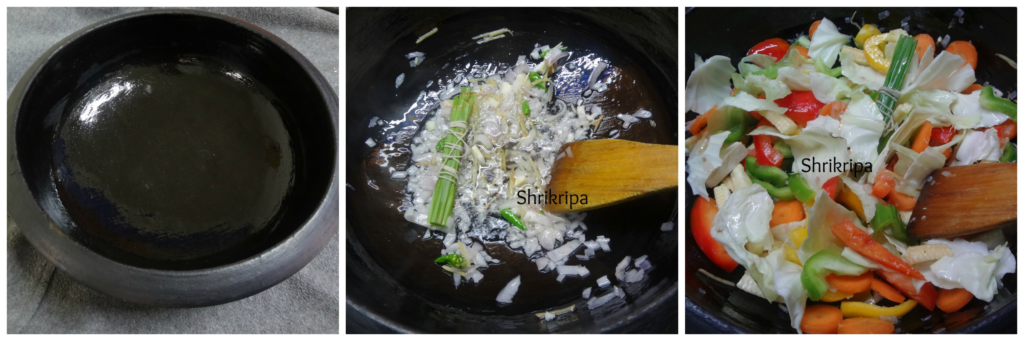
-Wash Dosa rice and soak it for 3 hours.

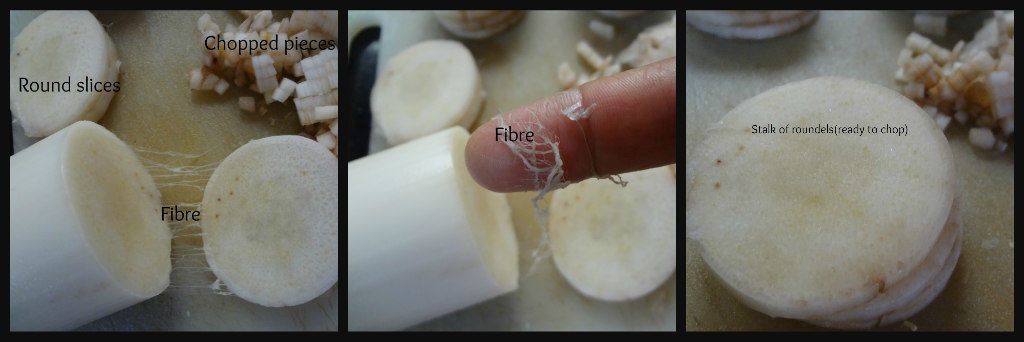
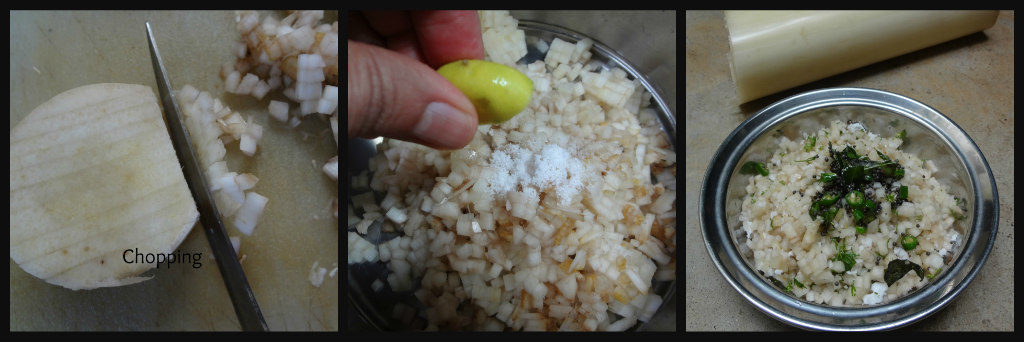
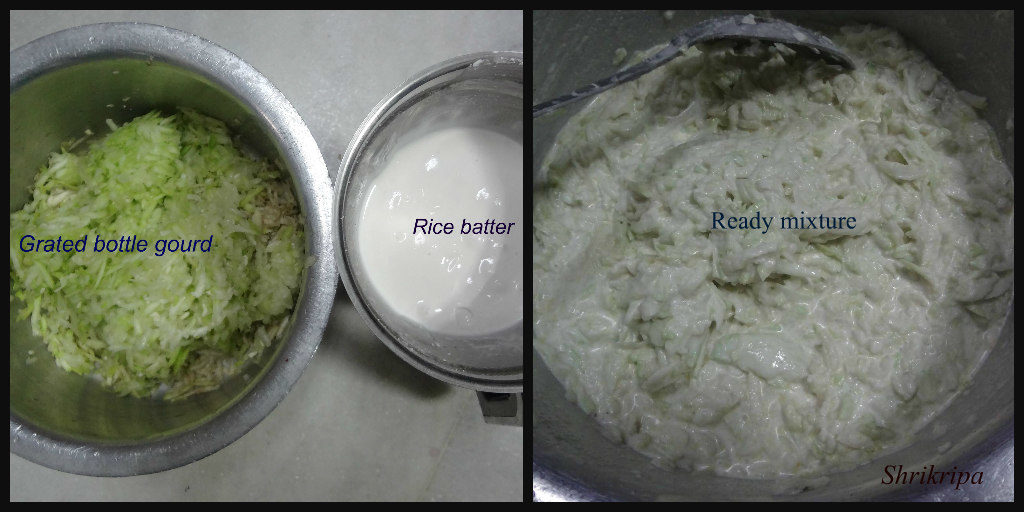
-Grate bottle gourd by using big hole of a grater or chop it into very small chunks.

-Grind soaked rice into a fine paste with minimal amount of water and salt.

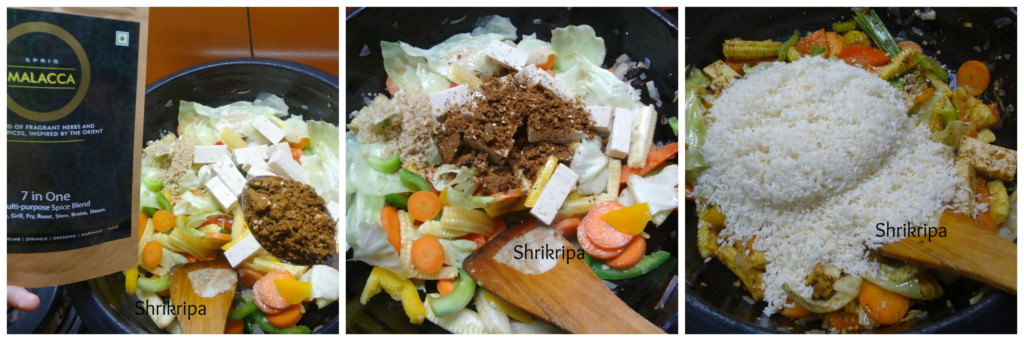
-Mix chopped or grated veggie and rice batter.

-If you are using turmeric leaves, wipe it and use as it is.

-If you are using banana leaves, take banana leaf, hold it over a gas flame (for wilting) then clean it with a wet cloth.

– If you are using turmeric leaves, use 2 leaves, place it in a “Plus” position, now pour one serving spoon of batter and fold the leaves like a packet.

collage 2

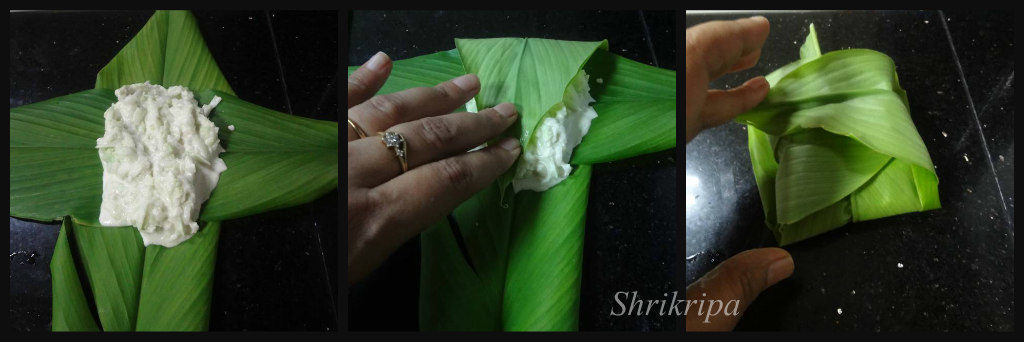
-If you are using banana leaf, pour batter, fold side wise, then close the ends.

collage 3

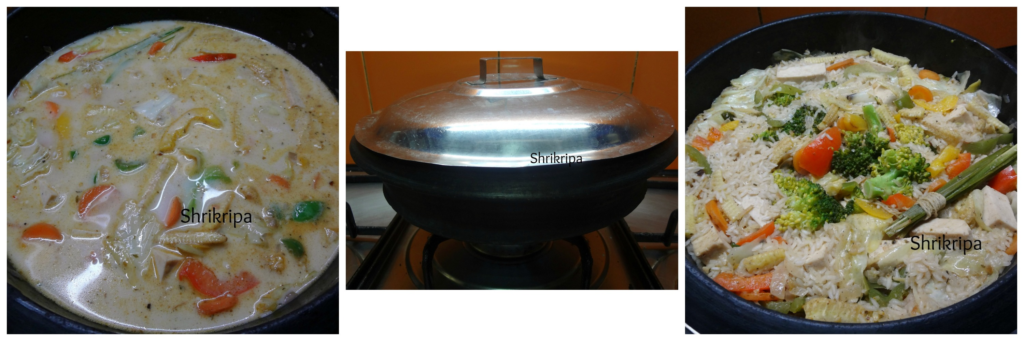
-Steam cook these ready packets in a water filled idly steamer for 30 minutes to 40 minutes in a medium heat.

collage 4

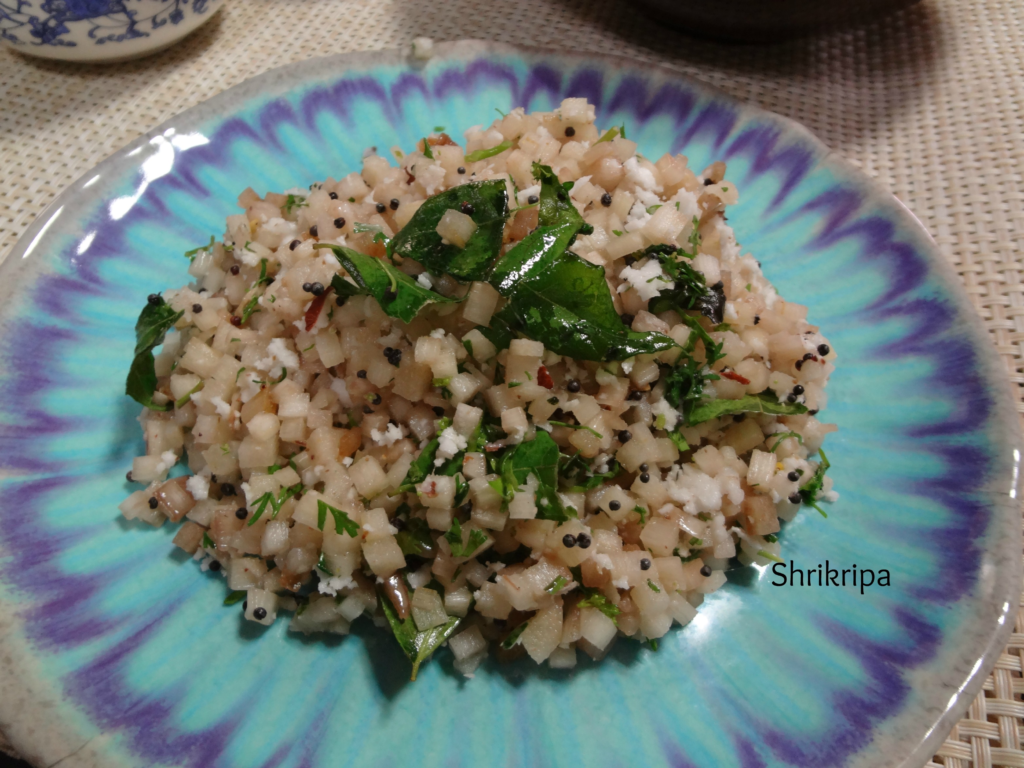
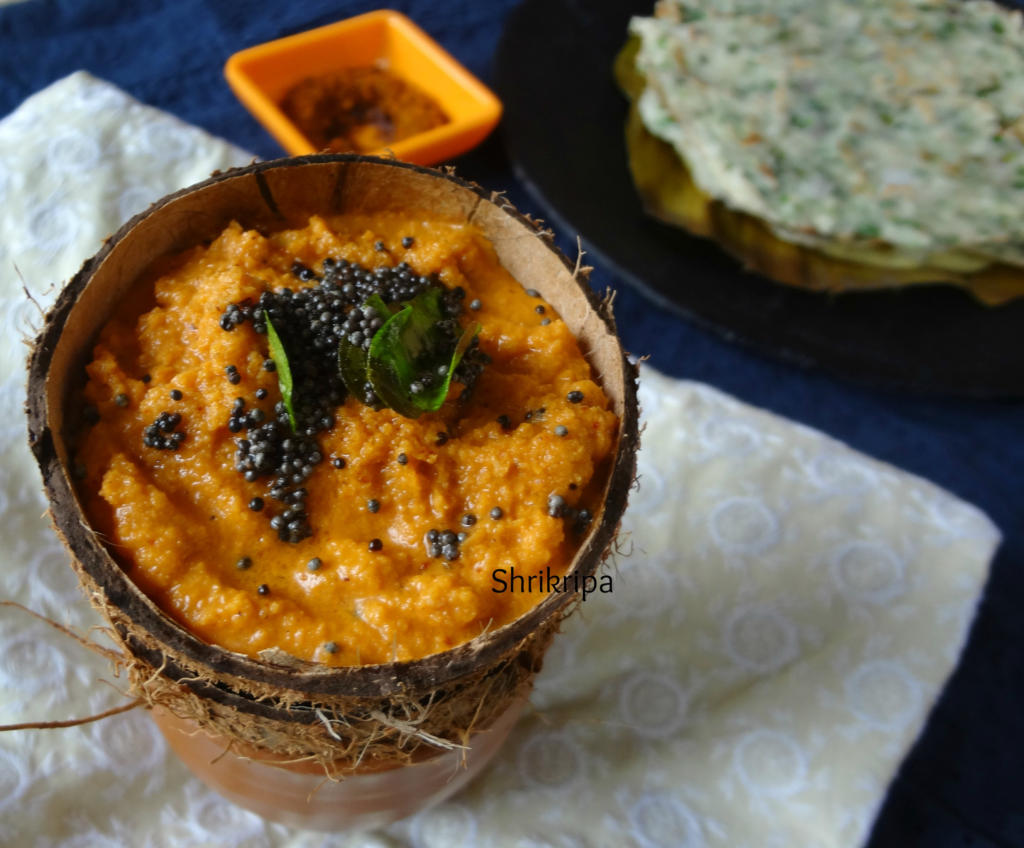
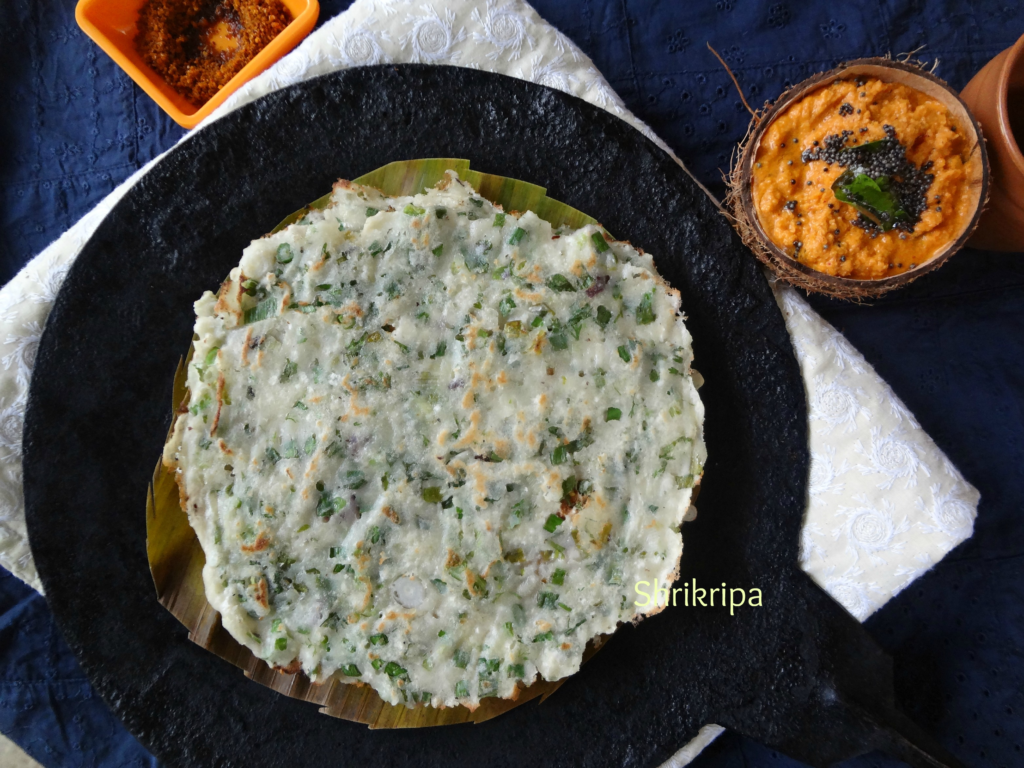
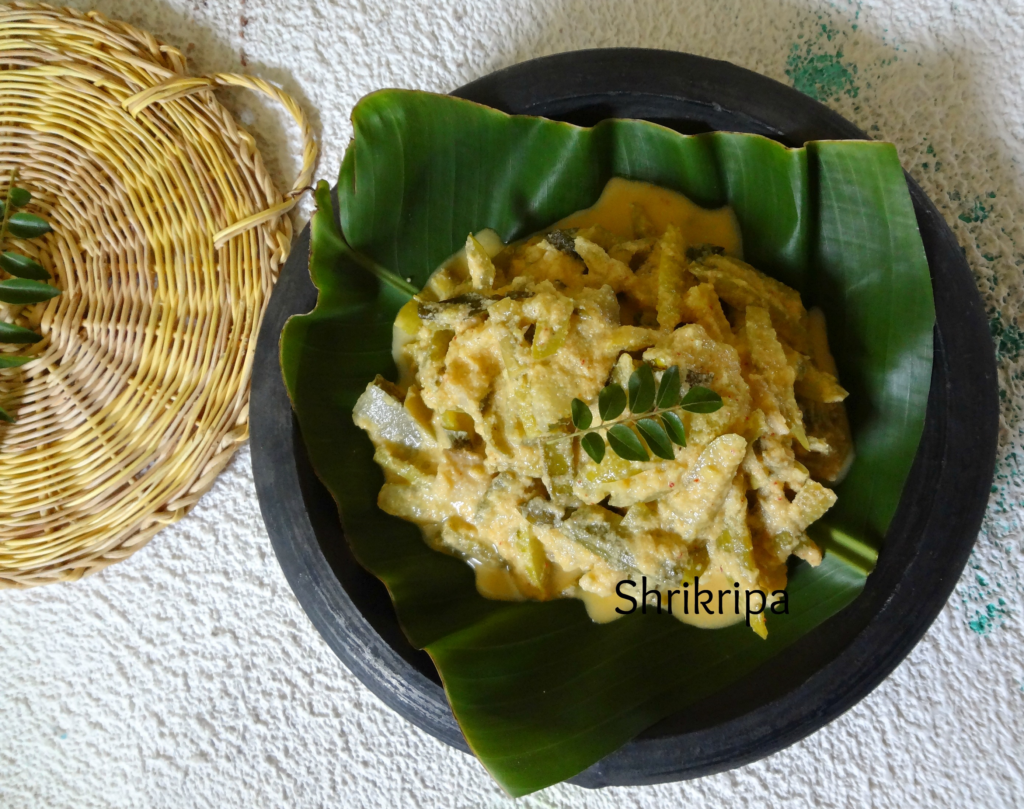
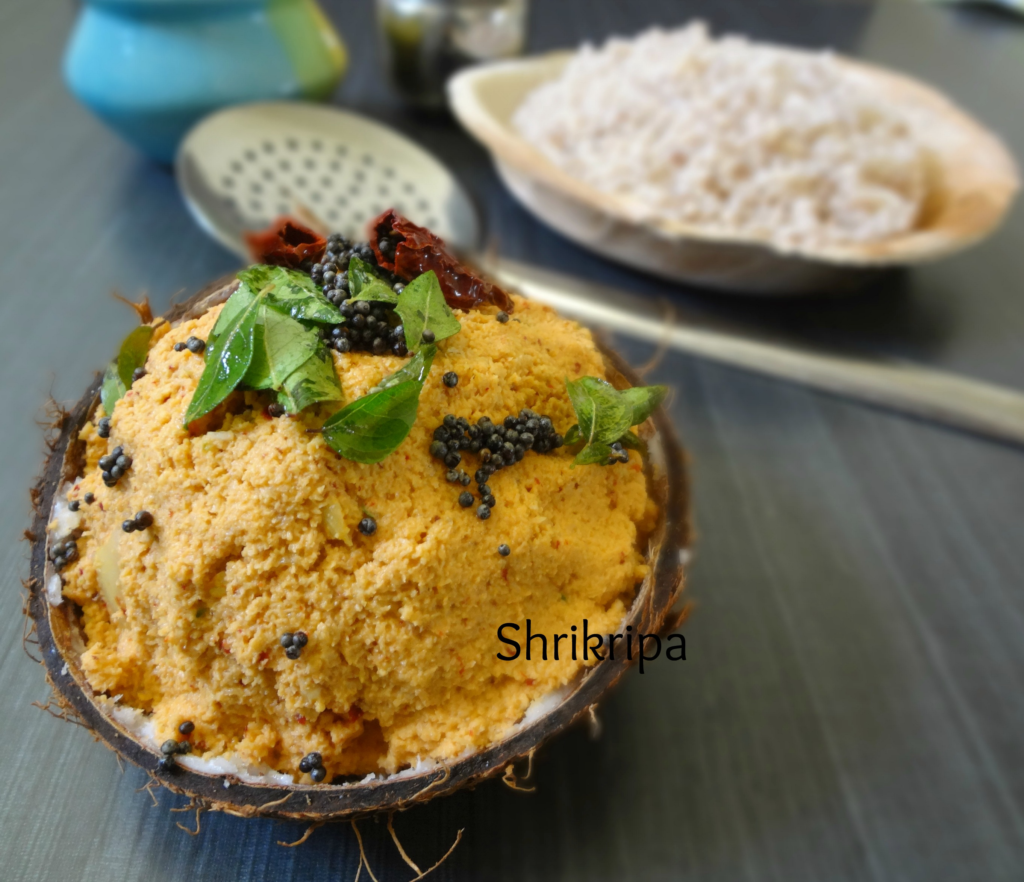
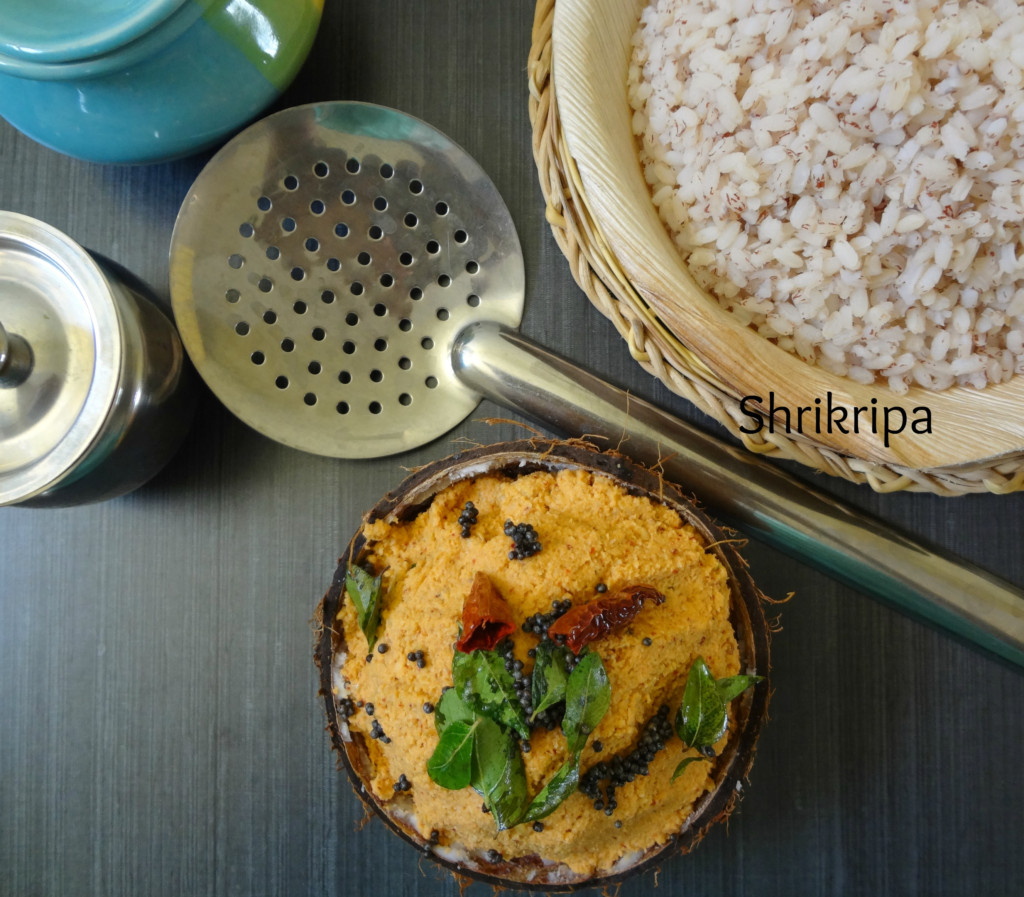
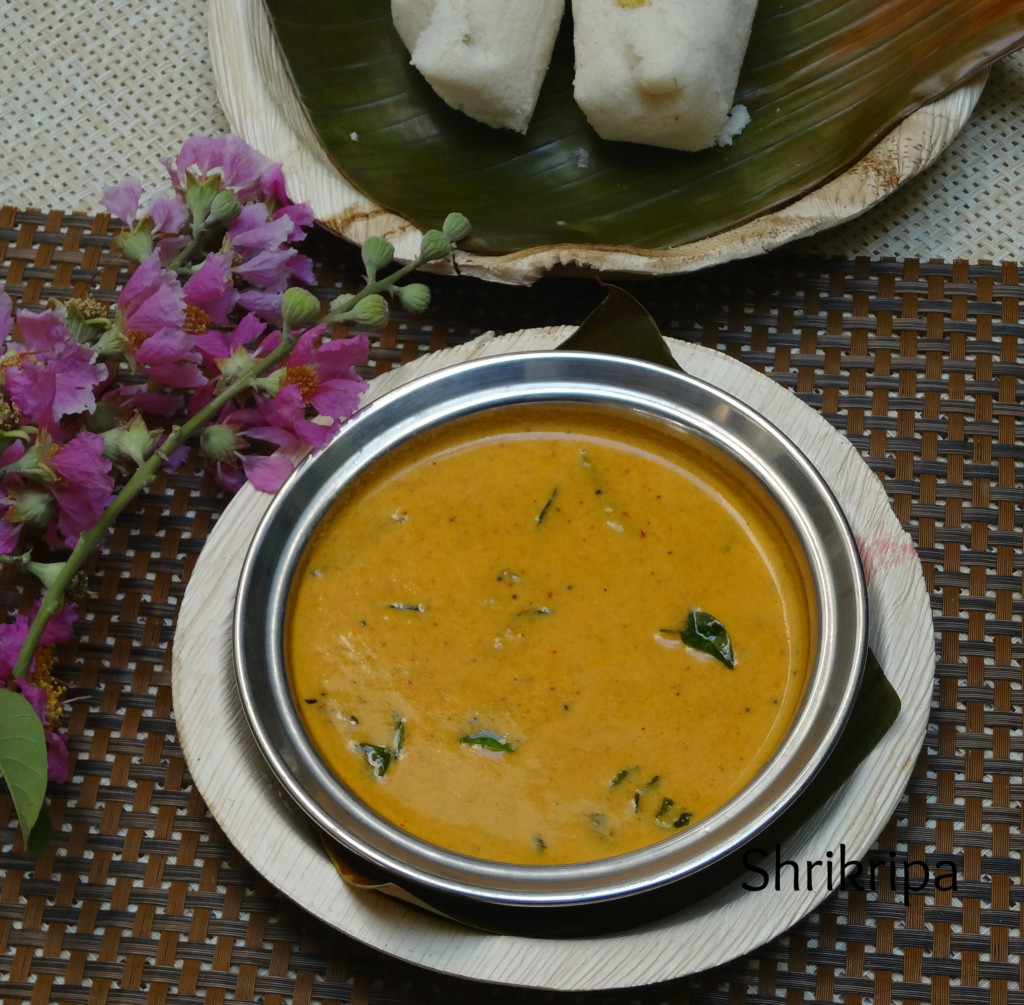
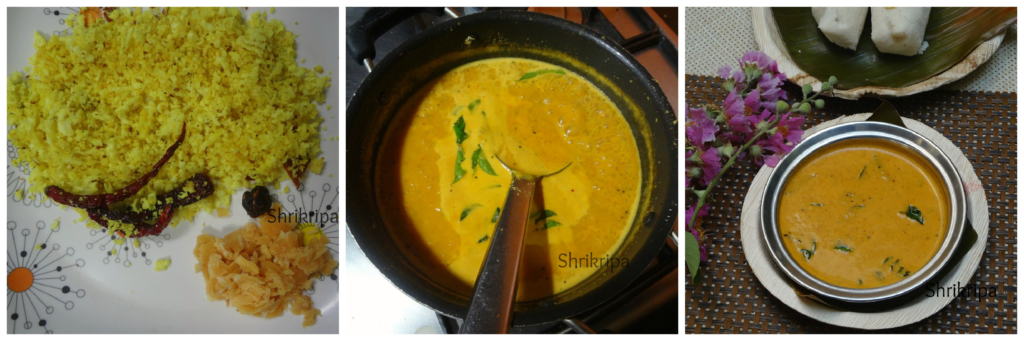
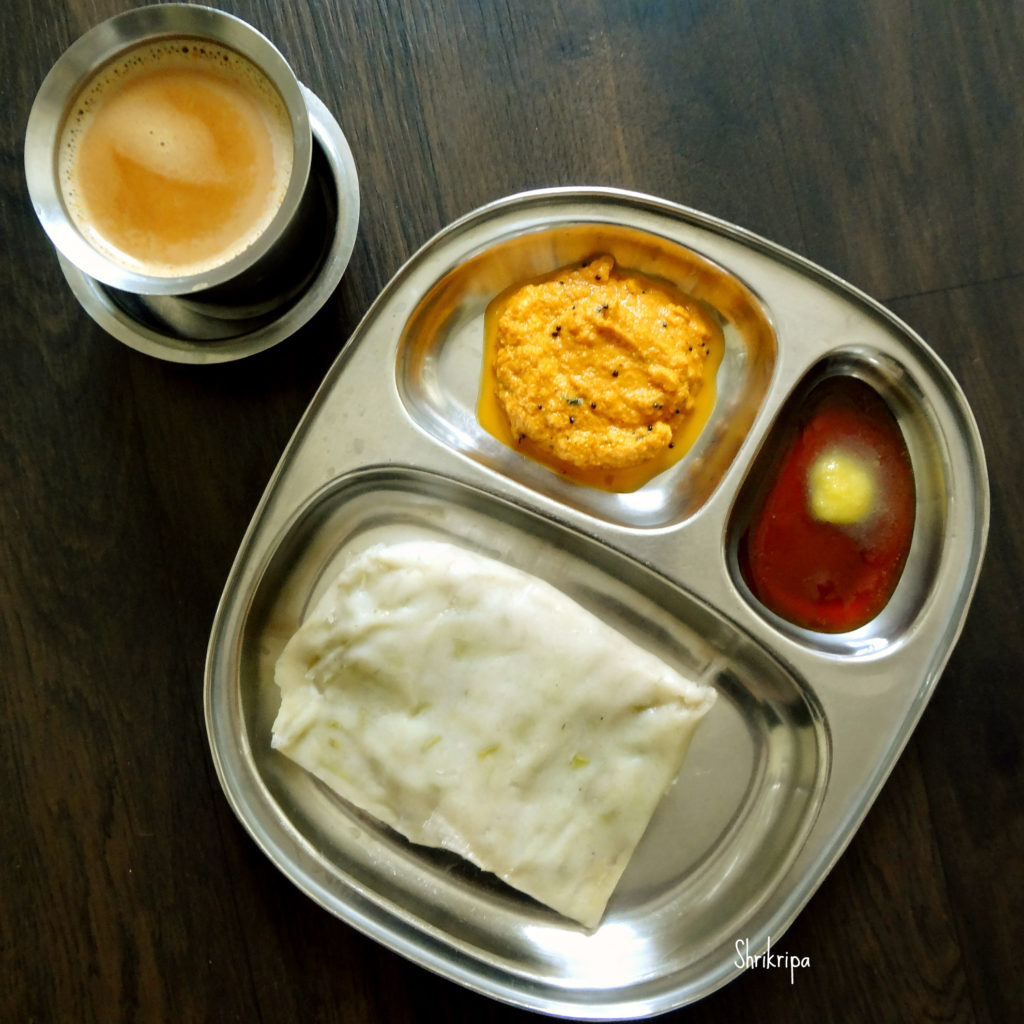
– Serve this kottige with jaggery syrup with ghee / Honey, coconut chutney or sambar.


Banana/Plantain Stem Salad:

Traditionally we have used banana stem from ages and it is a super-rich vegetable and neglected by many. Our ancestors were very intelligent and included all the available nutritive vegetables from their surroundings. In our native, usually most of the people rely on agriculture for a livelihood and include all parts of banana plant in day to day cooking. When a bunch of bananas is harvested, the banana tree is cut away. Which is 80% water and 20% fibre.

Eating banana stem is very good for health as well as the kidney. It’s high fibre nature is known for its cleansing property of the digestive system. So, it is very good for diabetic or kidney stone patients.

It has layers of covers which should be peeled off and foot long pieces are made by retaining only a couple of outer layers as a protective layer for this vegetable and they are stored and kept aside for future use.

According to the requirement, before chopping this veggie, chop off required length of the stem, remove outer remaining sheath, until you find the very soft inner core.

Now comes the chopping part. Make thin slices, while slicing you will see the thread like fibre, which sticks to the knife and sometimes it will stick to the slices itself. If you find any thread like fibre either in sliced pieces or knife, remove it by hand.

After slicing the roundels, stack 5 to 6 roundels one over the other and chop as desired. I usually make square small pieces for this salad.

pic main

Ingredients:

Plantain stem – 10-inch long.

green chillies – 2 (if available use bird eye chillies)

Fresh Coconut – 2 table spoons

Salt

Lemon – ½

Coriander leaves – 1 table spoon (chopped)

Coconut Oil – 2 tsp

Mustard – 1 tsp

Hing – 1 pinch

Curry leaves – 1 spring

Method:

  Chop banana stem as described in description.

  Now, remove the remaining outer cover.

collage 1

  Slice inner pith into roundels by removing thread like fibre.

  Stack all the roundels and chop as needed. I prefer small square pieces.

collage 2

  Sprinkle salt and lemon juice and mix it thoroughly.

  Chop chillies.

  Do seasoning, heat oil, splutter mustard, add chopped chillies, hing and curry leaves.

  Add this seasoning over salad.

  Garnish with chopped coriander leaves and grated coconut.

  Goes very well with hot rice or curd rice.


Thai Clay Pot Rice with Vegetables:

This recipe is my entry for BetterButter Contest in collaboration with SPRIG.

SPRIG is a brand that scours the world to get the finest gourmet ingredients into kitchens of people who love to experiment in their kitchen.

It was basically an introduction to SPRIG’s range of unique spice blends, to be used in our dishes covering cuisines from Europe to the Middle east to Asia.

To participate, at first there were four choices of spice blends and they made us select one spice blend from the lot and asked us to create a dish and recipe.

I chose Malacca: Oriental spice Blend.

This spice blend is a symphony of fragrant herbs and spices, inspired by the orient. It captures the rustic richness of South East Asian curries, with a twist. Flavourful chilies make for a delightful fusion, best enjoyed when sprinkled into curries, sauces, salad and stir fries. This versatile ingredient can be used as rub, marinade, glaze, paste, crumb, sprinkle or dressing!

We relish Thai food, lemon grass flavour, one pot meals. Being a Mangalorean, we love our dose of coconut milk too. So, I tried my hand in creating Thai flavoured rice, using clay pot. The dish turned into a super tasty, mildly flavoured one pot meal.

pic main 2


Ingredients:

Rice – 2 cups (small grain rice/ Jeera samba variety)

Vegetables – 1 bowl

Tofu – 100 grams

Onion – 1 medium

Ginger – ½ inch

Thai chillies – 3

Lemon grass – 4 sticks

SPRIG MALACCA spice blend – 2 table spoons

Thick Coconut milk – I tetra pack or 200 ML

Water – 3 ½ cups

Salt – as required

Oil – 2 table spoons (any refined oil)

Sesame oil – 1 table spoon.

Clay pot – for cooking

Method:

– Wash rice and drain the water and keep aside.

– Chop vegetables according to your choice.

pic 1

– I have used Broccoli, cabbage, three colours of capsicum and baby corn.

– Chop onion, slice chillies, sliver ginger and keep aside.

– Make 3-inch pieces of lemon grass, make a bunch and tie it with a small piece of cord.

-Take a clay pot and smear it with Sesame oil.

– Sesame oil will act as a non-sticky coat for clay utensil while cooking for long.

collage 1

-Now take oil for seasoning. When it is hot, add onion, chillies, ginger, lemon grass and fry until onion is glossy.

-Add all the vegetables and fry for a while.

-Now add tofu, Malacca spice, salt and mix everything thoroughly.

collage 2

– Next proceed with addition of drained rice and fry for 2 minutes.

-Add coconut milk, water.

collage 3

-Cook the mixture by closing the lid, in a very low flame for 20 to 30 minutes or until done by mixing twice in between.

-Serve hot by discarding lemon grass sticks. (Used to enhance flavour, since they can’t be swallowed)

pic main 1

NOTE:

  • If Thai chillies are not available, one can use any variety of chilli.
  • I have used bird eye chilli.
  • If sesame oil is not there, one can use refined oil to smear the clay pot.

Onion Chutney with Coconut:

We normally refer to this as Neerulli Chutney in Mangalore. Here Neerulli is Onion.Coconut is an integral part of our cooking. This is how we prepare onion chutney traditionally in our households. It can be paired with anything and everything from our breakfast list.

pic 1

Ingredient:

Grated Coconut – 1cup

Red chillies – 2 (Byadagi variety)

Salt – as required

Tamarind – ¼ tsp

Onion – ½ of medium size.

For seasoning-

Coconut oil – 1 tsp

Mustard – ½ tsp

Curry leaves – 1spring

Method:

-Roast the red chillies by putting 2 drops of oil.

-Chop onion

-Grind Coconut, roasted red chillies, tamarind, onion by adding required amount of water and salt into smooth paste.

– Empty out this paste to one small bowl.

-Do seasoning by heating oil, add mustard. When mustard starts to splutter, add curry leaves and pour this over the chutney.

Spring Onion Akki Rotti:

 Akki Rotti is a traditional Breakfast item of Karnataka. Usually it is prepared either by adding chopped greens, grated veggies or only onion. Here I have added chopped spring onion greens as well as bulbs, which is mixed with rice flour to form a thick pliable dough to make super tasty gluten free flat bread. I have served it with coconut and onion chutney, which we traditionally prepare in a Mangalore house hold.

pic main

Ingredients:

Rice flour – 3 cups

Spring onion -1 bundle

Green chillies – 2

Salt

Fresh Coconut gratings – 2 table spoons

Water – to bind

Oil – to fry the rotti.

Method:

  Wash and clean the spring onion and green chillies.

Chop green chillies, spring onion greens and bulbs finely.

 Take one wide steel bowl and mix in rice flour, chopped green chillies, spring onions, coconut gratings, salt.

 Make a pliable dough by adding sufficient water.

Keep it aside for 5 to 10 minutes to absorb all the seasoning as well as to soak.

 When you want to make rotti, take one piece of banana leaf or butter paper.

Take a little rotti dough in your moist hand, and start patting in a circular motion by dipping your hand in a water in-between.

Sprinkle one teaspoon of oil over this patted rotti and keep it ready.

 Heat iron griddle and cook oil sprinkled rotti by putting upside down on it.

After 2 to 3 minutes, peel off banana leaf or butter paper.

Sprinkle little oil over it and flip.

Cook and serve hot with Onion and coconut chutney.

Note:

-Keep one bowl of water in a reachable distance to dip your hand in-between.

-While patting the rotti, dip your hand in a bowl of water which you have kept aside.

– wetting your hand will help to avoid the dough sticking to your fingers while patting.


Plantain/Raw banana flour:

Plantain flour is a powdered form of dried banana, which can be a good raw material for any healthy baking or cooking, for people who follow Paleo, Vegan, gluten-free diet and it is diabetic friendly and organic too. Last month when I was thinking about gluten-free baking and options regarding its flours, what immediately comes to mind is our day to day available ingredient- the cheaper, more nutritious alternative to commercially available gluten-free flours. I have seen banana flour as baby food in my native and people prepare this flour at home and feed their babies as a healthy top food. Keeping that in my mind, I headed towards preparing homemade banana flour. I took small varieties of homegrown bananas from my native and started my journey.

pic 1

Ingredients:

Raw bananas – 1 kgs

Method:

-Select firm and raw bananas.

-wash, peel outer skin and immerse in plain water.

collage 1

-Take one wide, big plate. Line with one clean towel.

-Slice bananas directly on towel. Keep this in bright area, either near window sill or under sunlight.

collage 2

-If you keep under sunlight, it will take 2 days to dehydrate and become crisp.

-If you keep indoors, it will take 4 days to dehydrate.

-After it becomes crisp and dry, powder this in a dry grinding jar in a mixer grinder.

-Sieve the mixture and collect the fine powder.

pic 2

-Such a simple method and you will be ready with your gluten-free healthy flour for any of your bakes or for cooking!

Aviyal/Avial OR Avilu:

Aviyal is a mixed vegetable dish cooked in coconut gravy by adding some curd/yoghurt, Raw coconut oil and lots of curry leaves. It is an integral part of any festival cooking and It is believed that Bhima, one of the Pandava’s, invented this dish, during their exile period. Avial is a must dish during Onam Sadhya in Kerala. Aviyal is one of the favorite dishes of my family. I learnt this recipe from my mom-in-law. This is how we do this recipe in our family.   

pic mainIngredients:

Ivy gourd – 250gms.

Brinjal – 1

Snake gourd -1

Raw banana -1

Yam -250 grams.

Ridge gourd-1

Yard long beans -250 grams.

Bitter gourd -1

Coloured cucumber – 1

Raw mango-1 or Hog plum -4

Fresh grated Coconut – From one coconut.

Butter milk – 1 cup

Coconut oil – 6 tsp.

Jeera/cumin -1 tsp.

Dry red chilli – 2

Green chilli -4 to 5

Red chilli powder – 1tsp.

Turmeric Powder – 1tsp.

Curry Leaves- 5 springs.

Salt 

Procedure:

1. Cut all the above-mentioned vegetables in a matchstick manner (slightly big pieces).     collage 1     

2. Take all the vegetables and slit green chilies in a heavy bottomed vessel. To this add little red chilli powder, turmeric powder, salt and little water and cook till the veggies are done.                           

3. In the meantime, prepare coconut paste by adding grated coconut, jeera, dry red chilli in a mixer jar. Add little water, grind and keep it aside.

4.When veggies are cooked add this coconut paste along with butter milk. Mix nicely.

5.To this mixture add lot of curry leaves and pour raw coconut oil. Press everything using back of the ladle, close tightly using a plate and continue cooking till it boils nicely.                            

6.Once it starts boiling, switch-off the gas and delicious avial is ready to serve.

7. You can enjoy this Avial with rice, roti or Neer Dosa.                  

 NOTE: -Try to add all the mentioned vegetables as much as possible.

            – Usage of coconut oil will give the authentic taste.


Banana Berati / Plantain Preserve:

Whenever you have large stock of over ripe bananas, this is one such procedure one can follow and finish off all the stock and preserve this for future use. This preserve stays good almost a year or more in the freezer. It is a very handy when you want to make banana payasam/kheer or HalwaHere I have used yellow small variety of banana from Mangalore and we call this as Kadali.

pic main

Ingredients:

Over ripe banana – 22

Sugar – 1 bowl 

Method:

 Put all the peeled bananas to mixer grinder and make a smooth paste.

  Measure this by using any bowl of your choice. If this paste is 3 cups in quantity take one cup of sugar in that same measurement cup.

  So, your ratio of banana paste and sugar will be 3:1.

Take one thick bottomed kadai, put this paste and keep gas flame in a very low flame and cook for a while.

collage 1

       When it changes its colour to milky white, then to a pale colour and when you smell the banana flavour in the air, add sugar and mix this in a regular interval.

   After some time, it will turn into a pinkish or reddish colour and it will start to leave the sides of the kadai. Now it is the time to remove it from the fire.

collage 2

   Keep as it is and when it reaches room temperature; store it in an airtight container or a zip lock.

   You can do this in a microwave as well. Only thing, you should remove the glass bowl at regular intervals and give a stir and proceed as given above.


Neeru Mavinakayi/ Brined mango chutney:

The word “Neeru Mavinakayi” makes me nostalgic and my mouth water. I am sure that is the case with every Mangalorean. We grew up with very basic comfort food during monsoons. Which consists of kucchilakki (Red rice) ganji accompanied with ghee and this chutney, which is made by using coconut and dried red chillies.

Raw mango in brine is known as Neeru Mavinakayi. During its season we normally preserve raw, firm mangoes by putting it in brine solution. This way, the mangoes can be enjoyed throughout the year. We do make varieties of recipes and this chutney is one of them.

pic 3

Ingredients:

Brined mango – 1

Fresh Coconut – 1 cup

Dried red chillies – 3 to 4

Hing – ¼ tsp

Seasoning:

Coconut oil – 1 tsp

Mustard – 1 tsp

Red chilli – 1

Curry leaves – 1 string

Method:

– Take out one mango from the brine, wash properly and peel outer skin and chop.

-Roast red chillies and hing in a drop of coconut oil.

collage 1

– Grind chopped mango, roasted items and coconut into coarse paste by adding very minimal water.

-It usually doesn’t require salt, if needed you can check the taste and add accordingly.

-Add seasoning by heating oil, when mustard splutters add curry leaves and add this to the chutney.

pic 4

-Enjoy either with white rice or like us with boiled rice (red rice) ganji and ghee.


Menthe Kodilu/ Methi Sambar:

This is one of our traditional recipes and if you like a little sweetish tangy taste, this is the perfect combo for kotte kadubu / idly or semige.

We don’t use onion or garlic on any auspicious day and this side dish is usually prepared on such days and we relish this as a side dish with kotte kadubu/ Moode.

Here menthe is fenugreek and kodilu stands for sambar in our language. This is a very simple coconut based little sweetish gravy and needs very less ingredient and tastes good.

pic main

Ingredient:

Fresh grated coconut – 1 big bowl.

Dried red chillies – 3 to 4

Methi / fenugreek seeds – ½ tsp

Turmeric – ½ tsp

Coconut oil – 1tsp

Tamarind – ½ tsp

Jaggery – 2 tbl spoon

Salt

Seasoning:

Coconut oil – 1 tsp

Mustard – 1 tsp

Curry leaves – 1 springs

Red chilli – 1

Method:

 Take 1 spoon of coconut oil in a small kadai, heat.

 When it is hot, drop methi and fry for a while.

 When it is light brown, add red chillies and fry until it swells.

  Add coconut gratings, turmeric and fry for 2 to 3 minutes.

collage 1

  Cool this mixture and grind this into smooth paste by adding sufficient water, salt, jaggery and tamarind.

Now take that same kadai, in which we have fried chillies and coconut. Pour ground batter, adjust the consistency by adding water.

Boil this for a while and check for a salt and jaggery. If needed adjust that as well.

Do seasoning by heating oil, mustard, red chilli and curry leaves and pour this over boiled kodilu.